如何在Ubuntu 22.04上安装Nagios监控工具
Nagios 是一款功能强大的免费开源监控工具,用于监控 Linux 和 Windows 服务器以及网络和基础设施。使用 Nagios,您可以监控 CPU 使用情况、磁盘使用情况以及多种服务,包括 HTTP、SSH、FTP、SMTP 等。它具有简单且用户友好的 Web 界面,可帮助您从中央位置监控所有服务器。它可以轻松地与具有多个API的第三方应用程序集成。 Nagios 的工作原理是持续监控您指定的主机和服务,并在出现问题时向您发出警报。
本教程将向您展示如何在 Ubuntu 22.04 服务器上安装 Nagios Core。
先决条件
- 运行 Ubuntu 22.04 的服务器。
- 服务器上配置了 root 密码。
安装所需的依赖项
在开始之前,您需要更新系统软件包并在服务器上安装其他所需的依赖项:
apt-get update -y
apt-get install wget unzip vim curl openssl build-essential libgd-dev libssl-dev libapache2-mod-php php-gd php apache2 -y
安装所有软件包后,您可以继续下一步。
从源安装 Nagios Core
默认情况下,最新的 Nagios Core 版本在 22.04 默认存储库中不可用。所以建议从源码编译Nagios。
首先,使用以下命令从 Git 存储库下载最新版本的 Nagios Core:
wget https://assets.nagios.com/downloads/nagioscore/releases/nagios-4.4.7.tar.gz下载后,使用以下命令解压缩下载的文件:
tar -xvzf nagios-4.4.7.tar.gz接下来,将目录更改为提取的目录并使用以下命令配置 Nagios Core:
cd nagios-4.4.7
./configure --with-httpd-conf=/etc/apache2/sites-enabled
您应该得到以下输出:
*** Configuration summary for nagios 4.4.7 2022-04-14 ***:

 General Options:
 -------------------------
        Nagios executable:  nagios
        Nagios user/group:  nagios,nagios
       Command user/group:  nagios,nagios
             Event Broker:  yes
        Install ${prefix}:  /usr/local/nagios
    Install ${includedir}:  /usr/local/nagios/include/nagios
                Lock file:  /run/nagios.lock
   Check result directory:  /usr/local/nagios/var/spool/checkresults
           Init directory:  /lib/systemd/system
  Apache conf.d directory:  /etc/apache2/sites-enabled
             Mail program:  /bin/mail
                  Host OS:  linux-gnu
          IOBroker Method:  epoll

 Web Interface Options:
 ------------------------
                 HTML URL:  http://localhost/nagios/
                  CGI URL:  http://localhost/nagios/cgi-bin/
 Traceroute (used by WAP):


Review the options above for accuracy.  If they look okay,
type 'make all' to compile the main program and CGIs.
接下来,运行以下命令来编译 Nagios:
make all接下来,创建所需的用户和组,并使用以下命令将 Nagios 用户添加到 www-data 组:
make install-groups-users
usermod -a -G nagios www-data
接下来,使用以下命令安装 Nagios Core:
make install您应该看到以下输出:
*** Main program, CGIs and HTML files installed ***

You can continue with installing Nagios as follows (type 'make'
without any arguments for a list of all possible options):

  make install-init
     - This installs the init script in /lib/systemd/system

  make install-commandmode
     - This installs and configures permissions on the
       directory for holding the external command file

  make install-config
     - This installs sample config files in /usr/local/nagios/etc

make[1]: Leaving directory '/root/nagios-4.4.7'
安装 Nagios Core 后,您将需要创建一个 systemd 服务文件来管理 Nagios 服务。您可以使用以下命令创建 systemd 初始化脚本:
make install-daemoninit接下来,使用以下命令对 Nagios 安装目录设置适当的权限:
make install-commandmode接下来,使用以下命令创建示例 Nagios 配置文件:
make install-config接下来,使用以下命令安装 Nagios Web 界面:
make install-webconf
a2enmod rewrite cgi
接下来,重新启动 Apache 服务以应用更改:
systemctl restart apache2接下来,安装 Nagios Web 界面的主题。
make install-exfoliation创建 Nagios 管理员用户
接下来,您需要创建一个管理员用户来访问 Nagios Web 界面。您可以使用以下命令创建它:
htpasswd -c /usr/local/nagios/etc/htpasswd.users nagiosadmin设置您想要的密码,如下所示:
New password:
Re-type new password:
Adding password for user nagiosadmin
安装 Nagios 插件
接下来,您需要下载 Nagios 插件来监控系统服务。您可以使用以下命令从 Git 存储库下载它:
wget https://github.com/nagios-plugins/nagios-plugins/releases/download/release-2.4.0/nagios-plugins-2.4.0.tar.gz下载后,使用以下命令解压缩下载的文件:
tar -xvzf nagios-plugins-2.4.0.tar.gz接下来,将目录更改为解压目录并使用以下命令进行配置:
cd nagios-plugins-2.4.0
./configure --with-nagios-user=nagios --with-nagios-group=nagios
接下来,使用以下命令安装它:
make
make install
接下来,在启动 Nagios 之前使用以下命令验证示例 Nagios 配置文件:
/usr/local/nagios/bin/nagios -v /usr/local/nagios/etc/nagios.cfg如果一切正常,您应该得到以下输出:
Running pre-flight check on configuration data...

Checking objects...
	Checked 8 services.
	Checked 1 hosts.
	Checked 1 host groups.
	Checked 0 service groups.
	Checked 1 contacts.
	Checked 1 contact groups.
	Checked 24 commands.
	Checked 5 time periods.
	Checked 0 host escalations.
	Checked 0 service escalations.
Checking for circular paths...
	Checked 1 hosts
	Checked 0 service dependencies
	Checked 0 host dependencies
	Checked 5 timeperiods
Checking global event handlers...
Checking obsessive compulsive processor commands...
Checking misc settings...

Total Warnings: 0
Total Errors:   0

Things look okay - No serious problems were detected during the pre-flight check
启动Nagios服务
现在,使用以下命令启动 Nagios 服务并使其在系统重新启动时启动:
systemctl start nagios
systemctl enable nagios
您还可以使用以下命令检查 Nagios 服务的状态:
systemctl status nagios您应该得到以下输出:
? nagios.service - Nagios Core 4.4.7
     Loaded: loaded (/lib/systemd/system/nagios.service; enabled; vendor preset: enabled)
     Active: active (running) since Wed 2022-05-04 17:18:52 UTC; 1s ago
       Docs: https://www.nagios.org/documentation
    Process: 15854 ExecStartPre=/usr/local/nagios/bin/nagios -v /usr/local/nagios/etc/nagios.cfg (code=exited, status=0/SUCCESS)
    Process: 15855 ExecStart=/usr/local/nagios/bin/nagios -d /usr/local/nagios/etc/nagios.cfg (code=exited, status=0/SUCCESS)
   Main PID: 15856 (nagios)
      Tasks: 6 (limit: 2241)
     Memory: 5.2M
        CPU: 355ms
     CGroup: /system.slice/nagios.service
             ??15856 /usr/local/nagios/bin/nagios -d /usr/local/nagios/etc/nagios.cfg
             ??15857 /usr/local/nagios/bin/nagios --worker /usr/local/nagios/var/rw/nagios.qh
             ??15858 /usr/local/nagios/bin/nagios --worker /usr/local/nagios/var/rw/nagios.qh
             ??15859 /usr/local/nagios/bin/nagios --worker /usr/local/nagios/var/rw/nagios.qh
             ??15860 /usr/local/nagios/bin/nagios --worker /usr/local/nagios/var/rw/nagios.qh
             ??15861 /usr/local/nagios/bin/nagios -d /usr/local/nagios/etc/nagios.cfg

June 12 06:10:52 jellyfish nagios[15856]: qh: core query handler registered
June 12 06:10:52 jellyfish nagios[15856]: qh: echo service query handler registered
June 12 06:10:52 jellyfish nagios[15856]: qh: help for the query handler registered
June 12 06:10:52 jellyfish nagios[15856]: wproc: Successfully registered manager as @wproc with query handler
June 12 06:10:52 jellyfish nagios[15856]: wproc: Registry request: name=Core Worker 15858;pid=15858
June 12 06:10:52 jellyfish nagios[15856]: wproc: Registry request: name=Core Worker 15857;pid=15857
June 12 06:10:52 jellyfish nagios[15856]: wproc: Registry request: name=Core Worker 15860;pid=15860
June 12 06:10:52 jellyfish nagios[15856]: wproc: Registry request: name=Core Worker 15859;pid=15859
June 12 06:10:53 jellyfish nagios[15856]: Successfully launched command file worker with pid 15861
June 12 06:10:53 jellyfish nagios[15856]: HOST ALERT: localhost;DOWN;SOFT;1;(No output on stdout)
访问 Nagios Web 界面
现在,打开 Web 浏览器并输入 URL http://your-server-ip/nagios。您将被重定向到 Nagios 登录屏幕:
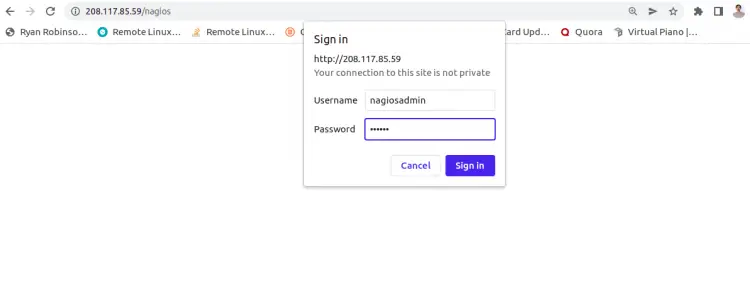
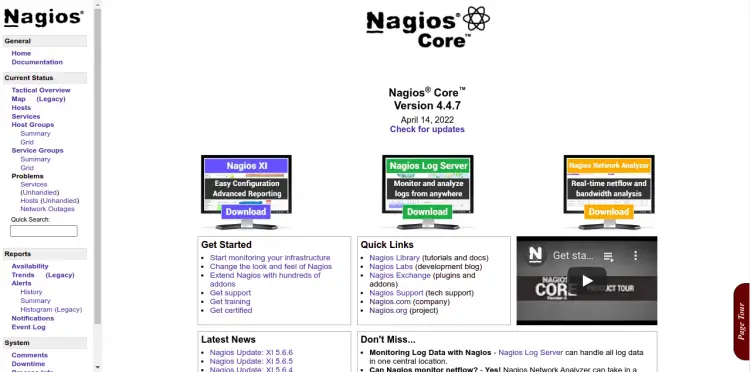
提供您的 Nagios 管理员用户名、密码,然后单击确定按钮。您应该在以下屏幕上看到 Nagios 默认仪表板:
结论
恭喜!您已在 Ubuntu 22.04 服务器上成功安装了最新版本的 Nagios Core。现在,您可以在基础设施中实施 Nagios,添加监控主机并开始通过 Web 浏览器监控它们。如果您有任何疑问,请随时问我。