在 Ubuntu 18.04 Bionic Beaver Linux 上安装 OpenCV
客观的
目标是在 Ubuntu 18.04 Bionic Beaver Linux 上安装 OpenCV 并提供一个简单的 OpenCV 示例
操作系统和软件版本
操作系统: – Ubuntu 18.04 Bionic Beaver
软件: – OpenCV 3.2 或更高版本
要求
需要以 root 身份或通过 sudo 命令对 Ubuntu 系统进行特权访问。
困难
简单的
惯例
# – 要求以root权限直接以root用户身份或使用
sudo命令执行给定的linux命令$ – 要求以常规非特权用户身份执行给定的 Linux 命令
在 Ubuntu 上安装 OpenCV
OpenCV 是一个多平台开源计算机视觉库。 OpenCV 是 Ubuntu Universe 软件包存储库的一部分。
Ubuntu OpenCV 与 Python
使用 python 绑定安装 OpenCV 有三种选择。您可以选择 Python 2 版本或 Python 3 版本或两者。
要使用 python 2 绑定在 Ubuntu 18.04 上安装 OpenCV,请打开终端并输入:
$ sudo apt -y install python-opencv
通过加载适当的 cv2 库确认 OpenCV 安装正确:
$ python
Python 2.7.14+ (default, Feb  6 2018, 19:12:18)
[GCC 7.3.0] on linux2
Type "help", "copyright", "credits" or "license" for more information.
>>> import cv2
>>> cv2._version__
'3.2.0'
>>>
要在 Ubuntu 18.04 上使用 Python 3 绑定安装 OpenCV,请执行:
$ sudo apt -y install python3-opencv
通过加载适当的 cv2 库确认 OpenCV 安装正确:
$ python3
Python 3.6.4+ (default, Feb 12 2018, 08:25:03)
[GCC 7.3.0] on linux
Type "help", "copyright", "credits" or "license" for more information.
>>> import cv2
>>> cv2.__version__
'3.2.0'
>>>
Opencv Python 测试示例
让我们执行一个示例 Opencv Python 测试来对图像样本进行去噪。将以下代码保存在主目录中的新 denoise.py 文件中:
import numpy as np
import cv2
from matplotlib import pyplot as plt

img = cv2.imread('gray_DSC00931.png')
b,g,r = cv2.split(img)           # get b,g,r
rgb_img = cv2.merge([r,g,b])     # switch it to rgb

# Denoising
dst = cv2.fastNlMeansDenoisingColored(img,None,10,10,7,21)

b,g,r = cv2.split(dst)           # get b,g,r
rgb_dst = cv2.merge([r,g,b])     # switch it to rgb

plt.subplot(211),plt.imshow(rgb_img)
plt.subplot(212),plt.imshow(rgb_dst)
plt.show()
安装上述代码所需的Python matplotlib。如果使用 Python 3 版本,请确保在 python 关键字后缀带有数字 3:
$ sudo apt install python3-matplotlib
使用 wget 命令获取示例图像:
$ wget -O ~/opencv-sample.png https://linuxconfig.org/images/opencv-sample.png
最后,执行上面的OpenCV python代码:
$ python3 denoise.py
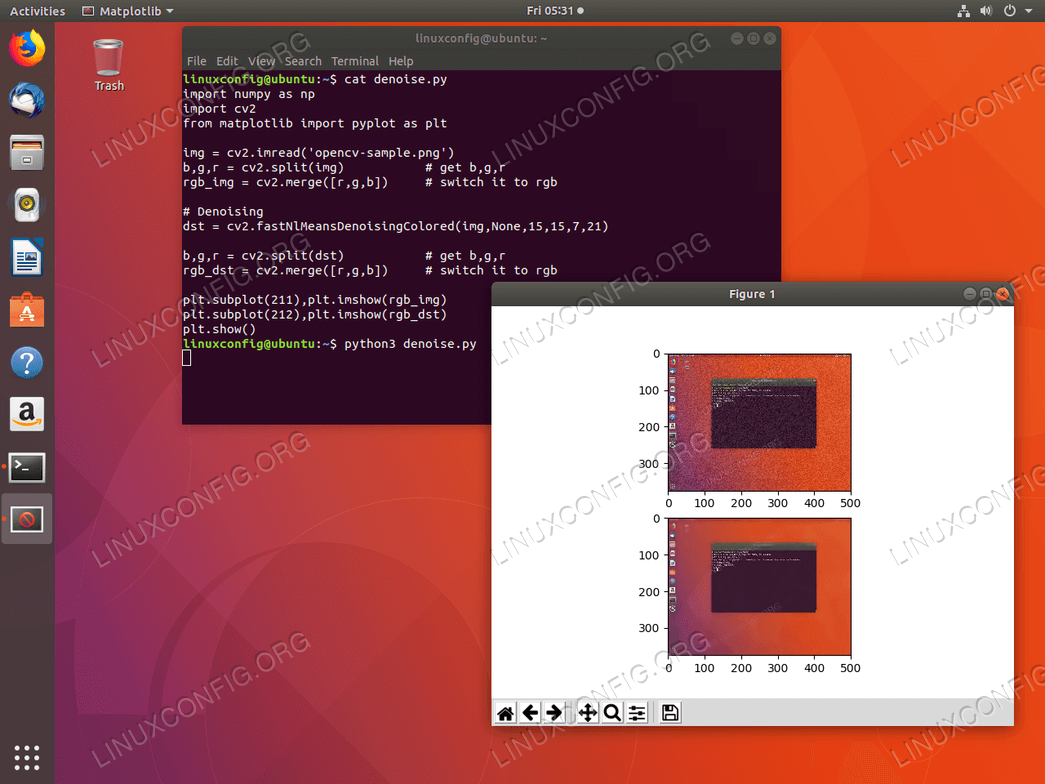
Ubuntu 18.04 上的 Python OpenCV。示例测试成功。
Ubuntu OpenCV 与 C++
以下 linux 命令将在 Ubuntu 18.04 上使用 C++ 库安装 OpenCV:
$ sudo apt install libopencv-dev
OpenCV 库现在安装在 /usr/include/opencv2 目录中。
C++ Opencv 示例
将以下代码存储到主目录中的新 img-display.cpp 文件中:
#include <opencv2/core/core.hpp>
#include <opencv2/highgui/highgui.hpp>
#include <iostream>

using namespace cv;
using namespace std;

int main( int argc, char** argv )
{
    if( argc != 2)
    {
     cout <<" Usage: display_image ImageToLoadAndDisplay" << endl;
     return -1;
    }

    Mat image;
    image = imread(argv[1], CV_LOAD_IMAGE_COLOR);   // Read the file

    if(! image.data )                              // Check for invalid input
    {
        cout <<  "Could not open or find the image" << std::endl ;
        return -1;
    }

    namedWindow( "Display window", WINDOW_AUTOSIZE );// Create a window for display.
    imshow( "Display window", image );                // Show our image inside it.

    waitKey(0);             // Wait for a keystroke in the window
    return 0;
}
准备就绪后,编译上述代码以生成 img-display 可执行二进制文件:
$ g++ img-display.cpp -o img-display `pkg-config --cflags --libs opencv`
下载示例图片:
$ wget -O ~/linuxconfig_logo.png https://linuxconfig.org/images/linuxconfig_logo.png
使用新编译的 img-display 可执行二进制文件显示图像:
$ ./img-display linuxconfig_logo.png
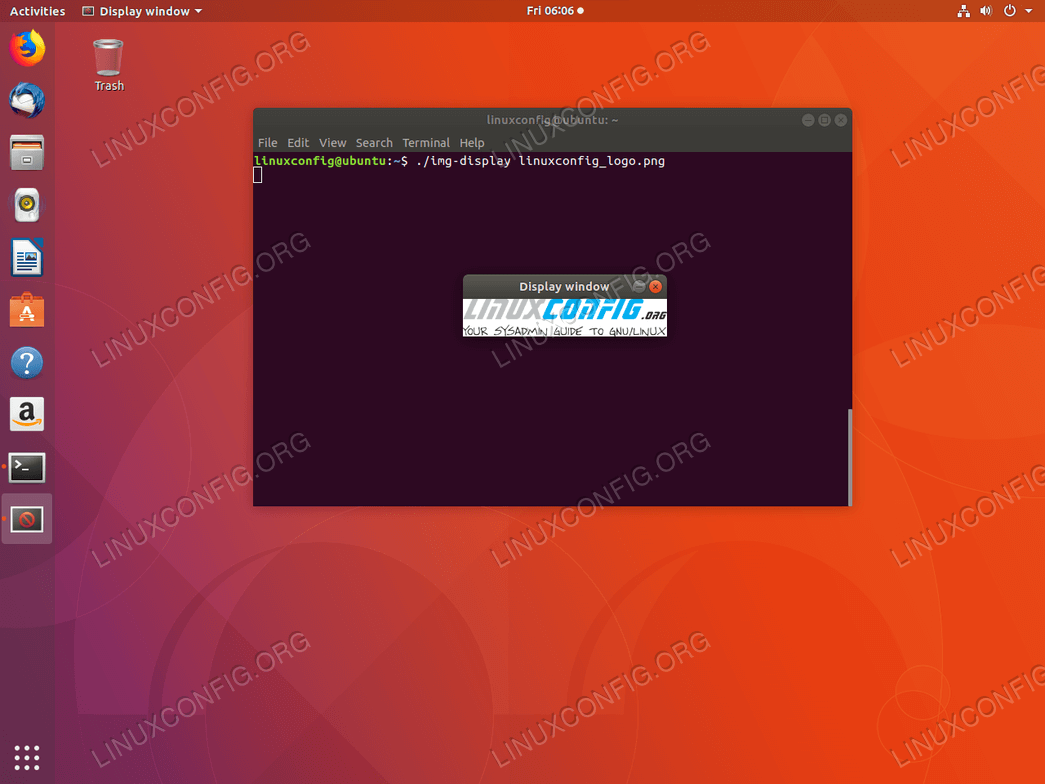
Ubuntu 18.04 上的 C++ OpenCV。示例测试成功。