在 Rocky Linux 8|AlmaLinux 8 | 上安装 LEMP Stack
LEMP 是 Linux Nginx、MariaDB/MySQL 和 PHP 的缩写。 Nginx 是一个 Web 服务器,MariaDB/MySQL 是一个数据库管理应用程序,PHP(超文本预处理器)是一种用于后端构建 Web 应用程序的编程语言。所有这些开源软件组成了 LEMP 堆栈,它们共同用于在生产周期或任何其他开发阶段托管和服务网页/应用程序。
通常,LEMP 堆栈用于托管具有高流量的高度可扩展的网站。在本指南中,我们将系统地介绍 LEMP Stack 在 Rocky Linux 8/AlmaLinux 8 上的安装和配置。
入门。
对于本指南,您将需要以下内容:
- Rocky Linux 8|AlmaLinux 8 系统。
- 具有 sudo 访问权限的用户
首先更新系统上的所有可用软件包,如下所示。
sudo dnf update -y步骤 1 – 在 Rocky Linux 8|AlmaLinux 8 上安装 Nginx。
这个强大的 Web 服务器存在于默认的 Rocky Linux 8|AlmaLinux 8 存储库中,可以使用以下命令进行安装。
sudo dnf install nginx 依赖树:
Dependencies resolved.
================================================================================
 Package          Arch   Version                                Repo       Size
================================================================================
Installing:
 nginx            x86_64 1:1.14.1-9.module+el8.4.0+542+81547229 appstream 566 k
Installing dependencies:
 nginx-all-modules
                  noarch 1:1.14.1-9.module+el8.4.0+542+81547229 appstream  22 k
 nginx-filesystem noarch 1:1.14.1-9.module+el8.4.0+542+81547229 appstream  23 k
 nginx-mod-http-image-filter
                  x86_64 1:1.14.1-9.module+el8.4.0+542+81547229 appstream  34 k
 nginx-mod-http-perl
                  x86_64 1:1.14.1-9.module+el8.4.0+542+81547229 appstream  45 k
 nginx-mod-http-xslt-filter
                  x86_64 1:1.14.1-9.module+el8.4.0+542+81547229 appstream  32 k
 nginx-mod-mail   x86_64 1:1.14.1-9.module+el8.4.0+542+81547229 appstream  63 k
 nginx-mod-stream x86_64 1:1.14.1-9.module+el8.4.0+542+81547229 appstream  84 k
Enabling module streams:
 nginx                   1.14

Transaction Summary
================================================================================
Install  8 Packages

Total download size: 870 k
Installed size: 2.0 M
Is this ok [y/N]: y
安装后,启动并启用 Nginx Web 服务器在启动时自动运行。
sudo systemctl start nginx
sudo systemctl enable nginx
检查服务的状态。
$ systemctl status nginx
● nginx.service - The nginx HTTP and reverse proxy server
   Loaded: loaded (/usr/lib/systemd/system/nginx.service; disabled; vendor preset: disabled)
   Active: active (running) since Wed 2021-12-29 03:00:08 EST; 7s ago
  Process: 128762 ExecStart=/usr/sbin/nginx (code=exited, status=0/SUCCESS)
  Process: 128752 ExecStartPre=/usr/sbin/nginx -t (code=exited, status=0/SUCCESS)
  Process: 128750 ExecStartPre=/usr/bin/rm -f /run/nginx.pid (code=exited, status=0/SUCCESS)
 Main PID: 128763 (nginx)
    Tasks: 3 (limit: 36449)
   Memory: 7.6M
   CGroup: /system.slice/nginx.service
           ├─128763 nginx: master process /usr/sbin/nginx
           ├─128764 nginx: worker process
           └─128765 nginx: worker process

Dec 29 03:00:08 localhost.localdomain systemd[1]: Starting The nginx HTTP and reverse proxy server...
Dec 29 03:00:08 localhost.localdomain nginx[128752]: nginx: the configuration file /etc/nginx/nginx.conf syntax is ok
Dec 29 03:00:08 localhost.localdomain nginx[128752]: nginx: configuration file /etc/nginx/nginx.conf test is successful
Dec 29 03:00:08 localhost.localdomain systemd[1]: Started The nginx HTTP and reverse proxy server.
可以使用以下命令检查已安装的 Nginx 版本:
$ nginx -v
nginx version: nginx/1.14.1
测试 Nginx 是否能够使用 URL http://IP_Address 或 http://domain_name 来服务器网页
允许 HTTP 和 HTTPS 通过防火墙。
sudo firewall-cmd --permanent --add-service={http,https}
sudo firewall-cmd --reload
您应该能够看到以下页面:
步骤 2 – 在 Rocky Linux 8|AlmaLinux 8 上安装 MariaDB 服务器。
MariaDB 可以安装在 Rocky Linux 8|AlmaLinux 8 上,如下所示。
sudo dnf -y install @mariadb在 Rocky Linux 8|AlmaLinux 8 上启动并启用 MariaDB。
sudo systemctl enable --now mariadb如下强化 MariaDB 实例。
$ sudo mysql_secure_installation
Enter current password for root (enter for none): Press Enter
....
Set root password? [Y/n] y
New password: Enter Password
Re-enter new password: Re-Enter Password
......
Remove anonymous users? [Y/n] y
...
Disallow root login remotely? [Y/n] y
...
Remove test database and access to it? [Y/n] y
....
Reload privilege tables now? [Y/n] y
.....
Thanks for using MariaDB!
登录 MariaDB shell。
$ mysql -u root -p
Enter password:
Welcome to the MariaDB monitor.  Commands end with ; or \g.
Your MariaDB connection id is 16
Server version: 10.3.28-MariaDB MariaDB Server

Copyright (c) 2000, 2018, Oracle, MariaDB Corporation Ab and others.

Type 'help;' or '\h' for help. Type '\c' to clear the current input statement.

MariaDB [(none)]> show databases;
+--------------------+
| Database           |
+--------------------+
| information_schema |
| mysql              |
| performance_schema |
+--------------------+
3 rows in set (0.000 sec)
MariaDB [(none)]> exit
Bye
步骤 3 – 在 Rocky Linux 8|AlmaLinux 8 上安装 PHP。
AppStream 存储库具有多个 PHP 版本,可以使用以下命令列出这些版本:
$ sudo dnf module list php
Last metadata expiration check: 0:50:10 ago on Wed 29 Dec 2021 02:14:25 AM EST.
Rocky Linux 8 - AppStream
Name      Stream       Profiles                       Summary
php       7.2 [d]      common [d], devel, minimal     PHP scripting language
php       7.3          common [d], devel, minimal     PHP scripting language
php       7.4          common [d], devel, minimal     PHP scripting language

Hint: [d]efault, [e]nabled, [x]disabled, [i]nstalled
如图所示,默认版本是 PHP 7.2,可以按如下方式重置。
sudo dnf module reset php启用所需的版本。
# For PHP 7.4
sudo dnf -y module install php:7.4

# For PHP 7.3
sudo dnf -y module install php:7.3

# For PHP 7.2
sudo dnf -y module install php:7.2
请按如下方式进行。
Dependencies resolved.
================================================================================
 Package          Arch   Version                                Repo       Size
================================================================================
Installing group/module packages:
 php-cli          x86_64 7.4.19-1.module+el8.5.0+696+61e7c9ba   appstream 3.1 M
 php-common       x86_64 7.4.19-1.module+el8.5.0+696+61e7c9ba   appstream 701 k
 php-fpm          x86_64 7.4.19-1.module+el8.5.0+696+61e7c9ba   appstream 1.6 M
 php-json         x86_64 7.4.19-1.module+el8.5.0+696+61e7c9ba   appstream  73 k
 php-mbstring     x86_64 7.4.19-1.module+el8.5.0+696+61e7c9ba   appstream 483 k
 php-xml          x86_64 7.4.19-1.module+el8.5.0+696+61e7c9ba   appstream 173 k
Installing dependencies:
 httpd-filesystem noarch 2.4.37-43.module+el8.5.0+714+5ec56ee8  appstream  38 k
Installing module profiles:
 php/common
Enabling module streams:
 httpd                   2.4
 php                     7.4
另外,安装 PHP 扩展。
sudo dnf -y install php php-fpm php-mysqlnd php-opcache php-gd php-xml php-mbstring php-zip验证已安装的 PHP 版本。
$ php --version
PHP 7.4.19 (cli) (built: May  4 2021 11:06:37) ( NTS )
Copyright (c) The PHP Group
Zend Engine v3.4.0, Copyright (c) Zend Technologies
    with Zend OPcache v7.4.19, Copyright (c), by Zend Technologies
使用 php-fpm 启动并启用 PHP。
sudo systemctl enable --now php-fpm检查服务的状态。
$ systemctl status php-fpm
● php-fpm.service - The PHP FastCGI Process Manager
   Loaded: loaded (/usr/lib/systemd/system/php-fpm.service; enabled; vendor preset: disabled)
   Active: active (running) since Wed 2021-12-29 03:06:55 EST; 6s ago
 Main PID: 131753 (php-fpm)
   Status: "Ready to handle connections"
    Tasks: 6 (limit: 36449)
   Memory: 13.7M
   CGroup: /system.slice/php-fpm.service
           ├─131753 php-fpm: master process (/etc/php-fpm.conf)
           ├─131754 php-fpm: pool www
           ├─131755 php-fpm: pool www
           ├─131756 php-fpm: pool www
           ├─131757 php-fpm: pool www
           └─131758 php-fpm: pool www

Dec 29 03:06:55 localhost.localdomain systemd[1]: Starting The PHP FastCGI Process Manager...
Dec 29 03:06:55 localhost.localdomain systemd[1]: Started The PHP FastCGI Process Manager.
通常 PHP-FPM 默认使用 APache 用户运行。由于我们使用的是Nginx,因此我们需要编辑配置文件。
$ sudo vim /etc/php-fpm.d/www.conf
user = nginx
Group = nginx
应用所做的更改。
sudo systemctl reload php-fpm现在在 /usr/share/nginx/html 目录中创建一个简单的 PHP 文件。
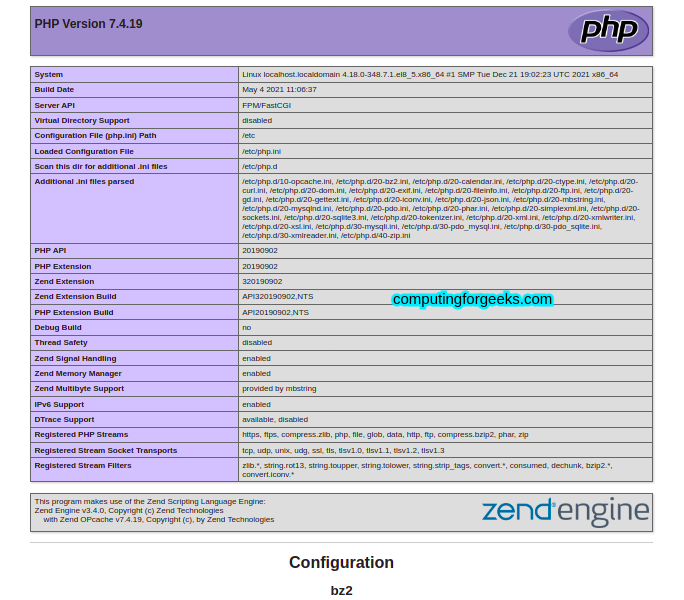
sudo vim /usr/share/nginx/html/info.php在该文件中,添加以下内容。
<?php

phpinfo();

?>
重新启动 Nginx 以使更改生效。
sudo systemctl restart nginx使用 URL http://IP_address/info.php 或 http://domain_name/info.php 访问网页。您将看到 PHP 及其扩展的详细列表。
步骤 4 – 在 Rocky Linux 8|AlmaLinux 8 上配置 Nginx 服务器块。
Nginx 服务器块允许通过定义站点文档根目录来运行多个网站。这些根文档目录包含网站文件。
在本指南中,我们将使用以下步骤创建一个 Nginx 服务器块文件:
1. 创建网站目录
这是第一步,请确保将 example.computingforgeeks.com 替换为您的域名。
sudo mkdir /var/www/example.computingforgeeks.com
sudo vim /var/www/example.computingforgeeks.com/index.html
在文件中添加内容:
<html>
  <head>
    <title>Welcome to computingforgeeks.com!</title>
  </head>
  <body>
    <h1>Voila! The LEMP server is working perfectly!</h1>
  </body>
</html>
2. 为网站创建 Nginx 服务器块
这是站点的配置文件。它详细说明了 Nginx 将如何处理请求。
sudo vim /etc/nginx/conf.d/example.computingforgeeks.com.conf将以下行添加到文件中。
server {
    listen  80;

    server_name example.computingforgeeks.com www.example.computingforgeeks.com;

    location / {
        root  /var/www/example.computingforgeeks.com;
        index  index.html index.htm;
        try_files $uri $uri/ =404;
    }

    error_page  500 502 503 504  /50x.html;
    location = /50x.html {
        root  /usr/share/nginx/html;
    }
}
重新启动 Nginx。
sudo systemctl restart nginx将您的域名添加到已知主机列表中。
$ sudo vim /etc/hosts
192.168.205.2 example.computingforgeeks.com
第 5 步 – 测试 Smaple 网站
现在可以使用 URL http://domain_name 访问该网站。
您应该能够看到以下页面。

现在这证实了我们的 LEMP 堆栈正在完美运行,这标志着本精彩指南的结束。
有兴趣了解更多吗?
- 在 CentOS 8|Rocky Linux 8 上安装 NetBox IPAM
- 使用 Kubeadm 和 CRI-O 在 Rocky Linux 8 上安装 Kubernetes 集群
- 在 CentOS 7|8 和 Rocky Linux 8 上安装 MongoDB Compass
- 使用 Cockpit Web 控制台管理 Rocky Linux 8 服务器