在 Linux 上安装和使用 Source-To-Image (S2I) 工具包
Source-to-Image (S2I) 是一个工具包和工作流程,用于从源代码构建可重现的容器映像。 S2I 用于通过将源代码注入容器映像并让容器准备要执行的源代码来生成可运行的映像。
S2I 为您提供了一种简单的方法来版本控制和控制构建环境,就像使用容器映像来版本运行时环境一样。这里我们将向您展示如何在Linux系统上轻松安装S2I Toolkit并使用它来构建容器应用程序。
在 Linux 上安装 Source-To-Image (S2I) 工具包
我们将下载 Source-To-Image (S2I) 二进制包存档,解压它并将二进制文件放置在我们的系统 PATH 中。
访问版本页面并下载适合您的计算机的正确发行版。如果在 32 位系统上,请选择linux-386或linux-amd64(对于 64 位)。
mkdir /tmp/s2i/ && cd /tmp/s2i/

# Linux
curl -s https://api.github.com/repos/openshift/source-to-image/releases/latest| grep browser_download_url | grep linux-amd64 | cut -d '"' -f 4  | wget -qi -

# macOS
 curl -s https://api.github.com/repos/openshift/source-to-image/releases/latest| grep browser_download_url | grep darwin-amd64 | cut -d '"' -f 4  | wget -qi -
下载后,使用命令解压 tar。
$ tar xvf source-to-image*.gz
./
./sti
./s2i
该文件应该是可执行的,将其移动到 /usr/local/bin 路径。
sudo mv s2i /usr/local/bin
rm -rf /tmp/s2i/
确认文件位置并检查安装的版本。
$ which s2i
/usr/local/bin/s2i

$ s2i version
s2i v1.3.8
要查看使用帮助页面,请使用:
$ s2i --help
Source-to-image (S2I) is a tool for building repeatable docker images.

A command line interface that injects and assembles source code into a docker image.
Complete documentation is available at http://github.com/openshift/source-to-image

Usage:
  s2i [flags]
  s2i [command]

Available Commands:
  build       Build a new image
  completion  Generate completion for the s2i command (bash or zsh)
  create      Bootstrap a new S2I image repository
  rebuild     Rebuild an existing image
  usage       Print usage of the assemble script associated with the image
  version     Display version

Flags:
      --ca string        Set the path of the docker TLS ca file (default "/home/jmutai/.docker/ca.pem")
      --cert string      Set the path of the docker TLS certificate file (default "/home/jmutai/.docker/cert.pem")
      --key string       Set the path of the docker TLS key file (default "/home/jmutai/.docker/key.pem")
      --loglevel int32   Set the level of log output (0-5)
      --tls              Use TLS to connect to docker; implied by --tlsverify
      --tlsverify        Use TLS to connect to docker and verify the remote
  -U, --url string       Set the url of the docker socket to use (default "unix:///var/run/docker.sock")

Use "s2i [command] --help" for more information about a command.
要引导新的启用 S2I 的映像存储库,请使用命令语法:
$ s2i create <image name> <destination directory>此命令将生成一个骨架 .s2i 目录,并用您可以开始破解的示例 S2I 脚本填充该目录。参见示例:
mkdir /tmp/s2i-test && cd /tmp/s2i-test
s2i create cent7-app .
目录树:
$ tree
.
├── Dockerfile
├── Makefile
├── README.md
├── s2i
│   └── bin
│       ├── assemble
│       ├── run
│       ├── save-artifacts
│       └── usage
└── test
    ├── run
    └── test-app
        └── index.html

4 directories, 9 files
在 Linux 上使用源到图像 (S2I)
现在我们已经安装了 S2I 工具,我们可以考虑一个简单的示例,说明如何使用它来通过应用程序构建映像。为简单起见,我们将使用 Software Collections S2I 存储库,其中包含许多应用程序的预先创建的模板。
我们的示例是 Nginx Web 服务器。让我们使用 OpenShift 的 Nginx 映像的 Dockerfiles 克隆存储库。您可以在基于 RHEL 和 CentOS 的映像之间进行选择。
git clone --recursive https://github.com/sclorg/nginx-container.git更改为 Nginx 版本文件夹。
cd nginx-container
git submodule update --init
cd 1.24
如果使用其他版本的 Nginx,只需将上述命令中的 1.24 值替换为特定版本即可。
存储库中的文件和目录
| File | Required? | Description |
|---|---|---|
| Dockerfile | Yes | Defines the base builder image |
| s2i/bin/assemble | Yes | Script that builds the application |
| s2i/bin/usage | No | Script that prints the usage of the builder |
| s2i/bin/run | Yes | Script that runs the application |
| s2i/bin/save-artifacts | No | Script for incremental builds that saves the built artifacts |
| test/run | No | Test script for the builder image |
| test/test-app | Yes | Test application source code |
在本地拥有存储库后,创建名为 nginx-fedora 的 Fedora bbuilder 映像。
docker||podman build -f Dockerfile.fedora -t nginx-fedora .创建应用程序映像
应用程序映像将构建器映像与应用程序源代码相结合,使用通过 Dockerfile 安装的任何应用程序来提供该源代码,使用 assemble 脚本进行编译,并使用 运行脚本。
您可以使用创建的映像作为基础来构建可在 Openshift 容器平台上运行的简单示例应用程序。以下命令将创建应用程序映像:
$ cd nginx-container/1.24
$ s2i build test/test-app nginx-fedora nginx-fedora-app
 ---> Installing application source
 ---> Copying nginx.conf configuration file…
 './nginx.conf' -> '/etc/opt/rh/rh-nginx124/nginx/nginx.conf'
 ---> Copying nginx configuration files…
 './nginx-cfg/default.conf' -> '/opt/app-root/etc/nginx.d/default.conf'
 ---> Copying nginx default server configuration files…
 './nginx-default-cfg/alias.conf' -> '/opt/app-root/etc/nginx.default.d/alias.conf'
 ---> Copying nginx start-hook scripts…
 Build completed successfully
使用汇编脚本中定义的逻辑,s2i 现在将使用构建器映像作为基础并包含 test/test-app 目录中的源代码来创建应用程序映像。
检查以确认您已创建应用程序映像。
$ docker images | grep nginx-centos7-app
nginx-centos7-app              latest              59cbe8e707c7        About a minute ago   320MB
运行应用程序镜像
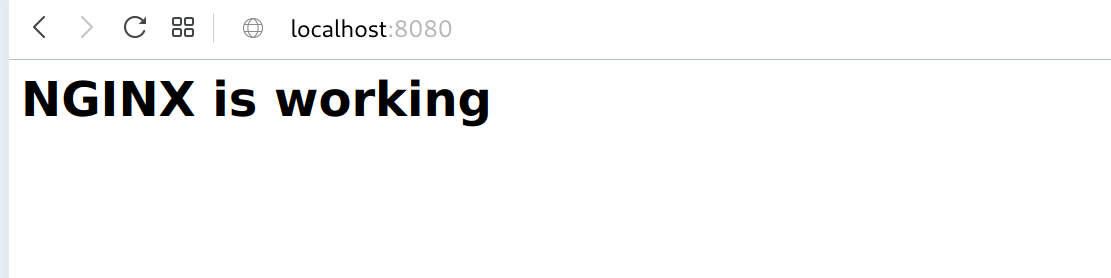
通过调用 docker run 命令来运行应用程序映像:
docker run -d -p 8080:8080 nginx-centos7-app部署的应用程序由一个简单的静态网页组成,应该可以通过 http://localhost:8080 进行访问。
有关S2I工具包的详细使用方法,请查看以下资源。
- S2I命令的描述和示例
- 使用构建器镜像的说明
- S2I 构建器映像创建者指南
- 使用非构建器映像作为应用程序映像的基础
- S2I 问题的故障排除和调试
要在计算机本地设置 Kubernetes/OpenShift,请检查:
- 使用 MicroK8s 和 Snap 部署轻量级 Kubernetes
- 如何在 Ubuntu 上设置 OpenShift Origin (OKD)
- 如何在 CentOS 7 上设置本地 OpenShift Origin (OKD) 集群
- 如何在 Ubuntu 上设置 3 节点 Kubernetes 集群
- 如何在 Ubuntu 上安装 Minikube