在 Ubuntu 20.04|18.04|16.04 上安装 MariaDB 10.4
如何在 Ubuntu 20.04|18.04|16.04 上安装 MariaDB 10.4?我可以从 APT 存储库在 Ubuntu 20.04|18.04|16.04 上安装 MariaDB 10.4 吗? MariaDB 是 MySQL 的直接替代品,具有更多功能、新存储引擎和更好的性能。您可以从官方网站了解有关 MariaDB 10.4 功能的更多信息。
对于 CentOS 7,请检查:如何在 CentOS 7 上安装 MariaDB 10.4
对于 Debian 9:如何在 Debian 9 上安装 MariaDB 10.4
在 Ubuntu 上安装 MariaDB 10.4 <元字符集=utf-8>20.04|18.04|16.04
要在 Ubuntu 18.04/Ubuntu 16.04 上安装 MariaDB 10.4,您需要将 MariaDB 存储库添加到系统中。
第 1 步:安装 software-properties-common(如果缺少):
sudo apt update
sudo apt install software-properties-common
第2步:导入MariaDB gpg密钥
运行以下命令将存储库密钥添加到系统
sudo apt-key adv --recv-keys --keyserver hkp://keyserver.ubuntu.com:80 0xF1656F24C74CD1D8第三步:添加apt存储库
导入 PGP 密钥后,继续添加存储库 URL:
sudo add-apt-repository "deb [arch=amd64,arm64,ppc64el] http://mariadb.mirror.liquidtelecom.com/repo/10.4/ubuntu $(lsb_release -cs) main"如果您的系统中没有 add-apt-repository。检查如何在 Debian/Ubuntu 18.04/16.04 上安装 add-apt-repository
第4步:安装MariaDB服务器
最后一步是MariaDB Server的安装:
sudo apt update
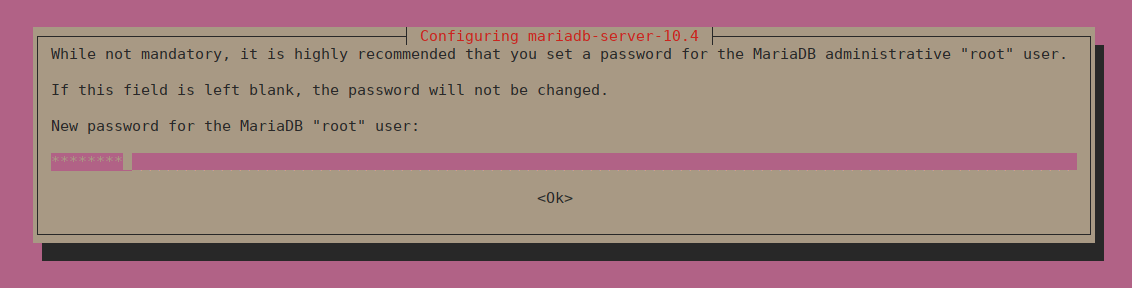
sudo apt -y install mariadb-server mariadb-client系统将提示您提供 MariaDB root 密码,输入密码进行设置。
确认密码:
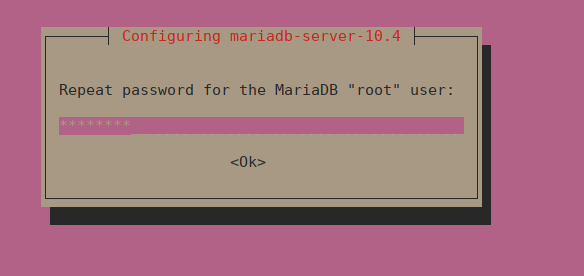
按<确定>确认新密码并安装 MariaDB。确保您记住或将提供的密码保存在您最喜欢的密码管理器上。
如果您没有收到密码设置提示,请手动运行 MySQL 强化脚本。
$ sudo mysql_secure_installation

NOTE: RUNNING ALL PARTS OF THIS SCRIPT IS RECOMMENDED FOR ALL MariaDB
      SERVERS IN PRODUCTION USE!  PLEASE READ EACH STEP CAREFULLY!

In order to log into MariaDB to secure it, we'll need the current
password for the root user. If you've just installed MariaDB, and
haven't set the root password yet, you should just press enter here.

Enter current password for root (enter for none):
OK, successfully used password, moving on...

Setting the root password or using the unix_socket ensures that nobody
can log into the MariaDB root user without the proper authorisation.

You already have your root account protected, so you can safely answer 'n'.

Switch to unix_socket authentication [Y/n] y
Enabled successfully!
Reloading privilege tables..
 ... Success!


You already have your root account protected, so you can safely answer 'n'.

Change the root password? [Y/n] y
New password:
Re-enter new password:
Password updated successfully!
Reloading privilege tables..
 ... Success!


By default, a MariaDB installation has an anonymous user, allowing anyone
to log into MariaDB without having to have a user account created for
them.  This is intended only for testing, and to make the installation
go a bit smoother.  You should remove them before moving into a
production environment.

Remove anonymous users? [Y/n] y
 ... Success!

Normally, root should only be allowed to connect from 'localhost'.  This
ensures that someone cannot guess at the root password from the network.

Disallow root login remotely? [Y/n] y
 ... Success!

By default, MariaDB comes with a database named 'test' that anyone can
access.  This is also intended only for testing, and should be removed
before moving into a production environment.

Remove test database and access to it? [Y/n] y
 - Dropping test database...
 ... Success!
 - Removing privileges on test database...
 ... Success!

Reloading the privilege tables will ensure that all changes made so far
will take effect immediately.

Reload privilege tables now? [Y/n] y
 ... Success!

Cleaning up...

All done!  If you've completed all of the above steps, your MariaDB
installation should now be secure.

Thanks for using MariaDB!
该服务应在安装后自动启动。
$ sudo systemctl status mysql
* mariadb.service - MariaDB 10.4.1 database server
   Loaded: loaded (/lib/systemd/system/mariadb.service; enabled; vendor preset: enabled)
  Drop-In: /etc/systemd/system/mariadb.service.d
           `-migrated-from-my.cnf-settings.conf
   Active: active (running) since Tue 2018-12-25 08:26:18 PST; 24min ago
     Docs: man:mysqld(8)
           https://mariadb.com/kb/en/library/systemd/
 Main PID: 7564 (mysqld)
   Status: "Taking your SQL requests now..."
    Tasks: 32 (limit: 1110)
   CGroup: /system.slice/mariadb.service
           `-7564 /usr/sbin/mysqld

Dec 25 08:26:23 ubuntu-01 /etc/mysql/debian-start[7604]: Running 'mysqlcheck' with connection arguments: --port='3306' --socket='/var/run/mysqld/mysqld
Dec 25 08:26:23 ubuntu-01 /etc/mysql/debian-start[7604]: # Connecting to localhost...
Dec 25 08:26:23 ubuntu-01 /etc/mysql/debian-start[7604]: # Disconnecting from localhost...
Dec 25 08:26:23 ubuntu-01 /etc/mysql/debian-start[7604]: Processing databases
Dec 25 08:26:23 ubuntu-01 /etc/mysql/debian-start[7604]: information_schema
Dec 25 08:26:23 ubuntu-01 /etc/mysql/debian-start[7604]: performance_schema
Dec 25 08:26:23 ubuntu-01 /etc/mysql/debian-start[7604]: Phase 7/7: Running 'FLUSH PRIVILEGES'
Dec 25 08:26:23 ubuntu-01 /etc/mysql/debian-start[7604]: OK
Dec 25 08:26:23 ubuntu-01 /etc/mysql/debian-start[7706]: Checking for insecure root accounts.
Dec 25 08:26:23 ubuntu-01 /etc/mysql/debian-start[7710]: Triggering myisam-recover for all MyISAM tables and aria-recover for all Aria tables
使用 mysql 命令测试登录 MariaDB shell:
$ mysql -u root -p
Enter password:
Welcome to the MariaDB monitor.  Commands end with ; or \g.
Your MariaDB connection id is 47
Server version: 10.4.21-MariaDB-1:10.4.21+maria~focal-log mariadb.org binary distribution

Copyright (c) 2000, 2018, Oracle, MariaDB Corporation Ab and others.

Type 'help;' or '\h' for help. Type '\c' to clear the current input statement.
MariaDB [(none)]>
使用以下命令检查版本:
MariaDB [(none)]> SELECT VERSION();
+-------------------------------------------+
| VERSION()                                 |
+-------------------------------------------+
| 10.4.21-MariaDB-1:10.4.21+maria~focal-log |
+-------------------------------------------+
1 row in set (0.000 sec)

MariaDB [(none)]> QUIT
Bye
第5步:安装桌面数据库管理工具
如果您不喜欢使用 MySQL 命令行,那么请考虑安装数据库工具来帮助您。请查看下面我们的指南:
- 在 Ubuntu 上安装和配置 DBeaver
更多学习:
- 最佳 Kubernetes 学习书籍
- 最佳 LPIC-1 和 LPIC-2 认证学习书籍
- 最佳 CCNA 安全 (210-260) 认证学习书籍
- 适合初学者和专家的最佳 Linux 书籍