如何在 Ubuntu/Debian 上安装 OSSEC HIDS
本指南将帮助您在 Ubuntu/Debian 上安装 OSSEC HIDS。 OSSEC 是一种基于主机的开源入侵检测系统 (HIDS),可在 Linux、OpenBSD、Solaris、FreeBSD、Windows 和其他系统上运行。 OSSEC 以服务器/客户端模型工作。 OSSEC 客户端执行日志分析、策略监控、文件完整性检查、实时警报、rootkit 检测和主动响应。
OSSEC 具有 HIDS(基于主机的入侵检测)、日志监控和 SIM/SIEM 等方面,作为具有 Web UI 管理的简单解决方案。
第1步:安装OSSEC依赖项
OSSEC 需要 PHP、gcc、libc 和 Apache Web 服务器。通过运行以下命令来安装它们:
sudo apt update
sudo apt install -y wget curl unzip make gcc build-essential
sudo apt install -y php php-cli php-common libapache2-mod-php apache2-utils sendmail inotify-tools
步骤 2:在 Ubuntu/Debian 上安装 OSSEC HIDS
安装依赖项后,下一步将安装 OSSEC HIDS。 OSSEC 的源代码可在 Github 上获取。
下载前检查是否有最新版本。
VER=$(curl -s https://api.github.com/repos/ossec/ossec-hids/releases/latest|grep tag_name|cut -d '"' -f 4)
wget https://github.com/ossec/ossec-hids/archive/${VER}.tar.gz
下载后,使用以下命令解压缩文件:
tar xvf $VER.tar.gz此提取将创建一个文件夹,更改为该文件夹并运行安装脚本:
cd ossec-hids-${VER}
sudo ./install.sh
<代码>1。 设置语言
(en/br/cn/de/el/es/fr/hu/it/jp/nl/pl/ru/sr/tr) [en]: en2. 按
OSSEC HIDS v3.1.0 Installation Script - http://www.ossec.net

 You are about to start the installation process of the OSSEC HIDS.
 You must have a C compiler pre-installed in your system.

  - System: Linux jammy 5.15.0-72-generic
  - User: root
  - Host: jammy

  -- Press ENTER to continue or Ctrl-C to abort. --
3. 选择本地安装类型
What kind of installation do you want (server, agent, local, hybrid or help)? local通过本地安装,您将能够执行服务器执行的所有操作,但从代理或外部系统日志设备接收远程消息除外。
4. 选择 OSSEC HIDS 的安装位置 [/var/ossec],按 Enter 键使用 /var/ossec
Installation will be made at /var/ossec .5. 配置 OSSEC HIDS
  3.1- Do you want e-mail notification? (y/n) [y]: y
   - What's your e-mail address? [email
   - What's your SMTP server ip/host? localhost

  3.2- Do you want to run the integrity check daemon? (y/n) [y]: y

   - Running syscheck (integrity check daemon).

  3.3- Do you want to run the rootkit detection engine? (y/n) [y]: y

   - Running rootcheck (rootkit detection).

  3.4- Active response allows you to execute a specific
       command based on the events received. For example,
       you can block an IP address or disable access for
       a specific user.
       More information at:
       http://www.ossec.net/en/manual.html#active-response

   - Do you want to enable active response? (y/n) [y]: y

     - Active response enabled.

   - By default, we can enable the host-deny and the
     firewall-drop responses. The first one will add
     a host to the /etc/hosts.deny and the second one
     will block the host on iptables (if linux) or on
     ipfilter (if Solaris, FreeBSD or NetBSD).
   - They can be used to stop SSHD brute force scans,
     portscans and some other forms of attacks. You can
     also add them to block on snort events, for example.

   - Do you want to enable the firewall-drop response? (y/n) [y]: y

     - firewall-drop enabled (local) for levels >= 6

   - Default white list for the active response:
      - 192.168.121.1

   - Do you want to add more IPs to the white list? (y/n)? [n]:

  3.6- Setting the configuration to analyze the following logs:
    -- /var/log/messages
    -- /var/log/auth.log
    -- /var/log/syslog
    -- /var/log/mail.info
    -- /var/log/dpkg.log
    -- /var/log/apache2/error.log (apache log)
    -- /var/log/apache2/access.log (apache log)

 - If you want to monitor any other file, just change
   the ossec.conf and add a new localfile entry.
   Any questions about the configuration can be answered
   by visiting us online at http://www.ossec.net .


--- Press ENTER to continue ---按Enter开始安装
用于管理 OSSEC HIDS 的初始化脚本为 /var/ossec/bin/ossec-control
要启动该服务,请使用:
$ sudo /var/ossec/bin/ossec-control start
Starting OSSEC HIDS v3.7.0 (by Trend Micro Inc.)...
Started ossec-maild...
Started ossec-execd...
Started ossec-analysisd...
Started ossec-logcollector...
Started ossec-syscheckd...
Started ossec-monitord...
Completed.
并通过运行来停止它
sudo /var/ossec/bin/ossec-control stop您可以通过编辑配置文件进一步配置OSSEC HIDS:
sudo vim /var/ossec/etc/ossec.conf规则位于目录/var/ossec/rules/下。本地系统文件的规则在文件 /var/ossec/rules/local_rules.xml 上设置
检查 OSSEC 文档以获取配置选项。
每当进行更改时,请不要忘记重新启动 OSSEC HIDS
sudo /var/ossec/bin/ossec-control restart第 3 步:安装 OSSEC Web UI
OSSEC HIDS 有一个简单的 Web 界面,但需要安装。
git clone https://github.com/ossec/ossec-wui.git
sudo mv  ossec-wui /srv
cd /srv/ossec-wui
sudo ./setup.sh设置仪表板管理员用户名/密码和网络服务器用户名
trap: SIGHUP: bad trap
Setting up ossec ui...

Username: admin
New password: <ENTER PASSWORD>
Re-type new password:<CONFIRM PASSWORD>
Adding password for user admin
Enter your web server user name (e.g. apache, www, nobody, www-data, ...)
www-data
You must restart your web server after this setup is done.

Setup completed successfully.
创建 Apache VirtualHost 配置文件
sudo vim /etc/apache2/sites-enabled/ossec-wui.conf将以下内容放入文件中
<VirtualHost *:80>
     DocumentRoot /srv/ossec-wui/
     ServerName ossec.example.com
     ServerAlias www.ossec.example.com
     ServerAdmin [email

     <Directory /srv/ossec-wui/>
        Options +FollowSymlinks
        AllowOverride All
        Require all granted
     </Directory>

     ErrorLog /var/log/apache2/moodle-error.log
     CustomLog /var/log/apache2/moodle-access.log combined
</VirtualHost>
将 example.com 替换为您的域名,保存文件并退出。
启用 Apache 重写模块
sudo a2enmod rewrite
sudo systemctl restart apache2
$ systemctl status apache2.service
● apache2.service - The Apache HTTP Server
Loaded: loaded (/lib/systemd/system/apache2.service; enabled; vendor preset: enabled)
Active: active (running) since Thu 2023-06-01 19:14:31 UTC; 11s ago
Docs: https://httpd.apache.org/docs/2.4/
Main PID: 7580 (apache2)
Tasks: 55 (limit: 4537)
Memory: 5.1M
CPU: 54ms
CGroup: /system.slice/apache2.service
├─7580 /usr/sbin/apache2 -k start
├─7582 /usr/sbin/apache2 -k start
└─7583 /usr/sbin/apache2 -k start在网络浏览器中打开 http://ossec.example.com 并向仪表板进行身份验证。
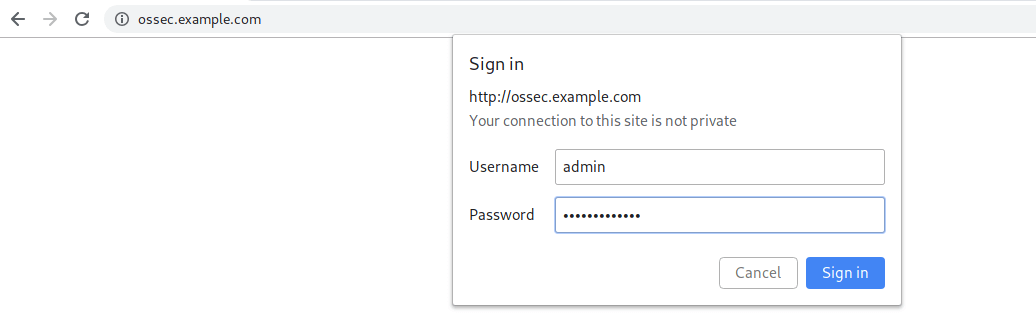
登录时。你应该得到如下页面:

这标志着在 Ubuntu/Debian 上安装 OSSEC HIDS 文章的结束。
推荐阅读的安全书籍:
- 最佳渗透测试书籍
- 最佳网络安全书籍
- 最佳 CompTIA Security+ (SY0-601) 认证书籍
- 顶级认证信息安全经理(CISM)学习书籍
参考文献:
OSSEC 手册/文档