如何在 Ubuntu 22.04|20.04|18.04 上安装 DokuWiki
DokuWiki 是一个用 PHP 编写的免费开源 wiki 软件。 DokuWiki 具有高度通用性,并且不需要数据库,因为它适用于纯文本文件。它的语法与 MediaWiki 使用的语法类似。本指南将介绍在 Ubuntu 22.04|20.04|18.04 上使用 Nginx 和 Letsencrypt SSL 证书进行加密安装 DokuWiki 的步骤。
DokuWiki 安装先决条件:
- 更新系统
- PHP 和 php-fpm
- Nginx 或 Apache Web 服务器
- certbot-auto 用于请求 Certbot 证书
让我们首先确保安装了所有软件要求。
第1步:更新系统包
确保您的 apt 索引和所有软件包均已更新。
sudo apt update重新启动系统后,设置系统主机名并继续安装 php 和所有必需的模块:
sudo hostnamectl set-hostname wiki.example.com第2步:安装php和所需模块
我们现在需要安装 php 和 DokuWiki 所需的一些 php 模块。运行以下命令来安装所有内容。
sudo apt -y install php php-curl php-apcu php-fpm php-bcmath php-gd php-intl php-pear php-imap php-memcache libapache2-mod-php php-pspell php-tidy php-xmlrpc php-mbstring php-gmp php-json php-xml php-common确认您系统上的 PHP 版本。
$ php -v
PHP 8.1.2 (cli) (built: Aug  8 2022 07:28:23) (NTS)
Copyright (c) The PHP Group
Zend Engine v4.1.2, Copyright (c) Zend Technologies
    with Zend OPcache v8.1.2, Copyright (c), by Zend Technologies
要获取系统上安装的 php 扩展列表,请使用 php -m 命令:
php -m步骤 3:安装 Nginx 和 certbot-auto
让我们安装 nginx 网络服务器和 certbot,稍后我们将使用它们来获取 DokuWiki 站点的证书。
sudo apt update
sudo apt install wget nginx certbot
第 4 步:下载并安装 DokuWiki
在下载任何版本的 DokuWiki 之前,请检查下载页面以获取最新的稳定版本。
wget https://download.dokuwiki.org/src/dokuwiki/dokuwiki-stable.tgz使用 tar 提取 DokuWiki 存档
tar xvf dokuwiki-stable.tgz
sudo mv dokuwiki-*/ /var/www/html/dokuwiki
将 /var/www/html/dokuwiki 的所有权更改为 www-data 用户和组。
sudo chown -R www-data:www-data /var/www/html/dokuwiki/第 5 步:为 DokuWiki 配置 Nginx 代理
您可以在 http 或 https 上使用 DokuWiki。
选项 1:使用没有 SSL 证书的 Nginx
如果你不需要 SSL 连接,你可以配置 Nginx 不带 https 部分。创建 Dokuwiki 虚拟主机文件。
sudo vim /etc/nginx/conf.d/dokuwiki.conf粘贴并修改这些设置。
# Dokuwiki Nginx configuration
server {
  listen 80;
  server_name wiki.example.com;
  root /var/www/html/dokuwiki/;

 access_log /var/log/nginx/dokuwiki.access.log;
 error_log /var/log/nginx/dokuwiki.error.log;

 index index.html index.php doku.php;

location / {
 try_files $uri $uri/ @dokuwiki;
 }

location @dokuwiki {
 rewrite ^/_media/(.*) /lib/exe/fetch.php?media=$1 last;
 rewrite ^/_detail/(.*) /lib/exe/detail.php?media=$1 last;
 rewrite ^/_export/([^/]+)/(.*) /doku.php?do=export_$1&id=$2 last;
 rewrite ^/(.*) /doku.php?id=$1 last;
 }

location ~ /(data|conf|bin|inc)/ {
 deny all;
 }

location ~* \.(css|js|gif|jpe?g|png)$ {
 expires 1M;
 add_header Pragma public;
 add_header Cache-Control "public, must-revalidate, proxy-revalidate";
 }

location ~ \.php$ {
 fastcgi_split_path_info ^(.+\.php)(/.+)$;
 fastcgi_pass unix:/var/run/php/php-fpm.sock;
 fastcgi_index index.php;
 include fastcgi_params;
 fastcgi_param SCRIPT_FILENAME $document_root$fastcgi_script_name;
 fastcgi_intercept_errors off;
 fastcgi_buffer_size 16k;
 fastcgi_buffers 4 16k;
 }

location ~ /\.ht {
 deny all;
 }
}
不要忘记将 wiki.example.com 替换为您的域名。完成测试 Nginx 配置语法后:
$ sudo nginx  -t
nginx: the configuration file /etc/nginx/nginx.conf syntax is ok
nginx: configuration file /etc/nginx/nginx.conf test is successful
重启nginx服务
sudo systemctl restart nginx确认服务启动无误:
$ systemctl status nginx
● nginx.service - A high performance web server and a reverse proxy server
     Loaded: loaded (/lib/systemd/system/nginx.service; enabled; vendor preset: enabled)
     Active: active (running) since Wed 2022-10-05 18:11:17 EAT; 7s ago
       Docs: man:nginx(8)
    Process: 53704 ExecStartPre=/usr/sbin/nginx -t -q -g daemon on; master_process on; (code=exited, status=0/SUCCESS)
    Process: 53705 ExecStart=/usr/sbin/nginx -g daemon on; master_process on; (code=exited, status=0/SUCCESS)
   Main PID: 53706 (nginx)
      Tasks: 2 (limit: 9460)
     Memory: 2.6M
        CPU: 23ms
     CGroup: /system.slice/nginx.service
             ├─53706 "nginx: master process /usr/sbin/nginx -g daemon on; master_process on;"
             └─53707 "nginx: worker process" "" "" "" "" "" "" "" "" "" "" "" "" "" "" "" "" "" "" "" "" "" "" "" "" "" "" ""

Oct 05 18:11:17 jammy systemd[1]: Starting A high performance web server and a reverse proxy server...
Oct 05 18:11:17 jammy systemd[1]: Started A high performance web server and a reverse proxy server.打开浏览器并访问http://wiki.example.com/install.php。
选项 2:使用没有 SSL 证书的 Nginx
停止 nginx,因为 certbot-auto 将绑定到端口 80
sudo systemctl stop nginx然后请求证书:
export DOMAIN='wiki.example.com'
export EMAIL="[email "
sudo certbot certonly --standalone -d $DOMAIN \
 --preferred-challenges http --agree-tos -n -m $EMAIL \
 --keep-until-expiring
如果成功,certbot 会给您一条成功消息:
Saving debug log to /var/log/letsencrypt/letsencrypt.log
Plugins selected: Authenticator standalone, Installer None
Obtaining a new certificate
Performing the following challenges:
http-01 challenge for wiki.computingforgeeks.com
Waiting for verification...
Cleaning up challenges

IMPORTANT NOTES:
 - Congratulations! Your certificate and chain have been saved at:
   /etc/letsencrypt/live/wiki.example.com/fullchain.pem
   Your key file has been saved at:
   /etc/letsencrypt/live/wiki.example.com/privkey.pem
   Your cert will expire on 2022-01-27. To obtain a new or tweaked
   version of this certificate in the future, simply run certbot-auto
   again. To non-interactively renew *all* of your certificates, run
   "certbot-auto renew"
 - If you like Certbot, please consider supporting our work by:

   Donating to ISRG / Let's Encrypt:   https://letsencrypt.org/donate
   Donating to EFF:                    https://eff.org/donate-le
创建 Dokuwiki 虚拟主机文件。
sudo vim /etc/nginx/conf.d/dokuwiki.conf添加以下内容,并进行修改以适合您的用例。将 wiki.example.com 替换为您的域名。
# Dokuwiki Nginx configuration
server {

listen 443 ssl;
 server_name wiki.example.com;
 root /var/www/html/dokuwiki/;

 access_log /var/log/nginx/dokuwiki.access.log;
 error_log /var/log/nginx/dokuwiki.error.log;

 ssl on;
 ssl_certificate /etc/letsencrypt/live/wiki.example.com/fullchain.pem;
 ssl_certificate_key /etc/letsencrypt/live/wiki.example.com/privkey.pem;
 ssl_session_timeout 5m;
 ssl_ciphers 'AES128+EECDH:AES128+EDH:!aNULL';
 ssl_protocols TLSv1 TLSv1.1 TLSv1.2;
 ssl_prefer_server_ciphers on;

 index index.html index.php doku.php;

location / {
 try_files $uri $uri/ @dokuwiki;
 }

location @dokuwiki {
 rewrite ^/_media/(.*) /lib/exe/fetch.php?media=$1 last;
 rewrite ^/_detail/(.*) /lib/exe/detail.php?media=$1 last;
 rewrite ^/_export/([^/]+)/(.*) /doku.php?do=export_$1&id=$2 last;
 rewrite ^/(.*) /doku.php?id=$1 last;
 }

location ~ /(data|conf|bin|inc)/ {
 deny all;
 }

location ~* \.(css|js|gif|jpe?g|png)$ {
 expires 1M;
 add_header Pragma public;
 add_header Cache-Control "public, must-revalidate, proxy-revalidate";
 }

location ~ \.php$ {
 fastcgi_split_path_info ^(.+\.php)(/.+)$;
 fastcgi_pass unix:/var/run/php/php7.2-fpm.sock;
 fastcgi_index index.php;
 include fastcgi_params;
 fastcgi_param SCRIPT_FILENAME $document_root$fastcgi_script_name;
 fastcgi_intercept_errors off;
 fastcgi_buffer_size 16k;
 fastcgi_buffers 4 16k;
 }

location ~ /\.ht {
 deny all;
 }
}

# Redirect http to https
server {
 listen 80;
 server_name wiki.example.com;
 add_header Strict-Transport-Security max-age=2592000;
 rewrite ^ https://wiki.example.com$request_uri? permanent;
}
将所有存在的 wiki.example.com 替换为您的 wiki 域。
检查 nginx 语法:
$ sudo nginx -t
nginx: the configuration file /etc/nginx/nginx.conf syntax is ok
nginx: configuration file /etc/nginx/nginx.conf test is successful
如果没有错误,重启nginx和php-fpm
sudo systemctl restart php-fpm nginx第 6 步:从 Web 界面配置 DokuWiki
打开链接:https://wiki.mydomain/install.php开始DokuWiki配置,您将看到如下安装页面:
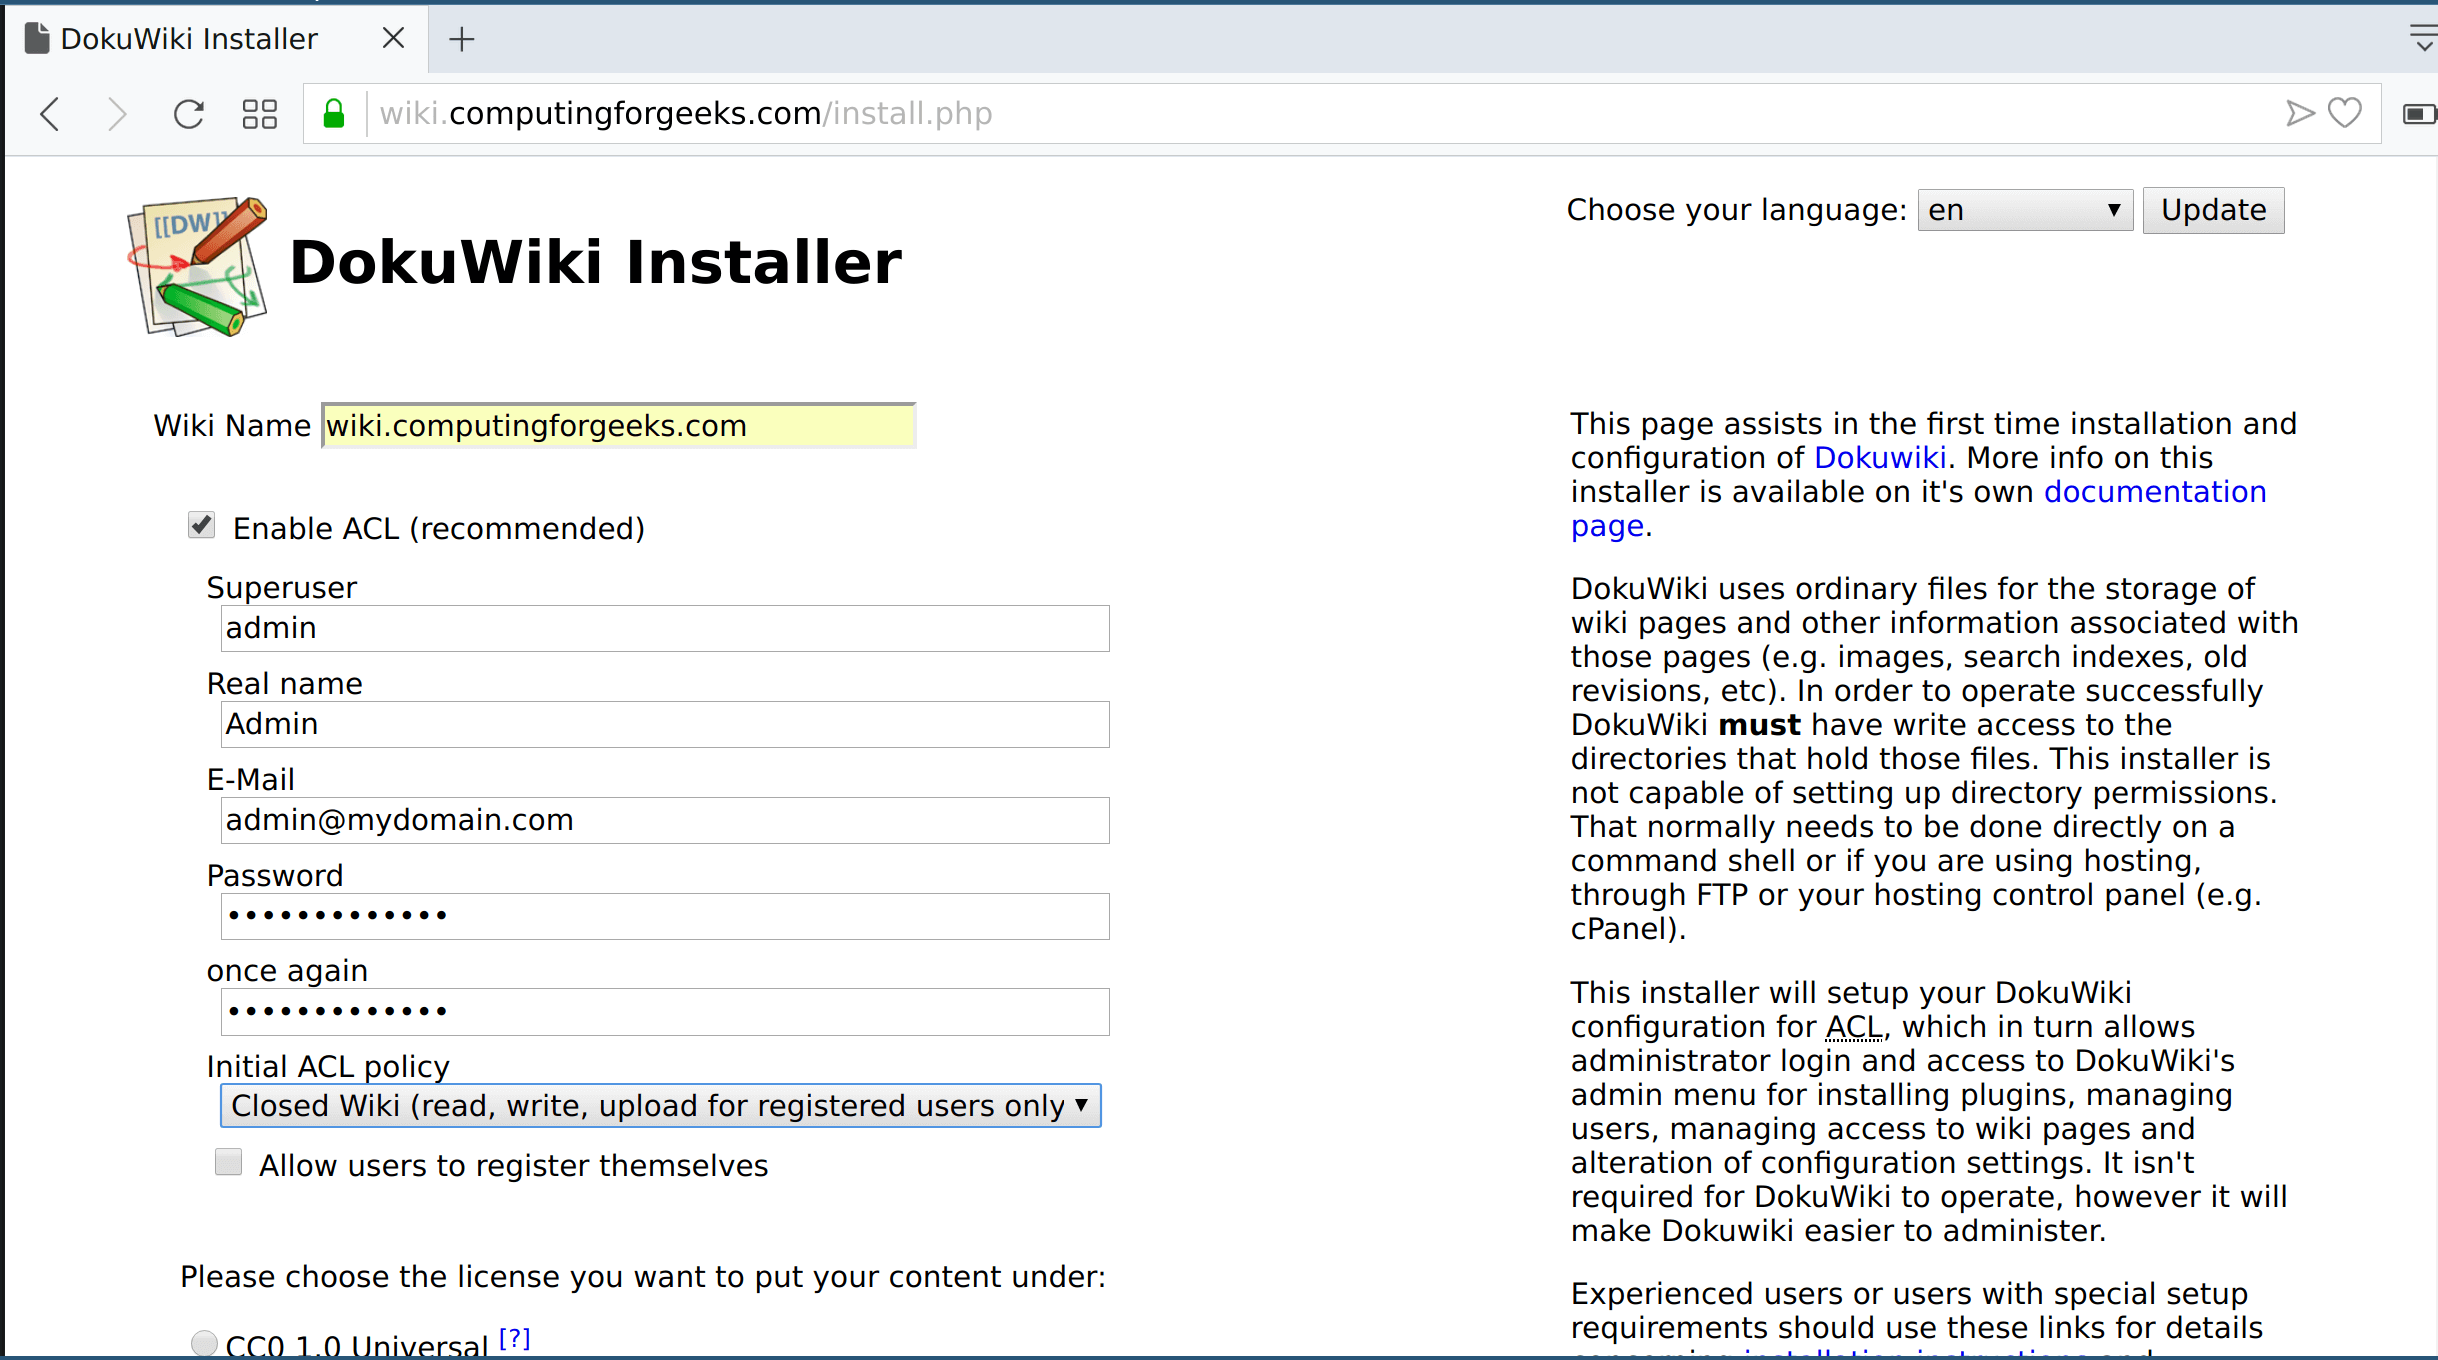
提供管理员用户详细信息,在初始 ACL 策略下从以下选项之一中选择您的策略:
- 开放维基 – 向所有人开放
- 公共维基 – 供所有人阅读,供注册用户上传和编辑
- 封闭式维基 – 仅供注册用户访问
检查您是否要允许用户自行注册
完成后,点击保存。 wiki 页面现在应该已准备就绪。
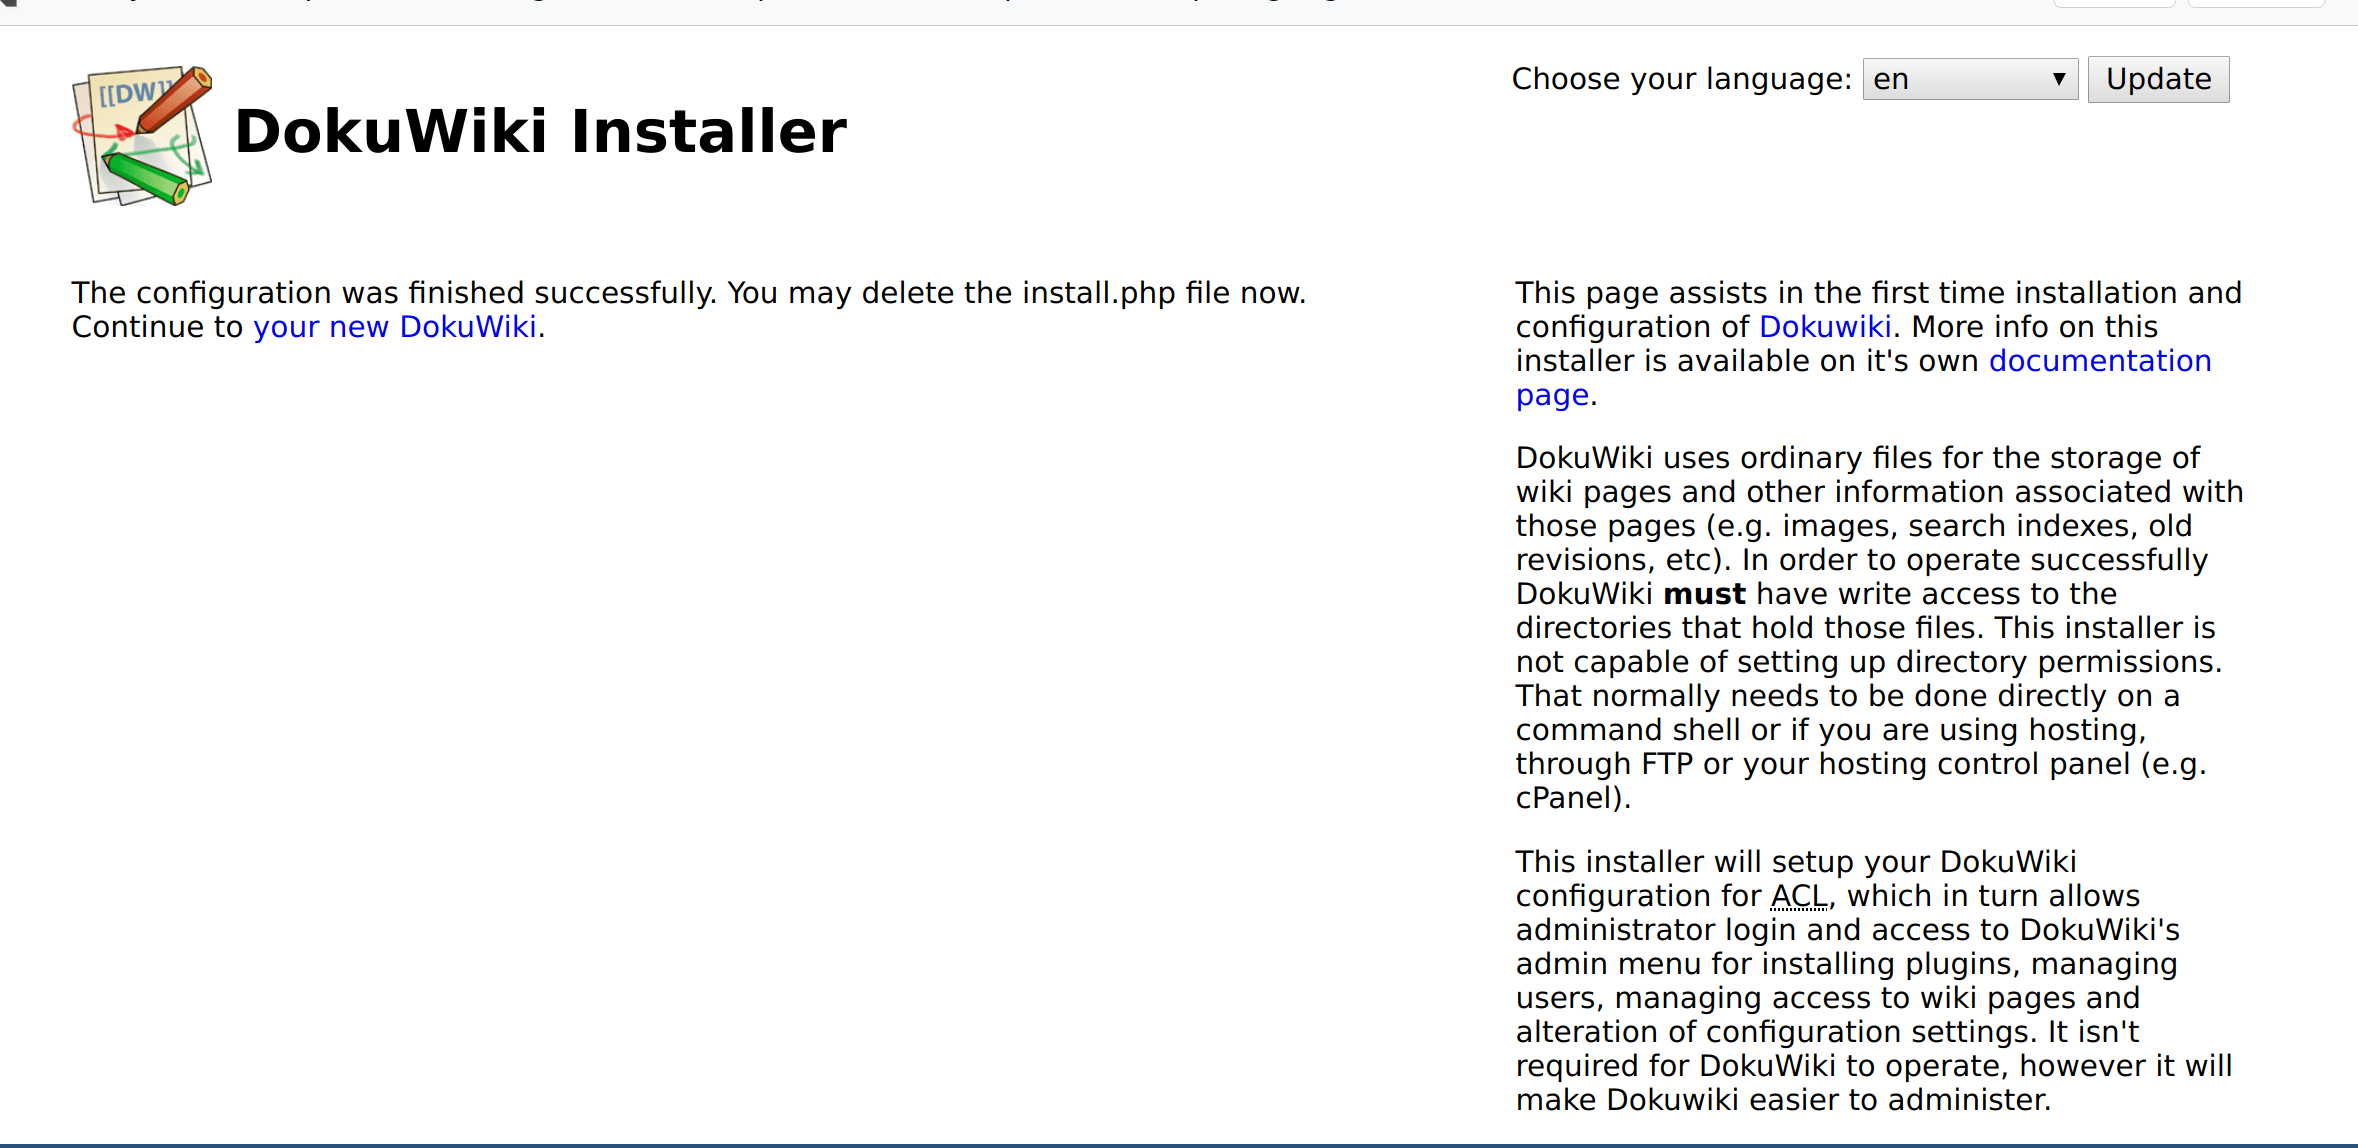
点击“您的新 DokuWiki” 即可访问 DokuWiki 主页。
第 8 步:将用户添加到 DokuWiki
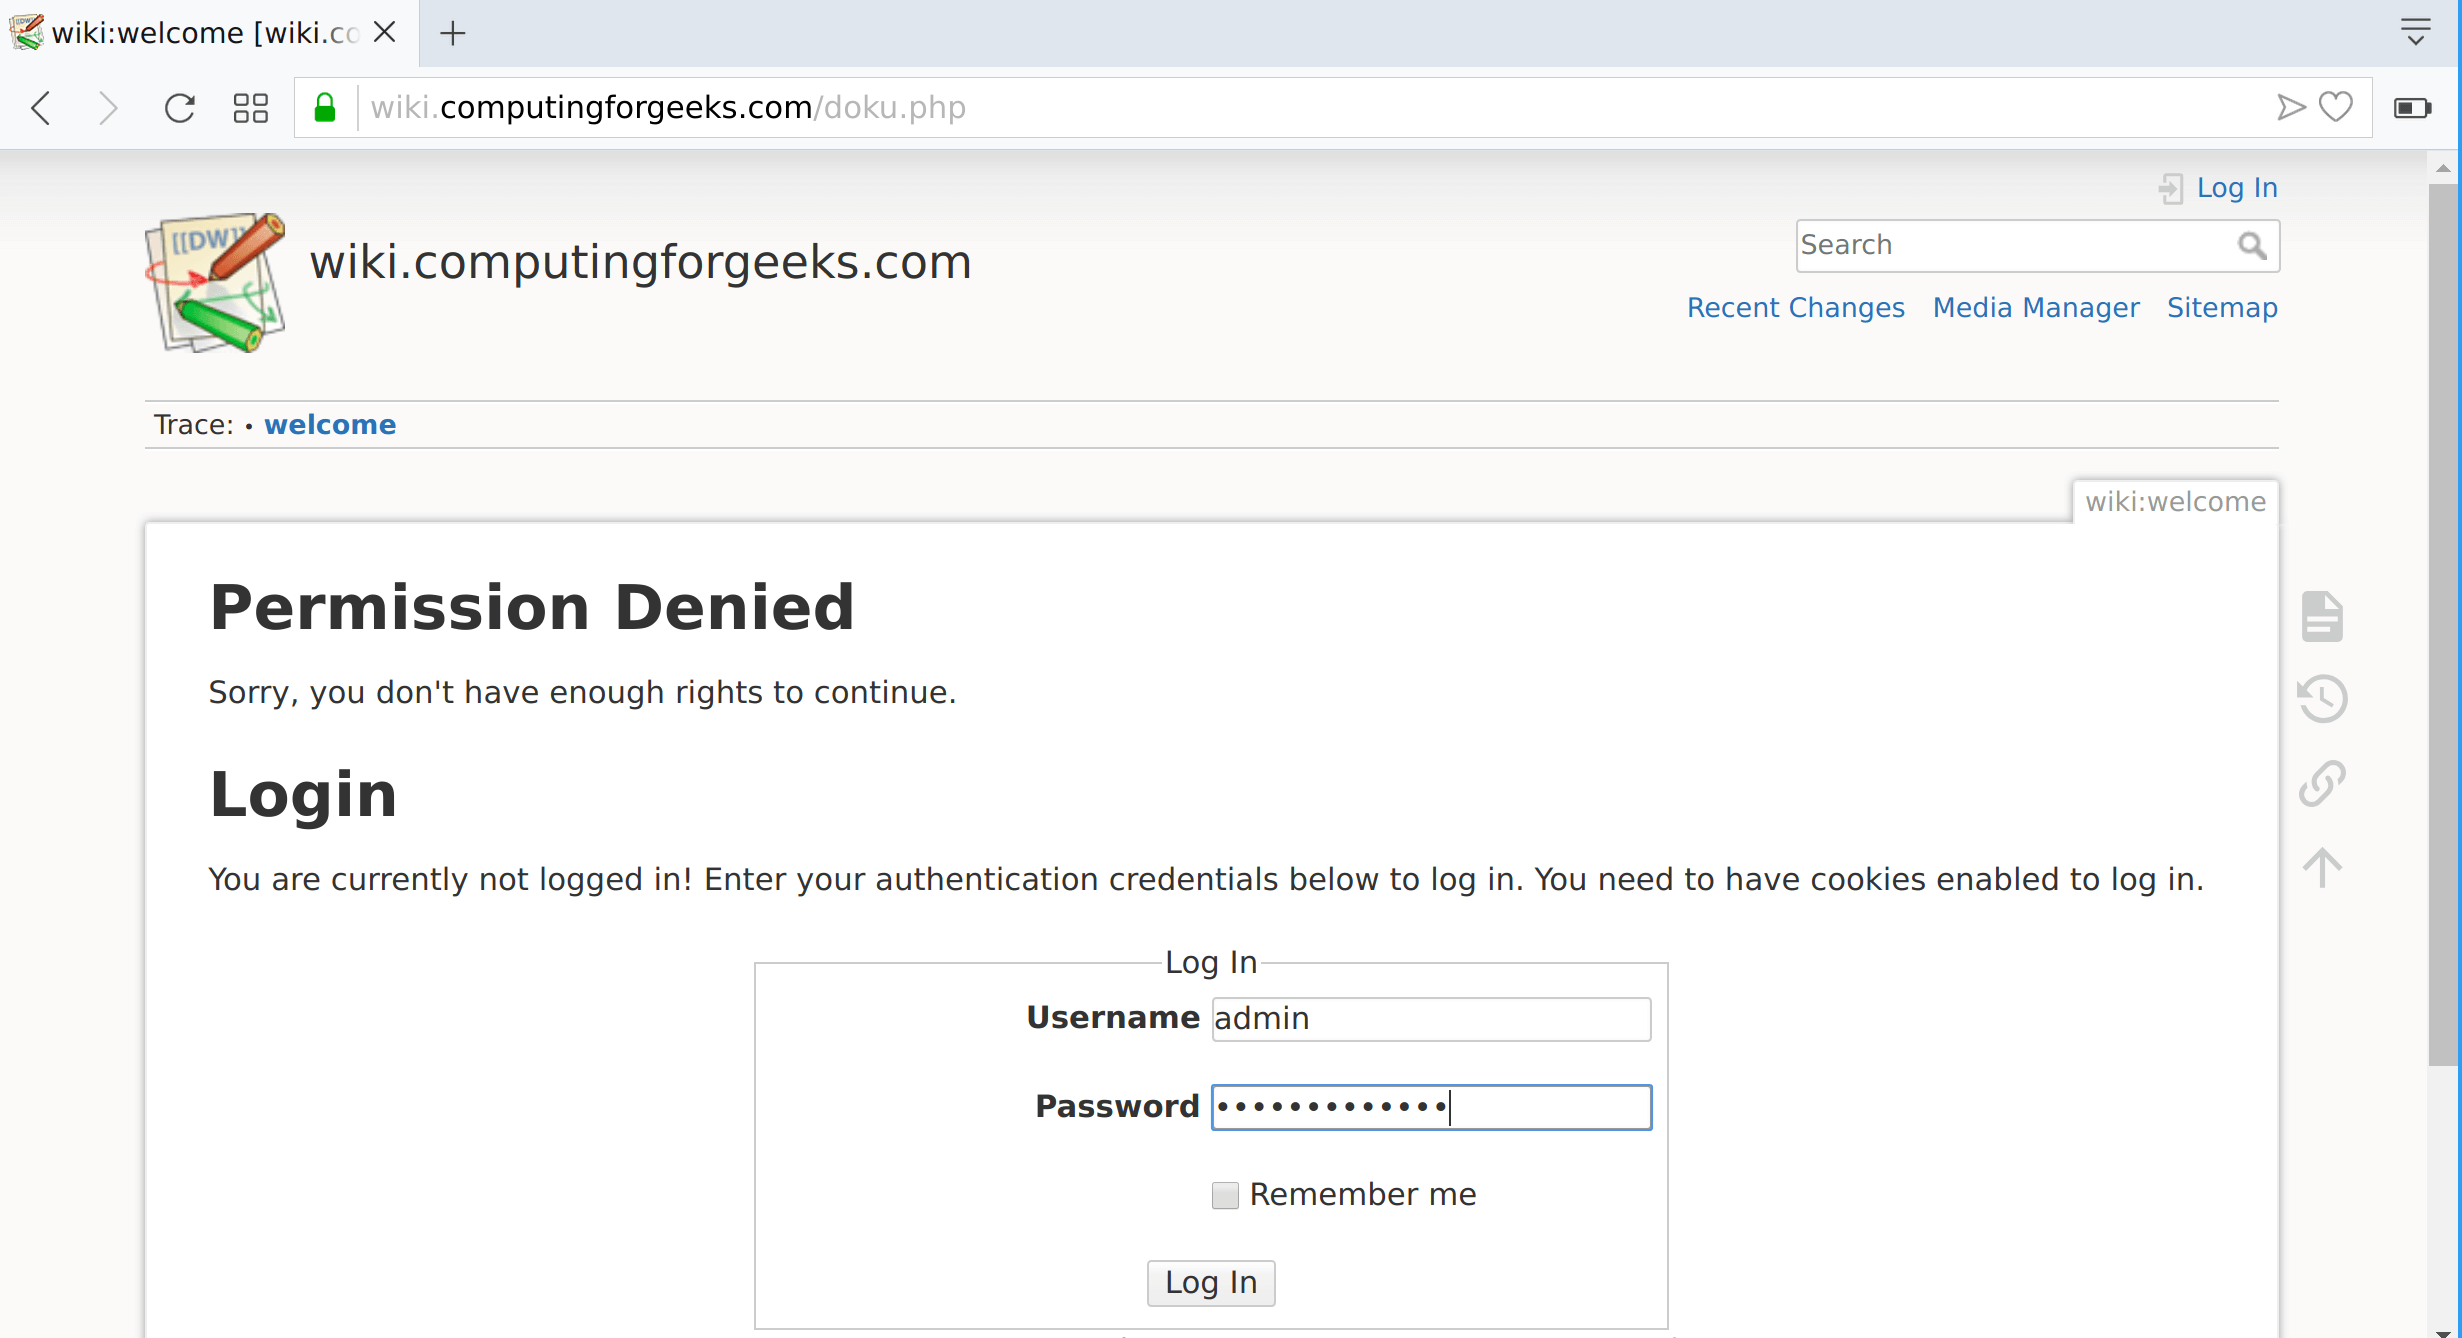
如果您选择了“关闭维基 |公开”作为您的 ACL 策略,您将获得用于编辑的登录页面。使用您之前创建的admin帐户登录,开始向系统添加其他用户:
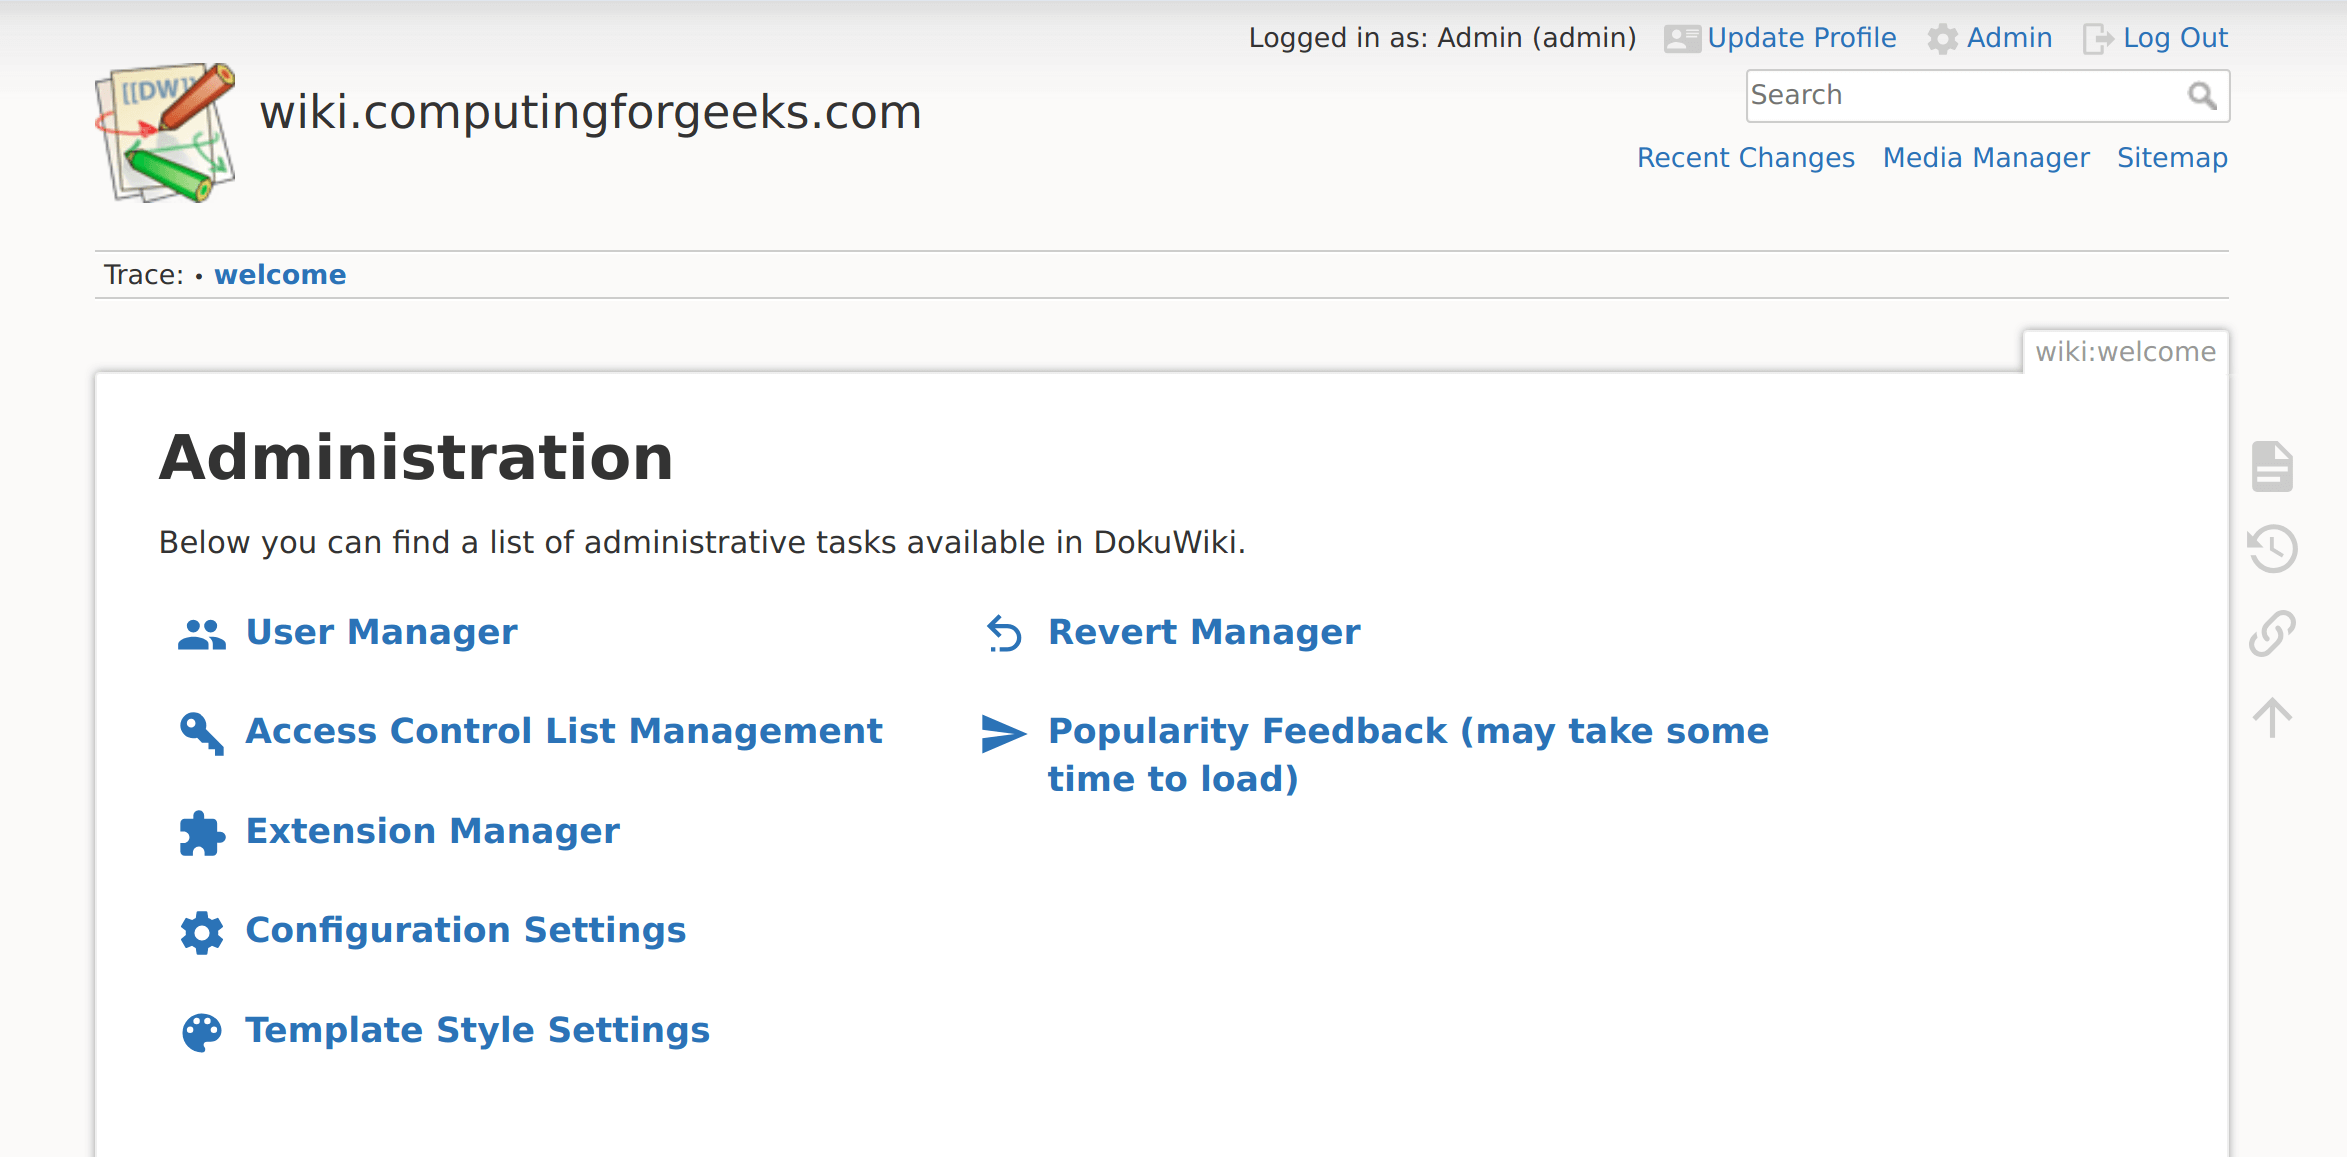
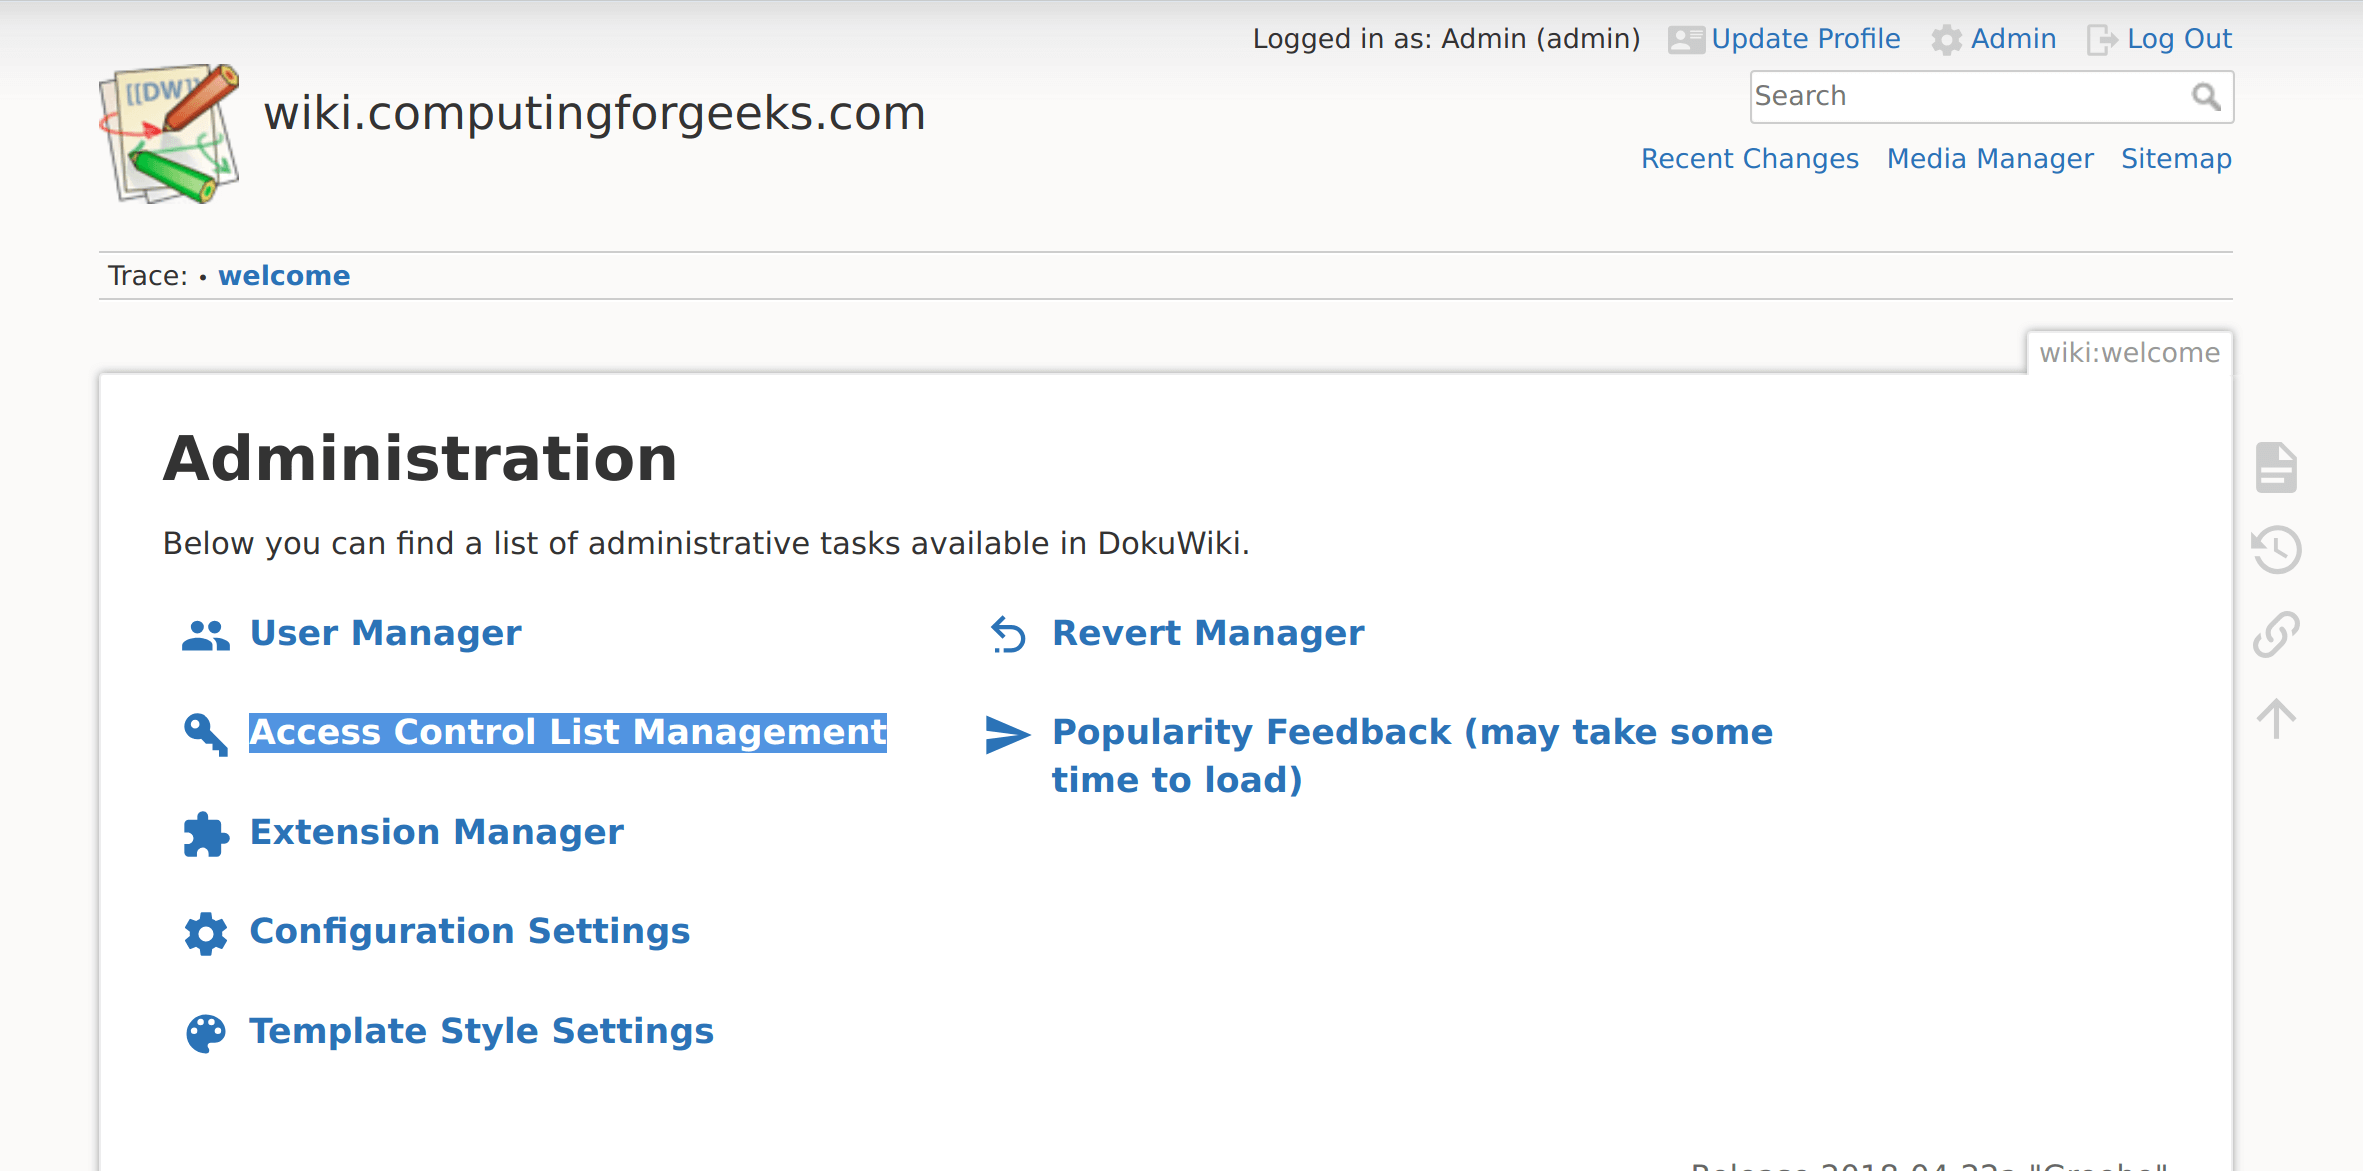
点击页面顶部的“管理”图标,这将带您进入管理页面:
点击“用户管理器”进入添加用户页面:
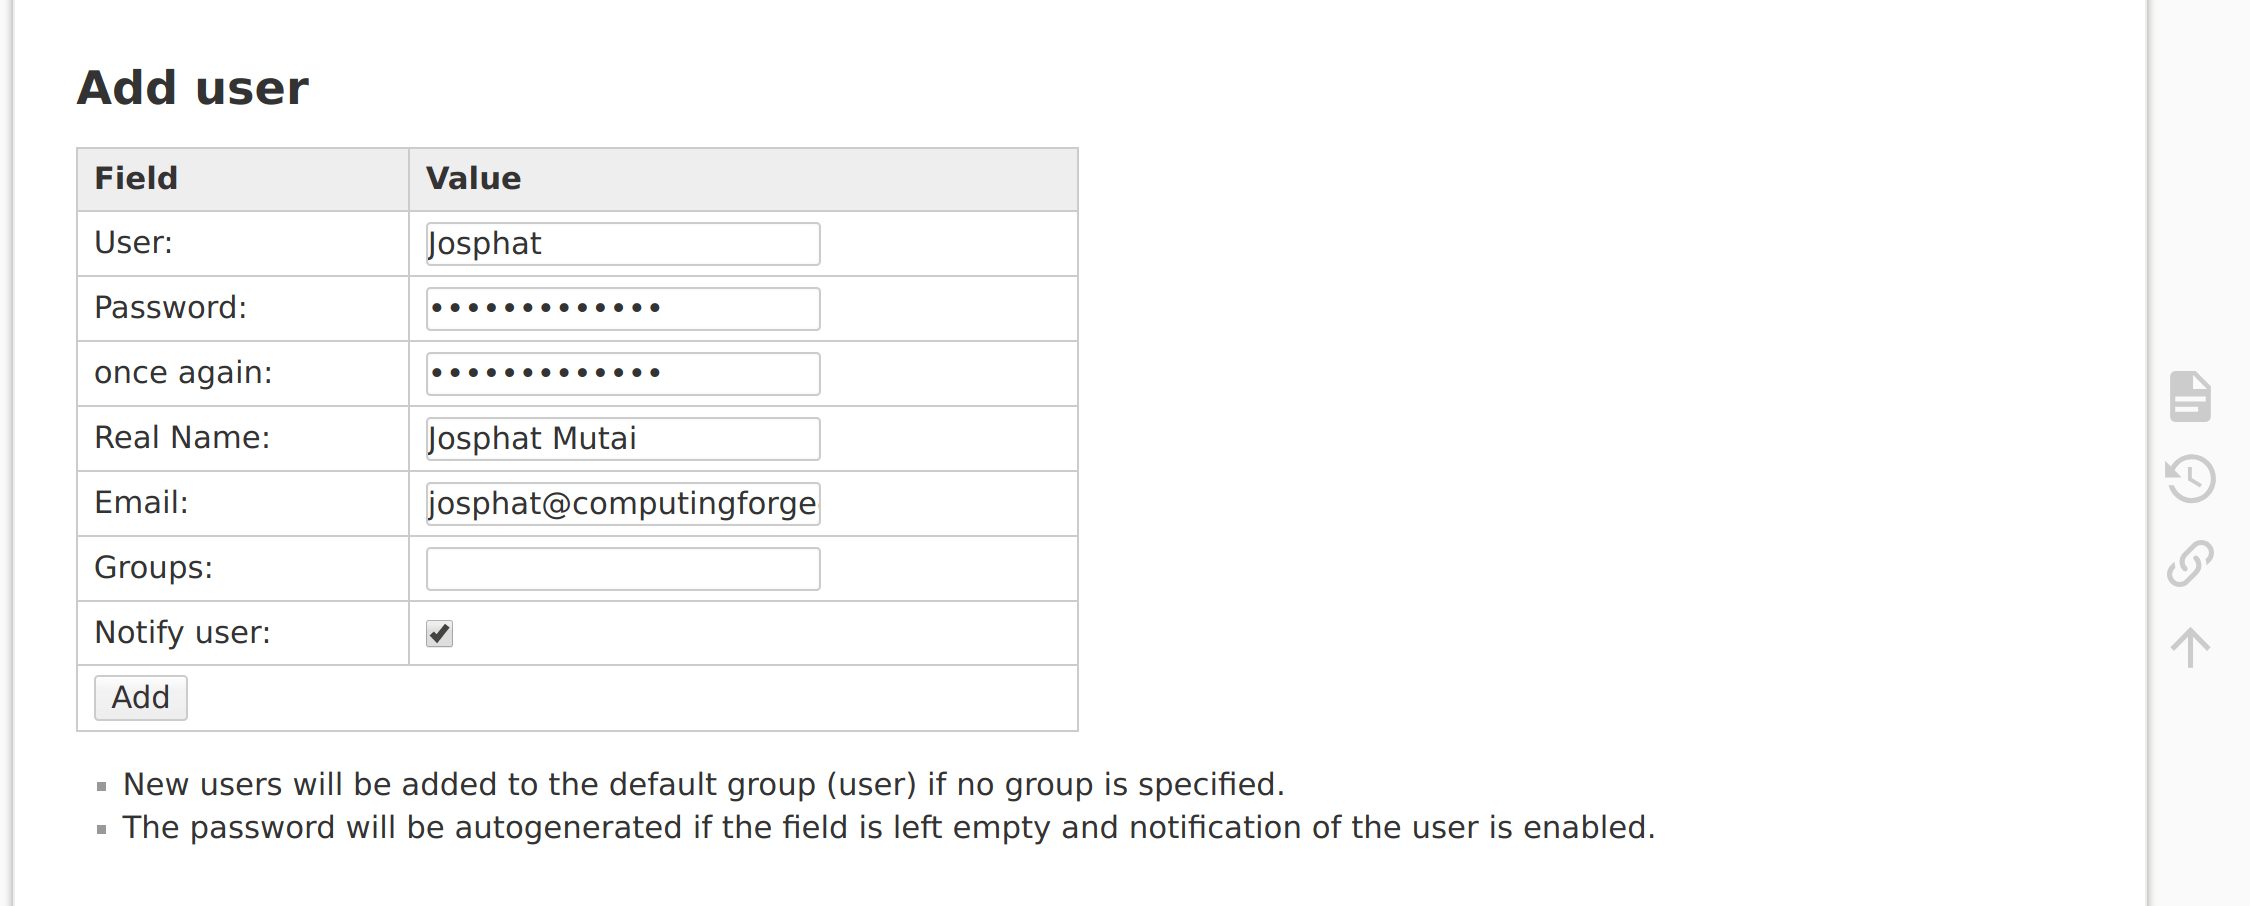
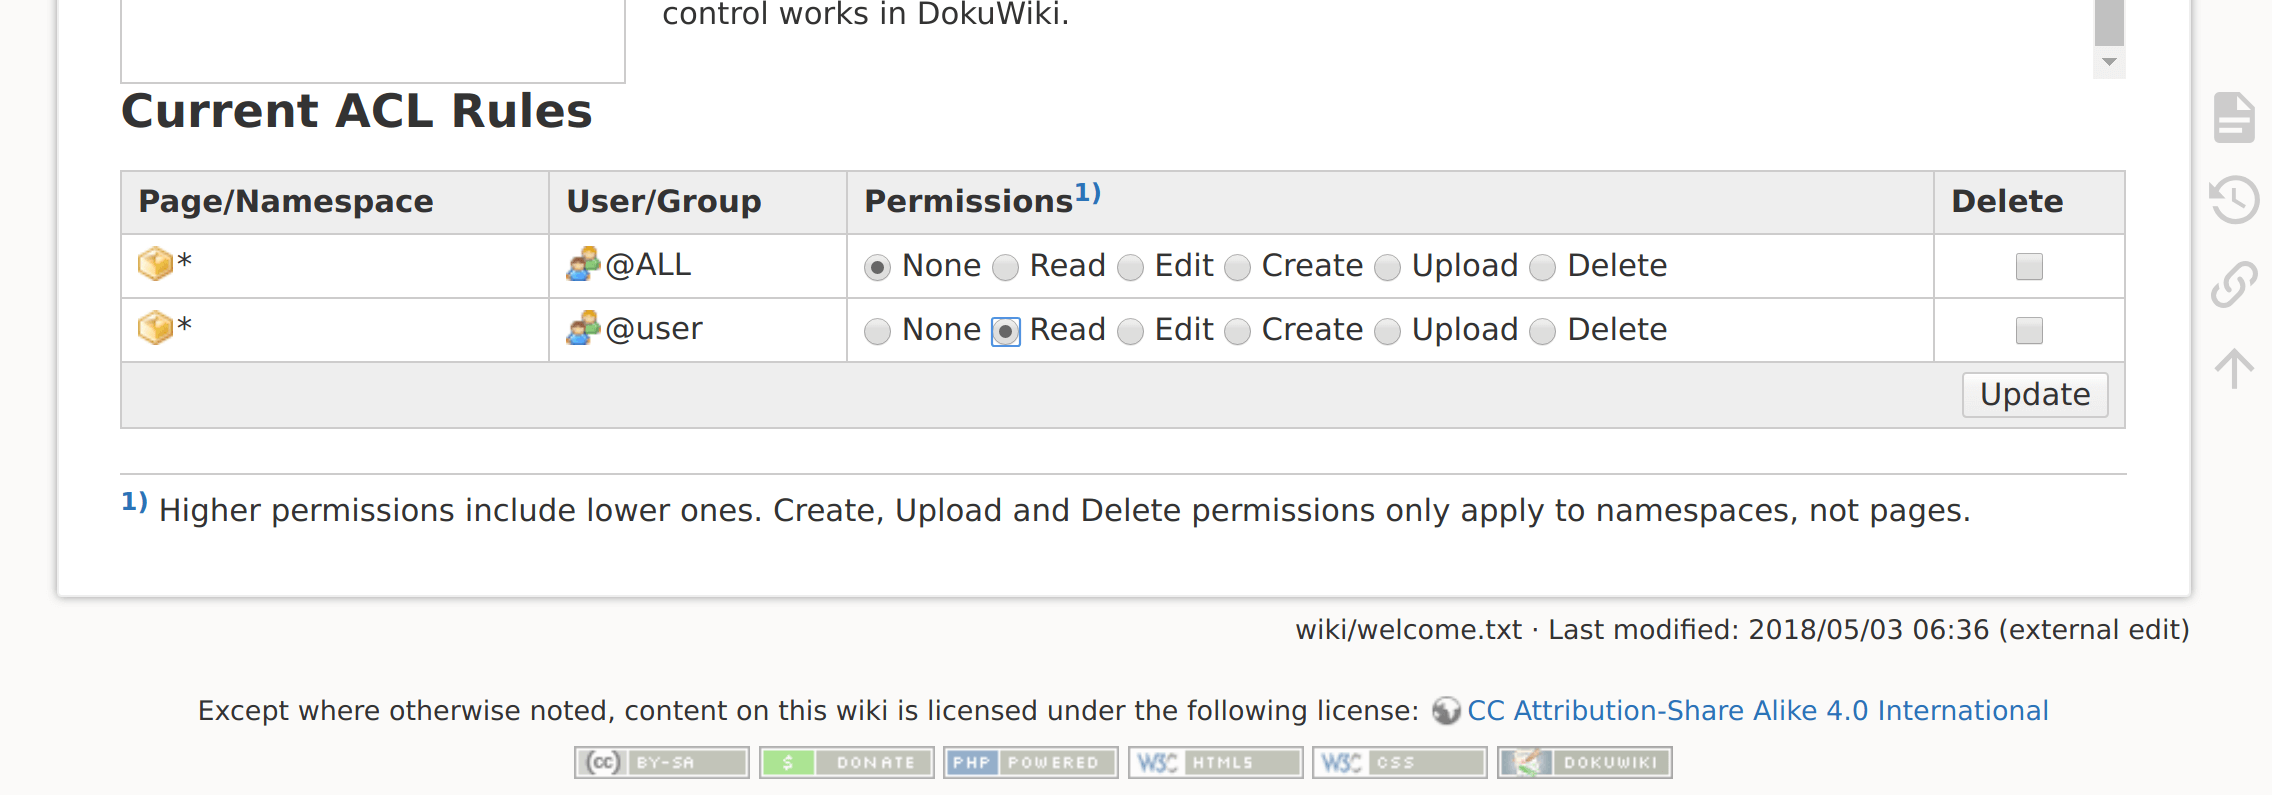
添加用户详细信息并单击“添加”按钮。添加用户后,您可以在“访问控制列表管理”页面分配ACL。
从给定的权限中选择。
在我们的下一篇 Wiki 指南中,我将介绍如何在 DokuWiki 上安装插件以扩展其功能。
- Chezmoi – 跨多台机器安全地管理点文件
- 为您的终端安装 wtfutil 个人信息仪表板