如何在 Ubuntu 20.04 上安装 Kuma - 自托管 Uptime Robot Alternative
在此页
- 先决条件
- 添加新用户
- 安装 NVM(节点版本管理器)
- 安装 Nodejs LTS 版本
- 下载并安装 Uptime-Kuma
- 使用 pm2 设置 Uptime-Kuma
- 将 Apache 设置为反向代理
- 使用 SSL Letsencrypt 保护 Uptime-kuma
- 验证 Uptime-Kuma 安装
- 结论
Uptime-Kuma 是一个用 Nodejs 编写的类似于“Uptime Robot”的开源监控工具。它是一个自托管的监控工具,具有漂亮的仪表板并支持多种通知方法。 Uptime-Kuma 将通过协议 HTTP(s)、TCP 和 Ping 监控主机或服务器的正常运行时间。如果主机在这样的间隔时间内无法通过这些协议进行 rach,正常运行的主机将通过 Webhooks、Telegram、Discord、Gotify、Slack、Pushover、电子邮件 (SMTP) 等方式发送通知。
在本指南中,您将学习如何在 Ubuntu 服务器上安装 Uptime-Kuma,并使用 Apache Web 服务器作为反向代理,并在其前面使用免费的 Lets Encrypt SSL 证书。在安装过程中,你还会通过nvm(node版本管理器)了解nodejs的安装。
先决条件
- Ubuntu 服务器 20.04。
- 具有根权限的用户。您将使用此用户安装新软件包和修改系统设置。
添加新用户
首先,您将向 Ubuntu 系统添加一个新用户。出于安全原因,应用程序 Uptime-Kuma 将以非根用户身份运行。
1. 通过执行以下命令添加新用户。对于此示例,我们将使用用户名 \johndoe\。确保用您自己的用户名更改用户名。
useradd -m -s /bin/bash johndoe您必须知道的选项:
- -m=自动为用户名创建主目录,该目录将位于 /home 目录下。
- -s=为用户定义 shell 的路径,大多数 Linux 都有 \/bin/bash shell。
2. 之后,运行以下命令为用户\johndoe\设置密码。
passwd johndoe现在输入一个新的强密码并重复,然后按“Enter”确认。
3. 接下来,使用以下命令将用户 \johndoe\ 添加到组 \sudo\。
usermod -aG sudo johndoe通过将用户添加到“sudo”组,将允许用户执行“sudo su”命令并获得root权限。
安装 NVM(节点版本管理器)
NVM 或 Node Version Manager 是一种命令行工具,用于在一个系统上安装多个 nodejs 版本。该工具使您能够为您的应用程序安装特定的 nodejs 版本,使您的开发和部署环境更加灵活。
对于这个阶段,您将在非根用户 \johndoe\ 下安装 nvm。
1. 从您的 root shell,使用以下命令登录到用户 \johndoe\。
su - johndoe2. 下载并执行 nvm 安装程序脚本,如下所示。
curl -o- https://raw.githubusercontent.com/nvm-sh/nvm/v0.38.0/install.sh | bash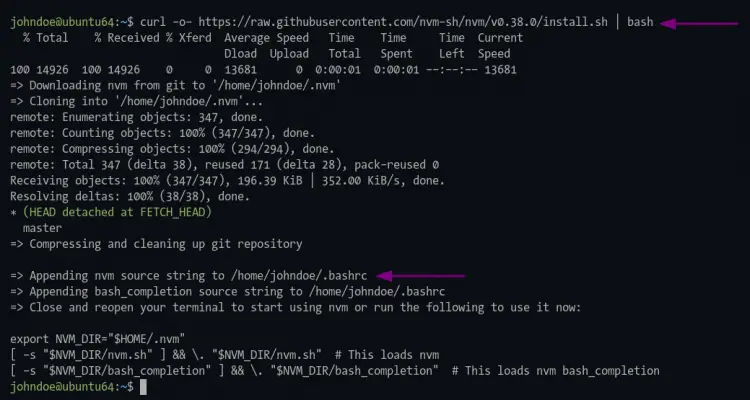
3. 成功后,使用以下命令重新加载 bash 环境。
source ~/.bashrc4. 现在通过运行以下命令验证 \nvm\ 安装。
command -v nvm如果安装成功,您将看到结果 \nvm\。否则,您将什么也看不到或结果为空白。
现在执行 nvm 命令如下。
nvm --help您将看到 nvm 命令的手动帮助页面。
Node Version Manager (v0.38.0)

Note: <version> refers to any version-like string nvm understands. This includes:
  - full or partial version numbers, starting with an optional "v" (0.10, v0.1.2, v1)
  - default (built-in) aliases: node, stable, unstable, iojs, system
  - custom aliases you define with `nvm alias foo`

 Any options that produce colorized output should respect the `--no-colors` option.

Usage:
  nvm --help                                  Show this message
    --no-colors                               Suppress colored output

.....

Note:
  to remove, delete, or uninstall nvm - just remove the `$NVM_DIR` folder (usually `~/.nvm`)
安装 Nodejs LTS 版本
要安装 uptime-Kuma 应用程序,您需要安装 nodejs >= 14、git 和 pm2。为此,您将使用 nvm 命令安装 nodejs LTS 最新版本。
1. 执行下面的 nvm 命令安装 nodejs LTS 最新版本。
nvm install --lts安装成功后,您将看到类似如下的输出。
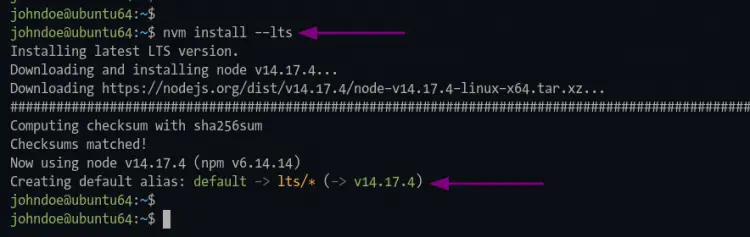
您安装的第一个 nodejs 版本将成为您开发环境中的默认版本。
2. 现在运行以下命令来验证 nodejs 安装。
node --version
npm --version
如果安装成功,您将看到类似如下的输出。
# nodejs version
v14.17.4

# npm version
6.14.14
下载并安装 Uptime-Kuma
此时,您已准备好安装 Uptime-Kuma 应用程序。
1. 使用下面的 git 命令克隆 uptime-Kuma 源代码。
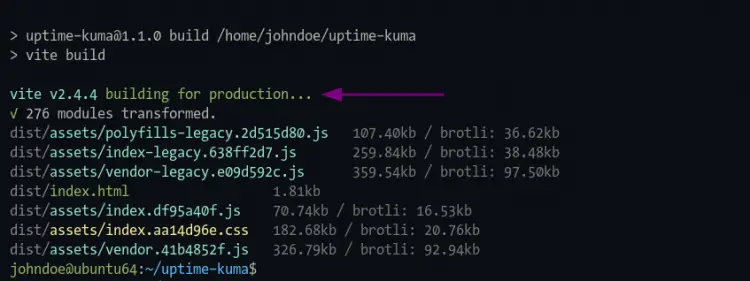
git clone https://github.com/louislam/uptime-kuma.git2. 之后,将工作目录更改为 \uptime-kuma/\ 并执行 npm 命令以安装 uptime-kuma 所需的所有包。
cd uptime-kuma/
npm run setup
你会看到类似下面的输出。
使用 pm2 设置 Uptime-Kuma
什么是pm2?它是一个 nodejs 进程管理器,可帮助您管理并使您的 nodejs 应用程序永远保持活动状态。 pm2 具有一些内置功能,可以使 nodejs 应用程序部署变得容易,它允许您监视应用程序状态、日志,甚至为您的应用程序设置服务文件。
1. 使用下面的 npm 命令安装 pm2 包。
npm install pm22. 安装完成后,执行下面的 pm2 命令启动 uptime-kuma 应用程序。
pm2 start npm --name uptime-kuma -- run start-server -- --port=3001 --hostname=127.0.0.1您将看到如下输出消息。
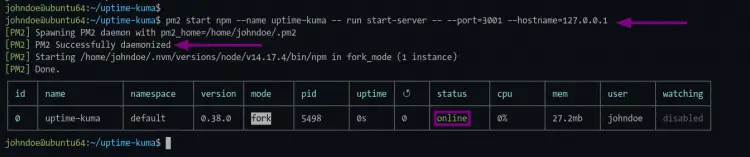
如图所示,应用程序名称“uptime-kuma”正在运行,状态为“在线”。
3. 要检查 pm2 上的应用程序状态,请运行以下命令。
检查 nodejs 应用程序状态。
pm2 status
检查 nodejs 应用程序日志。
pm2 logs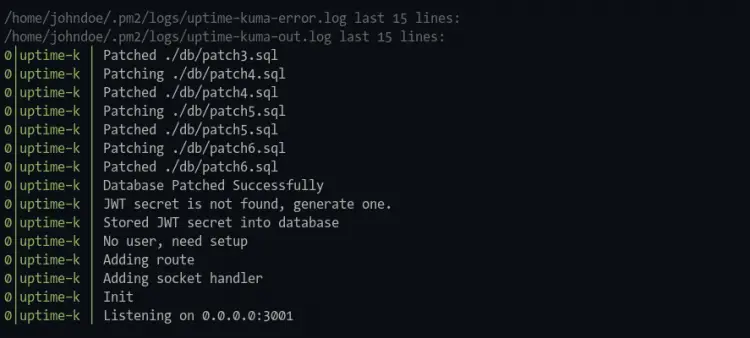
实时 nodejs 应用程序监控。
pm2 monit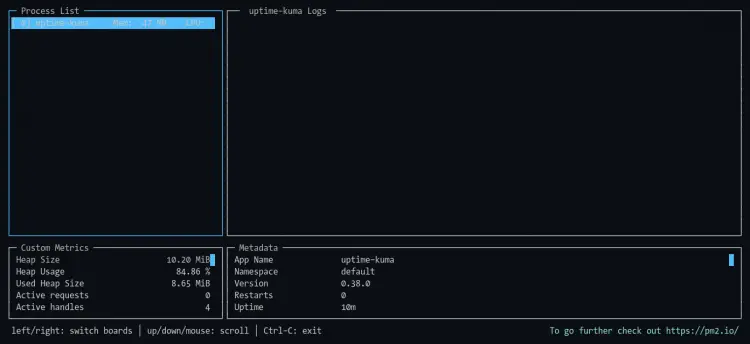
4.接下来,执行以下pm2命令为uptime-kuma应用程序生成服务文件。
pm2 startup之后,您应该按照输出中的命令运行命令。
sudo env PATH=$PATH:/home/johndoe/.nvm/versions/node/v14.17.4/bin /home/johndoe/.nvm/versions/node/v14.17.4/lib/node_modules/pm2/bin/pm2 startup systemd -u johndoe --hp /home/johndoe
请务必使用 \sudo\ 命令并为您的用户输入正确的密码以获得 root 权限。
命令完成后,您将看到以下输出。
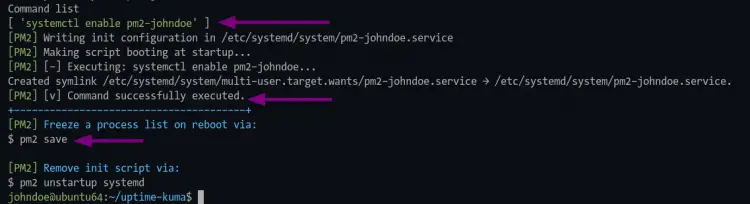
如屏幕截图所示,pm2 会根据用户生成一个 systemd 服务,在本例中为 \pm2-johndoe.service\。
现在执行以下命令生成并保存 uptime-kuma 应用程序状态。此命令对于使 uptime-kuma 应用程序始终在后台运行非常重要,即使在系统启动后也是如此。
pm2 save5. 要验证服务 pm2-johndoe,请运行以下命令。
sudo systemctl is-enabled pm2-johndoe您将看到输出“enabled”,这意味着 uptime-kuma 应用程序将在系统启动后自动运行。
此外,您可以尝试重新启动系统并再次登录服务器,然后检查 uptime-kuma 服务。
sudo systemctl status pm2-johndoe你应该会看到类似如下的输出。
? pm2-johndoe.service - PM2 process manager
     Loaded: loaded (/etc/systemd/system/pm2-johndoe.service; enabled; vendor preset: enabled)
     Active: active (running) since Tue 2021-08-10 01:52:37 UTC; 3min 57s ago
       Docs: https://pm2.keymetrics.io/
   Main PID: 745 (PM2 v5.1.0: God)
      Tasks: 34 (limit: 2343)
     Memory: 120.4M
     CGroup: /system.slice/pm2-johndoe.service
             ??745 PM2 v5.1.0: God Daemon (/home/johndoe/.pm2)
             ??772 npm
             ??873 sh -c node server/server.js "--port=3001" "--hostname=127.0.0.1"
             ??874 node server/server.js --port=3001 --hostname=127.0.0.1

Aug 10 01:52:36 ubuntu64 pm2[633]: [PM2] Spawning PM2 daemon with pm2_home=/home/johndoe/.pm2
Aug 10 01:52:37 ubuntu64 pm2[633]: [PM2] PM2 Successfully daemonized
Aug 10 01:52:37 ubuntu64 pm2[633]: [PM2] Resurrecting
Aug 10 01:52:37 ubuntu64 pm2[633]: [PM2] Restoring processes located in /home/johndoe/.pm2/dump.pm2
Aug 10 01:52:37 ubuntu64 pm2[633]: [PM2] Process /home/johndoe/.nvm/versions/node/v14.17.4/bin/npm restored
\pm2-johndoe.service\ 在系统启动时启动并运行。
将 Apache 设置为反向代理
对于本指南,您将安装和配置 Apache Web 服务器作为 uptime-Kuma 应用程序的反向代理。
1. 执行以下命令安装 apache web 服务器包。
sudo apt install apache2输入 \y\ 并按 \Enter\ 安装 apache 网络服务器。
2. 之后,使用下面的命令启用一些 apache 模块。
sudo a2enmod ssl proxy proxy_ajp proxy_wstunnel proxy_http rewrite deflate headers proxy_balancer proxy_connect proxy_html3. 接下来,使用下面的 nano 编辑器命令创建一个新的虚拟主机配置 uptime-kuma.conf。
sudo nano /etc/apache2/sites-available/uptime-kuma.conf将以下配置粘贴到您的终端 shell,并将域名 \uptime.example.net\ 更改为您的域,例如 \domain.com\。
<VirtualHost *:80>
  ServerName uptime.example.net

  ProxyPass / http://localhost:3001/
  RewriteEngine on
  RewriteCond %{HTTP:Upgrade} websocket [NC]
  RewriteCond %{HTTP:Connection} upgrade [NC]
  RewriteRule ^/?(.*) "ws://localhost:3001/$1" [P,L]
</VirtualHost>
按 \Ctrl+x\ 并键入 \Y\ 以保存配置。
4. 现在使用下面的命令激活 apache 虚拟主机配置 \uptime-kuma\。
sudo a2ensite uptime-kuma之后,执行以下命令来验证 apache 配置并确保没有任何错误。
sudo apachectl configtest5. 现在通过使用以下命令重新启动 apache 服务来应用新配置。
sudo systemctl restart apache2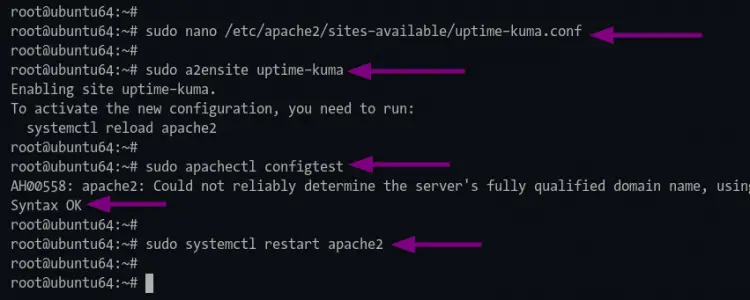
使用 SSL Letsencrypt 保护 Uptime-kuma
为了保护 Uptime-Kuma 访问,您将从 Letsencrypt 为 apache web 服务器设置 SSL。
1. 首先,通过运行以下命令安装 certbot 工具。
sudo apt install python3-certbot-apache输入 \y\ 并按 \Enter\ 开始安装。
2. 安装完成后,使用 certbot 命令生成 SSL letsencrypt,如下所示。
sudo certbot --apache yourdomain.com输入您的电子邮件地址以注册到 Letsencrypt,然后按“Enter”继续。每当您的 SSL 证书到期时,Letsencrypt 都会向您的电子邮件地址发送电子邮件。
```
Saving debug log to /var/log/letsencrypt/letsencrypt.log
Plugins selected: Authenticator apache, Installer apache
Enter email address (used for urgent renewal and security notices) (Enter 'c' to
cancel):
对于 Letsencrypt TOS(服务条款),输入“A”表示同意,然后按“Enter”继续。
- - - - - - - - - - - - - - - - - - - - - - - - - - - - - - - - - - - - - - - -
Please read the Terms of Service at
https://letsencrypt.org/documents/LE-SA-v1.2-November-15-2017.pdf. You must
agree in order to register with the ACME server at
https://acme-v02.api.letsencrypt.org/directory
- - - - - - - - - - - - - - - - - - - - - - - - - - - - - - - - - - - - - - - -
(A)gree/(C)ancel: A
对于与 EFF (Electronic Frontier Foundation) 的电子邮件共享,您可以键入 \Y\ 表示是,\N\ 表示否。对于此示例,我们不会与 EFF 共享电子邮件地址。
Would you be willing to share your email address with the Electronic Frontier
Foundation, a founding partner of the Let's Encrypt project and the non-profit
organization that develops Certbot? We'd like to send you email about our work
encrypting the web, EFF news, campaigns, and ways to support digital freedom.
- - - - - - - - - - - - - - - - - - - - - - - - - - - - - - - - - - - - - - - -
(Y)es/(N)o: N
现在 certbot 工具将为 Uptime-Kuma 域名生成 SSL Letsencrypt。此外,它还会为 apache 虚拟主机配置添加一些额外的配置。
系统将要求您设置从 HTTP 到 HTTPS 的自动重定向。输入数字“2”以设置 apache 自动将 HTTP 重定向到 HTTPS,然后按“Enter”。
```
Please choose whether or not to redirect HTTP traffic to HTTPS, removing HTTP access.
- - - - - - - - - - - - - - - - - - - - - - - - - - - - - - - - - - - - - - - -
1: No redirect - Make no further changes to the webserver configuration.
2: Redirect - Make all requests redirect to secure HTTPS access. Choose this for
new sites, or if you're confident your site works on HTTPS. You can undo this
change by editing your web server's configuration.
- - - - - - - - - - - - - - - - - - - - - - - - - - - - - - - - - - - - - - - -
Select the appropriate number [1-2] then [enter] (press 'c' to cancel): 2
部署过程成功后,您将看到类似如下的输出。
- - - - - - - - - - - - - - - - - - - - - - - - - - - - - - - - - - - - - - - -
Congratulations! You have successfully enabled https://uptime.example.net

You should test your configuration at:
https://www.ssllabs.com/ssltest/analyze.html?d=uptime.example.net
- - - - - - - - - - - - - - - - - - - - - - - - - - - - - - - - - - - - - - - -

IMPORTANT NOTES:
 - Congratulations! Your certificate and chain have been saved at:
   /etc/letsencrypt/live/uptime.example.net/fullchain.pem
   Your key file has been saved at:
   /etc/letsencrypt/live/uptime.example.net/privkey.pem
   Your cert will expire on 2021-10-10. To obtain a new or tweaked
   version of this certificate in the future, simply run certbot again
   with the "certonly" option. To non-interactively renew *all* of
   your certificates, run "certbot renew"
 - Your account credentials have been saved in your Certbot
   configuration directory at /etc/letsencrypt. You should make a
   secure backup of this folder now. This configuration directory will
   also contain certificates and private keys obtained by Certbot so
   making regular backups of this folder is ideal.
 - If you like Certbot, please consider supporting our work by:

   Donating to ISRG / Let's Encrypt:   https://letsencrypt.org/donate
   Donating to EFF:                    https://eff.org/donate-le

 - We were unable to subscribe you the EFF mailing list because your
   e-mail address appears to be invalid. You can try again later by
   visiting https://act.eff.org.
验证 Uptime-Kuma 安装
1. 打开您的网络浏览器并在地址栏中输入 Uptime-Kuma URL 安装。
您将被重定向到 HTTPS 安全连接。
2. 在第一页,为 Uptime-kuma 创建一个新的管理员用户。输入您的管理员用户和密码,然后单击“创建”按钮

3. 之后,使用您的新用户名和密码登录,然后单击“登录”按钮。
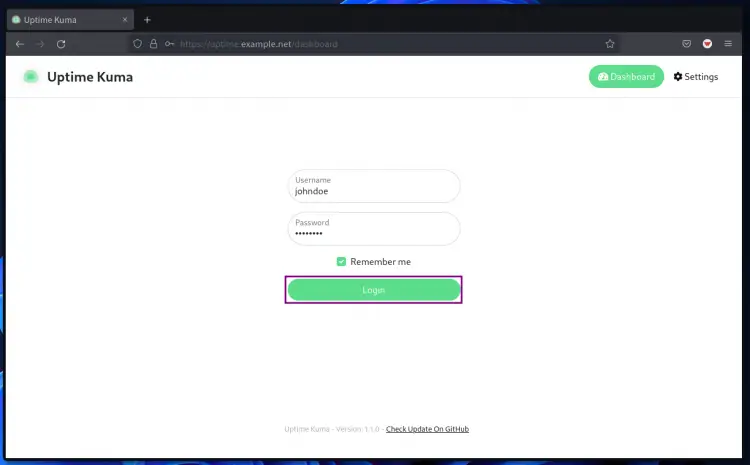
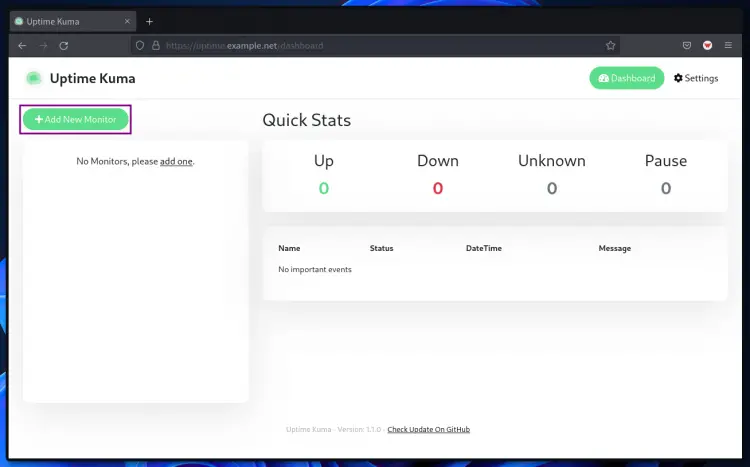
现在您将看到 uptime-kuma 仪表板。
4. 要添加新的主机进行监控,请单击“添加新监控器”按钮。
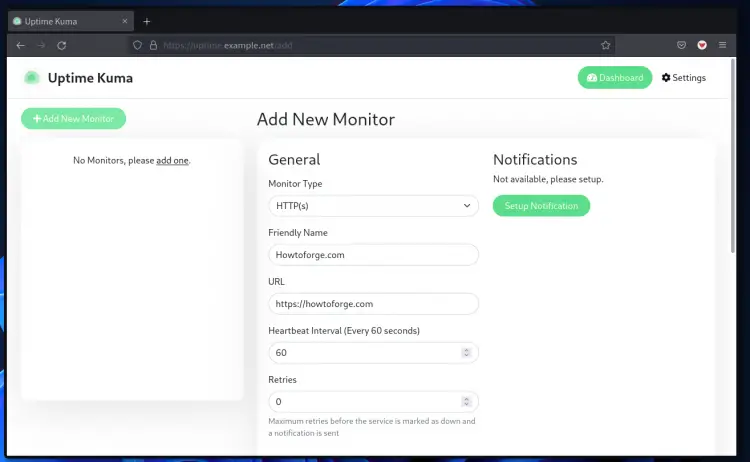
5、本例中,您要监控网站,所以选择“监控类型”为“HTTP(s)”,输入网站的URL地址,点击“设置通知”进行通知支持,然后单击页面底部的“保存”按钮。
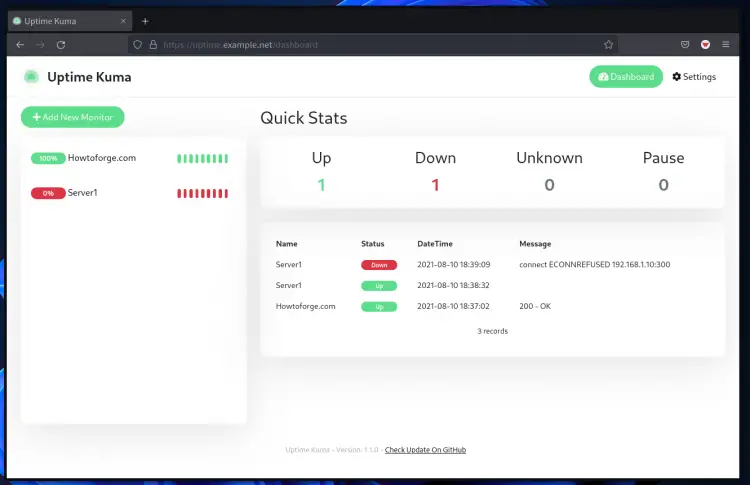
6.现在您将被重定向到 uptime-Kuma 仪表板,您将在仪表板页面上看到您的主机。

下面是添加新类型 \TCP/IP\ 并关闭端口后的另一个示例,结果是 \ENCONNREFUSED\ 或连接错误,因为端口被拒绝/关闭。
结论
恭喜!您已经成功安装了 Uptime-Kuma 和 Apache Web 服务器作为反向代理,并使用 SSL Letsencrypt 保护了 Uptime-Kuma 部署。对于下一阶段,您可以添加主机并激活任何停机事件的通知。