如何在 Debian 12 上安装和配置 OpenVPN 服务器
虚拟专用网络 (VPN) 允许您通过隐藏您的位置来访问互联网,这使您可以自由地在不受信任的网络上安全地访问互联网,并规避地理限制和审查制度。 OpenVPN 是实现这一目标的开源传输层安全 (TLS) VPN 解决方案。
在我们的教程中,我们将在 Debian 12 服务器上安装 OpenVPN,并将其配置为可从客户端计算机访问,并在它们之间创建 VPN 连接,以通过 OpenVPN 服务器重定向来自客户端的所有流量。
先决条件
运行 Debian 12 的服务器支持 IPv4 和 IPv6 连接。我们将其称为 OpenVPN 服务器。简单的防火墙(UFW)已启用并在其上运行。
运行 Debian 12 的服务器支持 IPv4 和 IPv6 连接。我们将其设置为私有证书颁发机构 (CA),我们将其称为 CA 服务器。
在 OpenVPN 和 CA 服务器上均具有 sudo 权限的非 root 用户。
连接到 OpenVPN 服务器的客户端计算机。您可以使用本地设备作为客户端计算机。 OpenVPN 拥有适用于 Windows、Linux、macOS、Android 和 iOS 的客户端。您可以使用其中任何一个进行连接。我们将在本教程中使用 Debian 12 客户端 PC。
OpenVPN 和 CA 服务器上的所有内容均已更新。
$ sudo apt update && sudo apt upgrade
第 1 步 - 设置 CA 服务器
证书颁发机构 (CA) 是负责颁发数字证书以验证 Internet 上身份的实体。在本教程中,我们将使用独立服务器作为私有 CA 服务器,它将验证 OpenVPN 服务器和客户端证书。除了导入、签名和验证证书之外,您的 CA 服务器不应运行任何其他服务。
步骤 1.1 - 安装 Easy-RSA
第一步是安装 easy-rsa 脚本集。 easy-rsa 是一个证书颁发机构管理工具,用于生成私钥和公共根证书。
$ sudo apt install easy-rsa
步骤 1.2 - 创建公钥基础设施目录
下一步是在 CA 服务器上创建公钥基础设施 (PKI) 框架。
$ mkdir ~/easy-rsa
创建指向已安装的 easy-rsa 包文件的符号链接。
$ ln -s /usr/share/easy-rsa/* ~/easy-rsa/
限制对 PKI 目录的访问。
$ chmod 700 /home/<username>/easy-rsa
初始化 PKI。
$ cd ~/easy-rsa
$ ./easyrsa init-pki
您将得到以下输出。
* Notice:

  init-pki complete; you may now create a CA or requests.

  Your newly created PKI dir is:
  * /home/<username>/easy-rsa/pki

* Notice:
  IMPORTANT: Easy-RSA 'vars' file has now been moved to your PKI above.
步骤 1.3 - 创建证书颁发机构
在创建 CA 的私钥和证书之前,您需要为其配置组织信息。配置文件 vars 已在 pki 目录中创建。打开它进行编辑。
$ cd ~/easy-rsa
$ nano pki/vars
找到以下变量并通过删除其前面的哈希 (#) 并进行编辑来取消注释它们,如下所示。
set_var EASYRSA_REQ_COUNTRY    "US"
set_var EASYRSA_REQ_PROVINCE   "NewYork"
set_var EASYRSA_REQ_CITY       "New York City"
set_var EASYRSA_REQ_ORG        "Howtoforge"
set_var EASYRSA_REQ_EMAIL      "[email "
set_var EASYRSA_REQ_OU         "Community"
set_var EASYRSA_ALGO           "ec"
set_var EASYRSA_DIGEST         "sha512"
按 Ctrl + X 并在出现提示时输入 Y 来保存文件。
运行以下命令为您的证书颁发机构创建根公钥和私钥对。
$ ./easyrsa build-ca
系统将提示您输入密钥对的密码。选择一个强密码,并记下以供稍后使用。接下来,系统会要求您输入 PEM 密码。系统还会要求您提供 CA 的通用名称 (CN)。您可以输入任何字符串,但为了简单起见,请按 ENTER 接受默认名称。
* Notice:
Using Easy-RSA configuration from: /home/<username>/easy-rsa/pki/vars

* Notice:
Using SSL: openssl OpenSSL 3.0.9 30 May 2023 (Library: OpenSSL 3.0.9 30 May 2023)


Enter New CA Key Passphrase:
Re-Enter New CA Key Passphrase:
Using configuration from /home/<username>/easy-rsa/pki/ab18123c/temp.918764ef
Enter PEM pass phrase:
Verifying - Enter PEM pass phrase:
-----
You are about to be asked to enter information that will be incorporated
into your certificate request.
What you are about to enter is what is called a Distinguished Name or a DN.
There are quite a few fields but you can leave some blank
For some fields there will be a default value,
If you enter '.', the field will be left blank.
-----
Common Name (eg: your user, host, or server name) [Easy-RSA CA]:

* Notice:

CA creation complete and you may now import and sign cert requests.
Your new CA certificate file for publishing is at:
/home/<username>/easy-rsa/pki/ca.crt
如果您不希望每次与 CA 交互时都提示输入密码,则可以使用以下命令。
$ ./easyrsa build-ca nopass
这将创建两个文件:
~/easy-rsa/pki/ca.crt是CA的公共证书文件。每个用户和 OpenVPN 服务器都需要该文件的副本。~/easy-rsa/pki/private/ca.key是 CA 用来签署 OpenVPN 服务器和客户端证书的私钥。如果攻击者获得对您的 CA 的访问权限,进而访问您的ca.key文件,您将需要销毁您的 CA。这就是为什么您的ca.key文件应该仅位于您的 CA 计算机上,并且理想情况下,您的 CA 计算机在不签署证书请求时应保持离线状态,作为额外的安全措施措施。
步骤 2 - 在 OpenVPN 服务器上安装 OpenVPN 和 Easy-RSA
登录到您的 OpenVPN 服务器并安装 OpenVPN 和 Easy-RSA 软件包。
$ sudo apt install openvpn easy-rsa
创建目录~/easy-rsa。
$ mkdir ~/easy-rsa
从我们安装的 easy-rsa 脚本创建一个符号链接,就像在 CA 服务器上一样。
$ ln -s /usr/share/easy-rsa/* ~/easy-rsa/
限制对目录的访问。
$ chmod 700 ~/easy-rsa
第 3 步 - 为 OpenVPN 服务器创建 PKI
下一步是使用 init-pki 选项创建 PKI 目录。尽管作为先决条件的一部分,您已经在 CA 服务器上运行了此命令,但仍有必要在这里运行它,因为您的 OpenVPN 服务器和 CA 服务器具有单独的 PKI 目录。
$ cd ~/easy-rsa
$ ./easyrsa init-pki
OpenVPN 服务器上的 PKI 用作存储证书请求和公共证书的集中位置。
打开~/easy-rsa/pki/vars目录来存储创建PKI所需的信息并打开它进行编辑。
$ nano pki/vars
找到以下变量并通过删除它们前面的哈希 (#) 并更改其值来取消注释它们,如下所示。
set_var EASYRSA_ALGO "ec"
set_var EASYRSA_DIGEST "sha512"
按 Ctrl + X 并在出现提示时输入 Y 来保存文件。
由于我们不使用该服务器作为 CA,因此这些是我们唯一需要的值。这会将您的 OpenVPN 和 CA 服务器配置为使用 ECC,这意味着当客户端和服务器尝试建立共享对称密钥时,它们将使用椭圆曲线算法进行交换。它比使用普通 Diffie-Hellman 和经典 RSA 算法要快得多,因为数字要小得多并且计算速度更快。
第 4 步 - 创建 OpenVPN 服务器证书请求和私钥
切换到 OpenVPN 服务器上的 ~/easy-rsa 目录。
$ cd ~/easy-rsa
下一步是在 OpenVPN 服务器上生成私钥和证书签名请求 (CSR)。运行带有 gen-req 选项的 easy-rsa 命令,后跟服务器的通用名称 (CN)。在我们的教程中,我们将使用 server 作为 OpenVPN 服务器的 CN。我们还将使用 nopass 选项来避免任何权限问题。
$ ./easyrsa gen-req server nopass
您将得到以下输出。
* Notice:
Using Easy-RSA configuration from: /home/<username>/easy-rsa/pki/vars

* Notice:
Using SSL: openssl OpenSSL 3.0.9 30 May 2023 (Library: OpenSSL 3.0.9 30 May 2023)

-----
You are about to be asked to enter information that will be incorporated
into your certificate request.
What you are about to enter is what is called a Distinguished Name or a DN.
There are quite a few fields but you can leave some blank
For some fields there will be a default value,
If you enter '.', the field will be left blank.
-----
Common Name (eg: your user, host, or server name) [server]:
* Notice:

Keypair and certificate request completed. Your files are:
req: /home/<username>/easy-rsa/pki/reqs/server.req
key: /home/<username>/easy-rsa/pki/private/server.key
这将创建服务器的私钥和名为 server.req 的证书请求文件。将服务器密钥复制到 /etc/openvpn/server 目录。
$ sudo cp /home/<username>/easy-rsa/pki/private/server.key /etc/openvpn/server/
证书签名请求 (CSR) 现已准备好由 CA 进行签名。
第 5 步 - 签署 OpenVPN 服务器的 CSR
下一步是将 CSR 文件复制到 CA 服务器进行签名。如果您的服务器启用了密码验证,则只需使用以下命令即可复制文件。
$ scp /home/username/easy-rsa/pki/reqs/server.req username@your_ca_server_ip:/tmp
如果您不想使用密码身份验证,则需要为每个服务器生成 SSH 密钥对,然后将 OpenVPN 服务器的公共 SSH 密钥添加到 CA 计算机的 authorized_keys 文件中,反之亦然。
如果您不想经历所有这些,您可以简单地复制文件。在 OpenVPN 服务器上打开该文件,复制其内容,然后在 CA 服务器上创建该文件并粘贴内容。
重新登录CA服务器,切换到~/easy-rsa目录并导入CSR文件。
$ cd ~/easy-rsa
$ ./easyrsa import-req /tmp/server.req server
您将得到以下输出。
* Notice:
Using Easy-RSA configuration from: /home/navjot/easy-rsa/pki/vars

* Notice:
Using SSL: openssl OpenSSL 3.0.9 30 May 2023 (Library: OpenSSL 3.0.9 30 May 2023)

* Notice:

The request has been successfully imported with a short name of: server
You may now use this name to perform signing operations on this request.
使用以下命令签署请求。由于我们正在签署 OpenVPN 服务器的 CSR,因此我们将使用其通用名称 (CN)。
$ ./easyrsa sign-req server server
系统将提示您验证请求是否来自可信来源。输入yes,然后按ENTER键确认。
* Notice:
Using Easy-RSA configuration from: /home/navjot/easy-rsa/pki/vars

* Notice:
Using SSL: openssl OpenSSL 3.0.9 30 May 2023 (Library: OpenSSL 3.0.9 30 May 2023)


You are about to sign the following certificate.
Please check over the details shown below for accuracy. Note that this request
has not been cryptographically verified. Please be sure it came from a trusted
source or that you have verified the request checksum with the sender.

Request subject, to be signed as a server certificate for 825 days:

subject=
    commonName                = server


Type the word 'yes' to continue, or any other input to abort.
  Confirm request details: yes
接下来,系统将提示您输入之前设置的 CA 私钥密码。
Using configuration from /home/<username>/easy-rsa/pki/de50cb3f/temp.93caaa8c
Enter pass phrase for /home/<username>/easy-rsa/pki/private/ca.key:
00F7EDB7:error:0700006C:configuration file routines:NCONF_get_string:no value:../crypto/conf/conf_lib.c:315:group=<NULL> name=unique_subject
Check that the request matches the signature
Signature ok
The Subject's Distinguished Name is as follows
commonName            :ASN.1 12:'server'
Certificate is to be certified until Nov 10 07:48:56 2025 GMT (825 days)

Write out database with 1 new entries
Data Base Updated

* Notice:
Certificate created at: /home/<username>/easy-rsa/pki/issued/server.crt
生成的证书包含 OpenVPN 服务器的公共加密密钥以及来自 CA 服务器的签名。将证书复制回 OpenVPN 服务器。
$ scp pki/issued/server.crt username@your_vpn_server_ip:/tmp
$ scp pki/ca.crt username@your_vpn_server_ip:/tmp
在 OpenVPN 服务器上,将文件复制到 /etc/openvpn/server 目录。
$ sudo cp /tmp/{server.crt,ca.crt} /etc/openvpn/server
第 6 步 - 配置 OpenVPN 加密材料
我们将添加一个额外的共享密钥,服务器和所有客户端将与 OpenVPN 的 tls-crypt 指令一起使用。这确保了 OpenVPN 服务器可以应对未经身份验证的流量、端口扫描和拒绝服务攻击。它还使得识别 OpenVPN 网络流量变得更加困难。
切换到~/easy-rsa目录。
$ cd ~/easy-rsa
使用以下命令生成在密钥交换期间使用的强 Diffie-Hellman 密钥。
$ ./easyrsa gen-dh
生成 tls-crypt 预共享密钥。这将创建一个名为 ta.key 的文件
$ sudo openvpn --genkey secret ta.key
将 ta.key 复制到 /etc/openvpn/server 目录。
$ sudo cp ta.key /etc/openvpn/server
$ sudo cp pki/dh.pem /etc/openvpn/server
第 7 步 - 生成客户端证书和密钥对
在您的VPN 服务器上创建一个目录来存储客户端证书和密钥文件。
$ mkdir -p ~/client-configs/keys
限制目录的权限以保护它。
$ chmod -R 700 ~/client-configs
接下来,切换到~/easy-rsa目录。
$ cd ~/easy-rsa
使用 client1 作为客户端的通用名称生成客户端密钥。您可以为客户端使用任何 CN。
$ ./easyrsa gen-req client1 nopass
按 ENTER 确认通用名称。您将得到以下输出。
* Notice:
Using Easy-RSA configuration from: /home/<username>/easy-rsa/pki/vars

* Notice:
Using SSL: openssl OpenSSL 3.0.9 30 May 2023 (Library: OpenSSL 3.0.9 30 May 2023)

-----
You are about to be asked to enter information that will be incorporated
into your certificate request.
What you are about to enter is what is called a Distinguished Name or a DN.
There are quite a few fields but you can leave some blank
For some fields there will be a default value,
If you enter '.', the field will be left blank.
-----
Common Name (eg: your user, host, or server name) [client1]:
* Notice:

Keypair and certificate request completed. Your files are:
req: /home/<username>/easy-rsa/pki/reqs/client1.req
key: /home/<username>/easy-rsa/pki/private/client1.key
接下来,将 client1.key 文件复制到 ~/client-configs/keys 目录。
$ cp pki/private/client1.key ~/client-configs/keys/
将 client1.req 文件传输到 CA 服务器。
$ scp pki/reqs/client1.req username@your_ca_server_ip:/tmp
重新登录 CA 服务器并导入服务器请求。
$ cd ~/easy-rsa
$ ./easyrsa import-req /tmp/client1.req client1
您将得到以下输出。
* Notice:
Using Easy-RSA configuration from: /home/<username>/easy-rsa/pki/vars

* Notice:
Using SSL: openssl OpenSSL 3.0.9 30 May 2023 (Library: OpenSSL 3.0.9 30 May 2023)

* Notice:

The request has been successfully imported with a short name of: client1
You may now use this name to perform signing operations on this request.
使用以下命令签署请求。我们使用 client 作为请求类型。
$ ./easyrsa sign-req client client1
出现提示时,输入 yes 以确认签署请求并且该请求来自受信任的来源。
* Notice:
Using Easy-RSA configuration from: /home/<username>/easy-rsa/pki/vars

* Notice:
Using SSL: openssl OpenSSL 3.0.9 30 May 2023 (Library: OpenSSL 3.0.9 30 May 2023)


You are about to sign the following certificate.
Please check over the details shown below for accuracy. Note that this request
has not been cryptographically verified. Please be sure it came from a trusted
source or that you have verified the request checksum with the sender.

Request subject, to be signed as a client certificate for 825 days:

subject=
    commonName                = client1


Type the word 'yes' to continue, or any other input to abort.
  Confirm request details: yes
系统将提示您输入 CA 密码。
Using configuration from /home/<username>/easy-rsa/pki/7bf6e9b1/temp.c01d673d
Enter pass phrase for /home/<username>/easy-rsa/pki/private/ca.key:
Check that the request matches the signature
Signature ok
The Subject's Distinguished Name is as follows
commonName            :ASN.1 12:'client1'
Certificate is to be certified until Nov 10 08:25:10 2025 GMT (825 days)

Write out database with 1 new entries
Data Base Updated

* Notice:
Certificate created at: /home/<username>/easy-rsa/pki/issued/client1.crt
将创建的证书传输回 OpenVPN 服务器。
$ scp pki/issued/client1.crt username@your_server_ip:/tmp
在 OpenVPN 服务器上,将客户端证书复制到 ~/client-configs/keys 目录。
$ cp /tmp/client1.crt ~/client-configs/keys/
将ca.crt和ta.key文件复制到~/client-configs/keys目录,并为当前登录的用户设置适当的权限- 在服务器中。
$ sudo cp ~/easy-rsa/ta.key ~/client-configs/keys/
$ sudo cp /etc/openvpn/server/ca.crt ~/client-configs/keys/
$ sudo chown username.username ~/client-configs/keys/*
第 8 步 - 配置 OpenVPN
复制示例 server.conf 文件作为配置 OpenVPN 的起点。
$ sudo cp /usr/share/doc/openvpn/examples/sample-config-files/server.conf /etc/openvpn/server/
打开文件进行编辑。
$ sudo nano /etc/openvpn/server/server.conf
通过查找 tls-auth 指令找到文件的 HMAC 部分。通过在行首添加分号 (;) 注释掉该行。在其下方添加一个新行,如图所示。
;tls-auth ta.key 0 # This file is secret
tls-crypt ta.key
接下来,通过查找 cipher 行来更改加密密码值。默认值设置为 AES-256-CBC。注释掉默认值并使用 AES-256-GCM 加密添加另一行,该加密可提供更好的加密级别和性能,如图所示。
;cipher AES-256-CBC
cipher AES-256-GCM
在下面添加 auth 指令来选择 HMAC 消息摘要算法。
auth SHA256
由于我们使用的是椭圆曲线加密技术,因此我们需要关闭 Diffie-Hellman 加密。注释掉 dh dh2048.pem 行并在其下方添加 dh none。
;dh dh2048.pem
dh none
OpenVPN 启动后应以无特权的方式运行。要启用此功能,请找到并取消注释 ;user openvpn 和 ;group openvpn 行,然后按所示进行更改。
user nobody
group nogroup
通过 VPN 重定向所有流量
上述设置在客户端和服务器之间创建 VPN 连接,但不会强制任何连接使用隧道。为此,首先找到 push "redirect-gateway def1bypass-dhcp" 行。此行告诉客户端通过 OpenVPN 服务器重定向其所有流量。取消注释该行以启用该功能。
push "redirect-gateway def1 bypass-dhcp"
找到此行下方的 dhcp-option 部分。删除两行开头的分号。这告诉客户端使用 OpenDNS 解析器。
push "dhcp-option DNS 208.67.222.222"
push "dhcp-option DNS 208.67.220.220"
更改端口和协议
OpenVPN 默认使用端口 1194 和 UDP 协议接受客户端连接。您可以根据需要更改端口。如果您不在 OpenVPN 服务器上托管 Web 内容,则可以使用端口 443。
找到port 1194行并更改其值。
# Optional!
port 443
找到 proto udp 行并通过在其前面添加分号将其注释掉。并且,通过删除分号来取消注释 proto tcp 行,如图所示。
proto tcp
;proto udp
由于我们使用的是 TCP 协议,因此需要将 explicit-exit-notify 指令的值从 1 更改为 0,如下所示指令仅由 UDP 使用。
explicit-exit-notify 0
指向非默认凭证
如果您之前在 ./easy-rsa gen-req server 命令中选择了不同的名称,则需要修改 cert 和 key行,以便它们指向适当的 .crt 和 .key 文件。由于我们使用默认的服务器名称,因此默认值是正确的。
cert server.crt
key server.key
完成后,按 Ctrl + X 并在出现提示时输入 Y 来保存文件。
步骤 9 - 调整 OpenVPN 服务器网络配置
下一步是配置服务器的网络配置,以使 OpenVPN 能够正确路由流量。我们需要配置的第一件事是端口转发。
打开 /etc/sysctl.conf 文件进行编辑。
$ sudo nano /etc/sysctl.conf
在文件底部添加以下行。
net.ipv4.ip_forward = 1
按 Ctrl + X 并在出现提示时输入 Y 来保存文件。
要读取文件并加载当前会话的新值,请使用以下命令。
$ sudo sysctl -p
vm.swappiness = 0
net.ipv4.ip_forward = 1
此配置将通过服务器的 IP 地址路由来自客户端的所有网络流量,并且客户端的公共 IP 地址将被有效隐藏。
步骤 10 - 配置防火墙
要允许 OpenVPN 通过防火墙,您需要启用伪装,这是一个 iptables 概念,可提供即时动态网络地址转换 (NAT) 以正确路由客户端连接。
在打开防火墙配置文件添加伪装规则之前,首先使用以下命令找到您机器的公共网络接口。
$ ip route list default
您将收到类似的输出。
default via 69.28.90.1 dev ens3 onlink
这告诉我们接口名称是 ens3。打开 /etc/ufw/before.rules 文件进行编辑。
$ sudo nano /etc/ufw/before.rules
在加载传统的 UFW 规则之前,将读取这些规则并将其落实到位。在文件开头添加以下行,如图所示。
#
# rules.before
#
# Rules that should be run before the ufw command line added rules. Custom
# rules should be added to one of these chains:
#   ufw-before-input
#   ufw-before-output
#   ufw-before-forward
#

# START OPENVPN RULES
# NAT table rules
*nat
:POSTROUTING ACCEPT [0:0]
# Allow traffic from OpenVPN client to ens3 (change to the interface you discovered!)
-A POSTROUTING -s 10.8.0.0/8 -o ens3 -j MASQUERADE
COMMIT
# END OPENVPN RULES

# Don't delete these required lines, otherwise there will be errors
*filter
. . .
按 Ctrl + X 并在出现提示时输入 Y 来保存文件。
接下来,我们需要配置 UFW 默认允许转发数据包。打开 /etc/default/ufw 文件进行编辑。
$ sudo nano /etc/default/ufw
找到 DEFAULT_FORWARD_POLICY 指令并将其值从 DROP 更改为 ACCEPT。
DEFAULT_FORWARD_POLICY="ACCEPT"
按 Ctrl + X 并在出现提示时输入 Y 来保存文件。
最后,打开您之前为 OpenVPN 服务器配置的端口 443。
$ sudo ufw allow 443/tcp
禁用并启用防火墙以应用新配置。
$ sudo ufw disable
$ sudo ufw enable
第 11 步 - 启动 OpenVPN
启动 OpenVPN 服务。
$ sudo systemctl start [email
检查服务的状态。
$ sudo systemctl status [email
您将收到类似的输出。
? [email  - OpenVPN service for server
     Loaded: loaded (/lib/systemd/system/[email ; disabled; preset: enabled)
     Active: active (running) since Tue 2023-08-08 09:22:49 UTC; 7s ago
       Docs: man:openvpn(8)
             https://community.openvpn.net/openvpn/wiki/Openvpn24ManPage
             https://community.openvpn.net/openvpn/wiki/HOWTO
   Main PID: 4531 (openvpn)
     Status: "Initialization Sequence Completed"
      Tasks: 1 (limit: 2315)
     Memory: 1.4M
        CPU: 27ms
     CGroup: /system.slice/system-openvpn\x2dserver.slice/[email
             ??4531 /usr/sbin/openvpn --status /run/openvpn-server/status-server.log --status-version 2 --suppress-timestamps --config server.conf

Aug 08 09:22:49 vpnserver openvpn[4531]: TCPv4_SERVER link local (bound): [AF_INET][undef]:443
Aug 08 09:22:49 vpnserver openvpn[4531]: TCPv4_SERVER link remote: [AF_UNSPEC]
Aug 08 09:22:49 vpnserver openvpn[4531]: UID set to nobody
Aug 08 09:22:49 vpnserver openvpn[4531]: GID set to nogroup
Aug 08 09:22:49 vpnserver openvpn[4531]: Capabilities retained: CAP_NET_ADMIN
Aug 08 09:22:49 vpnserver openvpn[4531]: MULTI: multi_init called, r=256 v=256
Aug 08 09:22:49 vpnserver openvpn[4531]: IFCONFIG POOL IPv4: base=10.8.0.4 size=62
Aug 08 09:22:49 vpnserver openvpn[4531]: IFCONFIG POOL LIST
Aug 08 09:22:49 vpnserver openvpn[4531]: MULTI: TCP INIT maxclients=1024 maxevents=1029
Aug 08 09:22:49 vpnserver openvpn[4531]: Initialization Sequence Completed
启用 OpenVPN 服务在启动时启动。
$ sudo systemctl -f enable [email
第 12 步 - 创建客户端配置
在测试客户端之前,我们需要为我们将使用的客户端创建配置文件。创建用于存储客户端配置文件的目录。
$ mkdir -p ~/client-configs/files
将示例客户端配置文件复制到该目录。
$ cp /usr/share/doc/openvpn/examples/sample-config-files/client.conf ~/client-configs/base.conf
打开配置文件进行编辑。
$ nano ~/client-configs/base.conf
找到 remote 指令并将其设置为指向您的 OpenVPN 服务器的公共 IP 地址。另外,更改端口以匹配您之前选择的端口。
. . .
# The hostname/IP and port of the server.
# You can have multiple remote entries
# to load balance between the servers.
remote your_server_ip 443
. . .
通过取消注释并注释掉 proto udp 设置来设置您之前选择的协议。
proto tcp
通过删除 user 和 group 指令前面的分号来取消注释它们。另外,按如下方式更改值。
# Downgrade privileges after initialization (non-Windows only)
user nobody
group nogroup
找到 ca、cert 和 key 指令,并通过在它们前面添加分号来将它们注释掉。这是因为我们将在客户端配置文件中添加证书和密钥。
# SSL/TLS parms.
# See the server config file for more
# description. It's best to use
# a separate .crt/.key file pair
# for each client. A single ca
# file can be used for all clients.
;ca ca.crt
;cert client.crt
;key client.key
注释掉 tls-auth 指令,因为我们将直接将 ta.key 添加到客户端配置文件中。
# If a tls-auth key is used on the server
# then every client must also have the key.
;tls-auth ta.key 1
匹配您在 `/etc/openvpn/server/server.conf 文件中设置的cipher 设置。另外,在文件底部添加 auth 设置。
cipher AES-256-GCM
....
auth SHA256
添加 key-direction 指令并将其设置为 1 以使 VPN 正常运行。
key-direction 1
接下来,添加一些注释掉的行来处理 VPN 客户端用于 DNS 解析的不同方法。为不使用 systemd-resolved 但依赖 resolvconf 实用程序来管理 DNS 的客户端添加以下行集。
; script-security 2
; up /etc/openvpn/update-resolv-conf
; down /etc/openvpn/update-resolv-conf
为使用 systemd-resolved 进行 DNS 解析的客户端添加以下行集。
; script-security 2
; up /etc/openvpn/update-systemd-resolved
; down /etc/openvpn/update-systemd-resolved
; down-pre
; dhcp-option DOMAIN-ROUTE .
按 Ctrl + X 并在出现提示时输入 Y 来保存文件。
创建一个脚本来编译具有相关证书、密钥和加密文件的基本配置,然后将生成的配置文件复制到 ~/client-configs/files 目录中。
在 ~/client-configs 目录中创建并打开文件 make_config.sh。
$ nano ~/client-configs/make_config.sh
将以下代码粘贴到其中。
#!/bin/bash

# First argument: Client identifier

KEY_DIR=/home/<username>/client-configs/keys
OUTPUT_DIR=/home/<username>/client-configs/files
BASE_CONFIG=/home/<username>/client-configs/base.conf

cat ${BASE_CONFIG} \
    <(echo -e '<ca>') \
    ${KEY_DIR}/ca.crt \
    <(echo -e '</ca>\n<cert>') \
    ${KEY_DIR}/${1}.crt \
    <(echo -e '</cert>\n<key>') \
    ${KEY_DIR}/${1}.key \
    <(echo -e '</key>\n<tls-crypt>') \
    ${KEY_DIR}/ta.key \
    <(echo -e '</tls-crypt>') \
    > ${OUTPUT_DIR}/${1}.ovpn
按 Ctrl + X 并在出现提示时输入 Y 来保存文件。
使文件可执行并限制对其的权限。
$ chmod 700 ~/client-configs/make_config.sh
此脚本复制 base.conf 文件,收集所有证书和密钥文件,提取其内容,将其附加到基本配置文件,然后导出所有内容以创建新的客户端配置文件。每次添加新客户端时,都需要为其生成新的密钥和证书,然后运行此脚本来创建客户端配置文件。
我们已经在步骤 7 中创建了客户端证书和密钥文件。让我们为其创建配置文件。
切换到 ~/client-configs 目录。
$ cd ~/client-configs
运行脚本来制作客户端配置文件。
$ ./make_config.sh client1
这将创建一个名为 client1.ovpn 的文件。如果您想要不同的文件名,请更改参数。检查目录内容。
$ ls ~/client-configs/files
client1.ovpn
这是您需要传输到客户端的配置文件,然后使用该文件连接到 OpenVPN 服务器。您可以使用任何 SFTP 协议/程序将文件传输到客户端。
第 13 步 - 安装并测试客户端连接
在我们的教程中,我们使用 Debian 12 客户端计算机。通过以下命令安装 OpenVPN。
$ sudo apt install openvpn
通过运行以下命令检查您的系统是否使用 systemd-resolved 来管理 DNS 查询。
$ cat /etc/resolv.conf
您将得到类似的输出。
# Generated by NetworkManager
nameserver 8.8.8.8
nameserver 8.8.4.4
如果系统使用 systemd-resolved,则上面的 IP 地址将为 127.0.0.53。此外,文件顶部的注释也将证实这一点。如果 IP 地址不是 127.0.0.53,则系统未使用 systemd-resolved,您需要按照后面提到的步骤操作。
但首先,使用以下命令从服务器下载 client1.ovpn 文件。
$ scp username@your_server_ip:/home/<username>/client-configs/files/client1.ovpn
对于使用 systemd-resolved 的客户端
安装 openvpn-systemd-resolved 软件包,该软件包提供强制 systemd-resolved 使用 VPN 服务器进行 DNS 的脚本。
$ sudo apt install openvpn-systemd-resolved
打开客户端配置文件进行编辑。
$ nano client1.ovpn
通过删除文件中以下行前面的分号来取消注释它们。
script-security 2
up /etc/openvpn/update-systemd-resolved
down /etc/openvpn/update-systemd-resolved
down-pre
dhcp-option DOMAIN-ROUTE .
按 Ctrl + X 并在出现提示时输入 Y 来保存文件。
对于具有 update-resolv-conf 的客户端
如果您有 Debian 系统,则需要执行此步骤。首先,确认您的发行版正在使用 update-resolv-conf。
$ ls /etc/openvpn
client server update-resolv-conf
如果您的系统包含 update-resolv-conf 文件,则打开客户端配置文件进行编辑。
$ nano client1.ovpn
通过删除文件中以下行前面的分号来取消注释它们。
script-security 2
up /etc/openvpn/update-resolv-conf
down /etc/openvpn/update-resolv-conf
如果您使用基于 CentOS 的发行版,请将 group 指令从 nogroup 更改为 nobody。
group nobody
按 Ctrl + X 并在出现提示时输入 Y 来保存文件。
连接客户端
运行以下命令将客户端连接到 VPN 服务器。
$ sudo openvpn --config client1.ovpn
您应该得到类似的输出。
2023-08-08 16:23:29 Note: Kernel support for ovpn-dco missing, disabling data channel offload.
2023-08-08 16:23:29 OpenVPN 2.6.3 x86_64-pc-linux-gnu [SSL (OpenSSL)] [LZO] [LZ4] [EPOLL] [PKCS11] [MH/PKTINFO] [AEAD] [DCO]
2023-08-08 16:23:29 library versions: OpenSSL 3.0.9 30 May 2023, LZO 2.10
2023-08-08 16:23:29 DCO version: N/A
2023-08-08 16:23:29 NOTE: the current --script-security setting may allow this configuration to call user-defined scripts
2023-08-08 16:23:29 TCP/UDP: Preserving recently used remote address: [AF_INET]69.28.91.204:443
2023-08-08 16:23:29 Socket Buffers: R=[131072->131072] S=[16384->16384]
2023-08-08 16:23:29 Attempting to establish TCP connection with [AF_INET]69.28.91.204:443
2023-08-08 16:23:29 TCP connection established with [AF_INET]69.28.91.204:443
2023-08-08 16:23:29 TCPv4_CLIENT link local: (not bound)
2023-08-08 16:23:29 TCPv4_CLIENT link remote: [AF_INET]69.28.91.204:443
2023-08-08 16:23:29 NOTE: UID/GID downgrade will be delayed because of --client, --pull, or --up-delay
2023-08-08 16:23:29 TLS: Initial packet from [AF_INET]69.28.91.204:443, sid=6bd67e12 50ebf8bc
2023-08-08 16:23:30 VERIFY OK: depth=1, CN=Easy-RSA CA
2023-08-08 16:23:30 VERIFY KU OK
2023-08-08 16:23:30 Validating certificate extended key usage
2023-08-08 16:23:30 ++ Certificate has EKU (str) TLS Web Server Authentication, expects TLS Web Server Authentication
2023-08-08 16:23:30 VERIFY EKU OK
2023-08-08 16:23:30 VERIFY OK: depth=0, CN=server
2023-08-08 16:23:30 Control Channel: TLSv1.3, cipher TLSv1.3 TLS_AES_256_GCM_SHA384, peer certificate: 384 bit ECsecp384r1, signature: ecdsa-with-SHA512
2023-08-08 16:23:30 [server] Peer Connection Initiated with [AF_INET]69.28.91.204:443
2023-08-08 16:23:30 TLS: move_session: dest=TM_ACTIVE src=TM_INITIAL reinit_src=1
2023-08-08 16:23:30 TLS: tls_multi_process: initial untrusted session promoted to trusted
2023-08-08 16:23:31 SENT CONTROL [server]: 'PUSH_REQUEST' (status=1)
2023-08-08 16:23:31 PUSH: Received control message: 'PUSH_REPLY,redirect-gateway def1 bypass-dhcp,dhcp-option DNS 208.67.222.222,dhcp-option DNS 208.67.220.220,route 10.8.0.1,topology net30,ping 10,ping-restart 120,ifconfig 10.8.0.6 10.8.0.5,peer-id 0,cipher AES-256-GCM,protocol-flags cc-exit tls-ekm dyn-tls-crypt,tun-mtu 1500'
2023-08-08 16:23:31 OPTIONS IMPORT: --ifconfig/up options modified
2023-08-08 16:23:31 OPTIONS IMPORT: route options modified
2023-08-08 16:23:31 OPTIONS IMPORT: --ip-win32 and/or --dhcp-option options modified
2023-08-08 16:23:31 OPTIONS IMPORT: tun-mtu set to 1500
2023-08-08 16:23:31 net_route_v4_best_gw query: dst 0.0.0.0
2023-08-08 16:23:31 net_route_v4_best_gw result: via 10.0.2.2 dev enp0s3
2023-08-08 16:23:31 ROUTE_GATEWAY 10.0.2.2/255.255.255.0 IFACE=enp0s3 HWADDR=08:00:27:b7:cc:29
2023-08-08 16:23:31 TUN/TAP device tun0 opened
2023-08-08 16:23:31 net_iface_mtu_set: mtu 1500 for tun0
2023-08-08 16:23:31 net_iface_up: set tun0 up
2023-08-08 16:23:31 net_addr_ptp_v4_add: 10.8.0.6 peer 10.8.0.5 dev tun0
2023-08-08 16:23:31 /etc/openvpn/update-resolv-conf tun0 1500 0 10.8.0.6 10.8.0.5 init
2023-08-08 16:23:31 net_route_v4_add: 69.28.91.204/32 via 10.0.2.2 dev [NULL] table 0 metric -1
2023-08-08 16:23:31 net_route_v4_add: 0.0.0.0/1 via 10.8.0.5 dev [NULL] table 0 metric -1
2023-08-08 16:23:31 net_route_v4_add: 128.0.0.0/1 via 10.8.0.5 dev [NULL] table 0 metric -1
2023-08-08 16:23:31 net_route_v4_add: 10.8.0.1/32 via 10.8.0.5 dev [NULL] table 0 metric -1
2023-08-08 16:23:31 UID set to nobody
2023-08-08 16:23:31 GID set to nogroup
2023-08-08 16:23:31 Capabilities retained: CAP_NET_ADMIN
2023-08-08 16:23:31 Initialization Sequence Completed
2023-08-08 16:23:31 Data Channel: cipher 'AES-256-GCM', peer-id: 0
2023-08-08 16:23:31 Timers: ping 10, ping-restart 120
2023-08-08 16:23:31 Protocol options: protocol-flags cc-exit tls-ekm dyn-tls-crypt
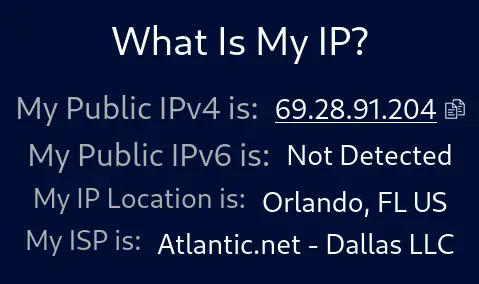
您可以通过在浏览器中访问 URL https://whatismyip.com 来验证连接,您将看到您的 IP 地址和 OpenVPN 服务器的位置。
您还可以通过在 https://www.dnsleaktest.com/ 网站上执行标准测试来进一步验证。
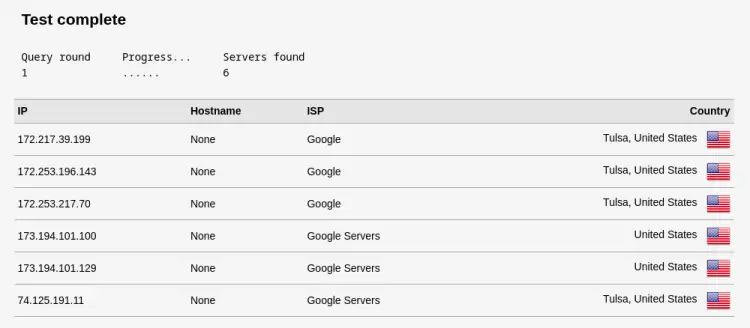
您可以看到 Google IP 地址,因为我们从客户端上的 resolv.conf 文件中获取了 IP 地址,并且它们的位置位于美国,与我们使用的 OpenVPN 服务器的位置相匹配。
上述命令在前台运行OpenVPN,这意味着终端将被阻止。要关闭连接,您需要按Ctrl + C。不过,您也可以在后台运行 OpenVPN。使用以下命令来执行此操作。
sudo openvpn --config client1.ovpn --daemon
要关闭连接,请找到该进程的进程 ID。
$ ps aux | grep openvpn
您将得到类似的输出。
nobody      4357  0.3  0.0  13468  8432 ?        Ss   15:35   0:00 openvpn --config client1.ovpn --daemon
username    4406  0.0  0.0  17732  2432 pts/0    S+   15:35   0:00 grep --color=auto openvpn
可以看到,OpenVPN进程对应的进程ID为4357。使用以下命令关闭 VPN 连接以终止该进程。
$ sudo kill -9 4357
OpenVPN 提供适用于 Windows、macOS、Android 和 iOS 平台的 GUI 客户端,您可以在其中导入客户端配置文件以进行连接。
第 14 步 - 撤销客户端证书
如果您想撤销客户端的证书以阻止访问,您可以通过登录 CA 服务器来执行此操作。
切换到~/easy-rsa目录。
$ cd ~/easy-rsa
使用 revoke 选项运行脚本,后跟客户端名称。
$ ./easyrsa revoke client1
系统将提示您是否要吊销证书。
* Notice:
Using Easy-RSA configuration from: /home/navjot/easy-rsa/pki/vars

* Notice:
Using SSL: openssl OpenSSL 3.0.9 30 May 2023 (Library: OpenSSL 3.0.9 30 May 2023)


  Please confirm you wish to revoke the certificate
  with the following subject:

  subject=
    commonName                = client1

  serial-number: A38D324EC106628F53D1ADFCF8F2D706


Type the word 'yes' to continue, or any other input to abort.
    Continue with revocation: yes
如果您的 CA 私钥受密码短语保护,请在出现提示时输入密码。
Using configuration from /home/<username>/easy-rsa/pki/a02dc925/temp.0b5d5ab5
Enter pass phrase for /home/<username>/easy-rsa/pki/private/ca.key:
Revoking Certificate A38D324EC106628F53D1ADFCF8F2D706.
Data Base Updated

* Notice:

IMPORTANT!!!

Revocation was successful. You must run gen-crl and upload a CRL to your
infrastructure in order to prevent the revoked cert from being accepted.
这会撤销 CA 服务器上的证书。但是,OpenVPN 服务器无法检查吊销状态。为此,我们需要生成证书吊销列表 (CRL) 并将其传输到 OpenVPN 服务器。
生成 CRL。
$ ./easyrsa gen-crl
系统将提示您输入 CA 密码。上述命令生成一个 crl.pem 文件。
* Notice:
Using Easy-RSA configuration from: /home/<username>/easy-rsa/pki/vars

* Notice:
Using SSL: openssl OpenSSL 3.0.9 30 May 2023 (Library: OpenSSL 3.0.9 30 May 2023)

Using configuration from /home/<username>/easy-rsa/pki/bce6b789/temp.522aebf7
Enter pass phrase for /home/<username>/easy-rsa/pki/private/ca.key:

* Notice:

An updated CRL has been created.
CRL file: /home/<username>/easy-rsa/pki/crl.pem
将此文件复制到 OpenVPN 服务器。
$ scp ~/easy-rsa/pki/crl.pem username@your_server_ip:/tmp
重新登录 OpenVPN 服务器并将 CRL 文件复制到 /etc/openvpn/server 目录。
$ sudo cp /tmp/crl.pem /etc/openvpn/server/
打开 OpenVPN 服务器配置文件进行编辑。
$ sudo nano /etc/openvpn/server/server.conf
在文件底部添加以下行。这指示 OpenVPN 服务器检查已被限制的客户端的撤销列表。
crl-verify crl.pem
按 Ctrl + X 并在出现提示时输入 Y 来保存文件。
重新启动 OpenVPN 服务器以应用更改。
sudo systemctl restart [email
客户端无法再连接到 OpenVPN 服务器。
结论
我们关于在 Debian 12 服务器上安装和配置 OpenVPN 服务器的教程到此结束。我们还将 OpenVPN Linux 客户端连接到服务器。如果您有任何疑问,请在下面的评论中发表。