如何在 Ubuntu 22.04 上安装 Wallabag
Wallabag 是一种稍后阅读的服务。它允许您保存网页以便稍后以您的休闲节奏阅读。有很多服务可以让您做到这一点,例如 Pocket、Instapaper 等,但在您拥有的服务器上安装服务会更好。其一,它不会停业并导致链接消失。
本教程将介绍在运行 Ubuntu 22.04 的服务器上安装和设置 Wallabag。它还将介绍如何设置 Wallabag 运行所需的 Nginx、MySQL、Composer 和 PHP。
先决条件
运行 Ubuntu 22.04 的服务器。
具有 sudo 权限的非 root 用户。
完全限定域名 (FQDN),例如 wallabag.example.com。
确保一切都已更新。
$ sudo apt update
$ sudo apt upgrade
您的系统需要的软件包很少。
$ sudo apt install wget curl nano software-properties-common dirmngr apt-transport-https gnupg2 ca-certificates lsb-release ubuntu-keyring unzip -y
其中一些软件包可能已经安装在您的系统上。
第 1 步 - 配置防火墙
第一步是配置防火墙。 Ubuntu 默认带有 ufw(简单防火墙)。
检查防火墙是否正在运行。
$ sudo ufw status
您应该得到以下输出。
Status: inactive
允许 SSH 端口,以便防火墙在启用它时不会中断当前连接。
$ sudo ufw allow OpenSSH
还允许 HTTP 和 HTTPS 端口。
$ sudo ufw allow http
$ sudo ufw allow https
启用防火墙
$ sudo ufw enable
Command may disrupt existing ssh connections. Proceed with operation (y|n)? y
Firewall is active and enabled on system startup
再次检查防火墙的状态。
$ sudo ufw status
您应该看到类似的输出。
Status: active

To                         Action      From
--                         ------      ----
OpenSSH                    ALLOW       Anywhere
80/tcp                     ALLOW       Anywhere
443                        ALLOW       Anywhere
OpenSSH (v6)               ALLOW       Anywhere (v6)
80/tcp (v6)                ALLOW       Anywhere (v6)
443 (v6)                   ALLOW       Anywhere (v6)
第 2 步 - 安装 PHP 及其扩展
Ubuntu 22.04 附带 PHP 8.1.2 版本,该版本有点过时。我们将使用 Ondrej 的 PHP 存储库安装最新的 PHP 8.1 版本。
$ sudo add-apt-repository ppa:ondrej/php
接下来,安装 Wallabag 所需的 PHP 及其扩展。
$ sudo apt install php8.1-fpm php8.1-mysql php8.1-bcmath php8.1-xml php8.1-zip php8.1-curl php8.1-mbstring php8.1-gd php8.1-tidy php8.1-intl php8.1-cli
验证安装。
$ php --version
PHP 8.1.16 (cli) (built: Feb 14 2023 18:35:37) (NTS)
Copyright (c) The PHP Group
Zend Engine v4.1.16, Copyright (c) Zend Technologies
    with Zend OPcache v8.1.16, Copyright (c), by Zend Technologies
第 3 步 - 安装 Composer
Composer 是 PHP 的依赖管理工具,是 Wallabag 安装所必需的。
运行以下命令来下载 Composer 二进制文件。 Wallabag 仅适用于 Composer 2.2 LTS,因此我们相应地修改了命令。
$ php -r "copy('https://getcomposer.org/installer', 'composer-setup.php');"
$ php composer-setup.php --2.2
$ php -r "unlink('composer-setup.php');"
通过将二进制文件移至 /usr/local/bin 目录来安装 Composer。
$ sudo mv composer.phar /usr/local/bin/composer
通过检查版本来验证安装。
$ composer --version
Composer version 2.2.21 2023-02-15 13:07:40
第 4 步 - 安装 MySQL
Ubuntu 22.04 附带最新版本的 MySQL。您可以使用单个命令安装它。
$ sudo apt install mysql-server
检查MySQL的版本。
$ mysql --version
mysql  Ver 8.0.32-0ubuntu0.22.04.2 for Linux on x86_64 ((Ubuntu))
对于 MySQL 8.0.28 及以上版本,此步骤是必需的。输入 MySQL Shell。
$ sudo mysql
运行以下命令来设置 root 用户的密码。确保它包含数字、大写字母、小写字母和特殊字符的混合。
mysql> ALTER USER 'root'@'localhost' IDENTIFIED WITH mysql_native_password BY 'YourPassword12!';
退出外壳。
mysql> exit
运行 MySQL 安全安装脚本。
$ sudo mysql_secure_installation
首先,系统会要求您输入 root 密码。输入它。接下来,系统将要求您安装验证密码组件。它检查 MySQL 中使用的密码的强度。按Y进行安装。接下来,系统将要求您设置密码验证策略的级别。选择2,因为它是最强的。
Securing the MySQL server deployment.

Enter password for user root:

VALIDATE PASSWORD COMPONENT can be used to test passwords
and improve security. It checks the strength of password
and allows the users to set only those passwords which are
secure enough. Would you like to setup VALIDATE PASSWORD component?

Press y|Y for Yes, any other key for No: Y

There are three levels of password validation policy:

LOW    Length >= 8
MEDIUM Length >= 8, numeric, mixed case, and special characters
STRONG Length >= 8, numeric, mixed case, special characters and dictionary                  file

Please enter 0 = LOW, 1 = MEDIUM and 2 = STRONG: 2
Using existing password for root.

Estimated strength of the password: 100
接下来,输入N拒绝更改您的root密码。另外,输入Y 可删除匿名用户、禁止远程 root 登录、删除测试数据库并重新加载权限表。
Change the password for root ? ((Press y|Y for Yes, any other key for No) : N

 ... skipping.
By default, a MySQL installation has an anonymous user,
allowing anyone to log into MySQL without having to have
a user account created for them. This is intended only for
testing, and to make the installation go a bit smoother.
You should remove them before moving into a production
environment.

Remove anonymous users? (Press y|Y for Yes, any other key for No) : Y
Success.


Normally, root should only be allowed to connect from
'localhost'. This ensures that someone cannot guess at
the root password from the network.

Disallow root login remotely? (Press y|Y for Yes, any other key for No) : Y
Success.

By default, MySQL comes with a database named 'test' that
anyone can access. This is also intended only for testing,
and should be removed before moving into a production
environment.


Remove test database and access to it? (Press y|Y for Yes, any other key for No) : Y
 - Dropping test database...
Success.

 - Removing privileges on test database...
Success.

Reloading the privilege tables will ensure that all changes
made so far will take effect immediately.

Reload privilege tables now? (Press y|Y for Yes, any other key for No) : Y
Success.

All done!
第 5 步 - 配置 MySQL
登录 MySQL shell。出现提示时输入您的 root 密码。
$ sudo mysql -u root -p
创建示例数据库。
mysql> CREATE DATABASE wallabag;
创建一个 SQL 用户帐户。
mysql> CREATE USER 'wallabaguser'@'localhost' IDENTIFIED BY 'Your_password2';
向用户授予数据库的所有权限。
mysql> GRANT ALL PRIVILEGES ON wallabag.* TO 'wallabaguser'@'localhost';
刷新用户权限。
mysql> FLUSH PRIVILEGES;
退出外壳。
mysql> exit
第 6 步 - 安装 Nginx
Ubuntu 22.04 附带旧版本的 Nginx。您需要下载官方 Nginx 存储库来安装最新版本。
导入 Nginx 的签名密钥。
$ curl https://nginx.org/keys/nginx_signing.key | gpg --dearmor \
| sudo tee /usr/share/keyrings/nginx-archive-keyring.gpg >/dev/null
添加 Nginx 稳定版本的存储库。
$ echo "deb [signed-by=/usr/share/keyrings/nginx-archive-keyring.gpg arch=amd64] \
http://nginx.org/packages/ubuntu `lsb_release -cs` nginx" \
| sudo tee /etc/apt/sources.list.d/nginx.list
更新系统存储库。
$ sudo apt update
安装 Nginx。
$ sudo apt install nginx
验证安装。
$ nginx -v
nginx version: nginx/1.22.1
启动 Nginx 服务器。
$ sudo systemctl start nginx
第 7 步 - 安装 SSL
我们需要安装 Certbot 来生成 SSL 证书。您可以使用 Ubuntu 的存储库安装 Certbot,也可以使用 Snapd 工具获取最新版本。我们将使用 Snapd 版本。
Ubuntu 22.04 默认安装了 Snapd。运行以下命令以确保您的 Snapd 版本是最新的。
$ sudo snap install core && sudo snap refresh core
安装证书机器人。
$ sudo snap install --classic certbot
使用以下命令确保可以通过创建到 /usr/bin 目录的符号链接来运行 Certbot 命令。
$ sudo ln -s /snap/bin/certbot /usr/bin/certbot
运行以下命令生成 SSL 证书。
$ sudo certbot certonly --nginx --agree-tos --no-eff-email --staple-ocsp --preferred-challenges http -m [email -d wallabag.example.com
上述命令会将证书下载到服务器上的 /etc/letsencrypt/live/wallabag.example.com 目录中。
生成 Diffie-Hellman 组证书。
$ sudo openssl dhparam -dsaparam -out /etc/ssl/certs/dhparam.pem 4096
检查 Certbot 续订调度程序服务。
$ sudo systemctl list-timers
您会发现 snap.certbot.renew.service 是计划运行的服务之一。
NEXT                        LEFT          LAST                        PASSED        UNIT                      ACTIVATES
.....
Sun 2023-02-26 06:32:00 UTC 9h left       Sat 2023-02-25 18:04:05 UTC 2h 59min ago  snap.certbot.renew.timer  snap.certbot.renew.service
Sun 2023-02-26 06:43:20 UTC 9h left       Sat 2023-02-25 10:49:23 UTC 10h ago       apt-daily-upgrade.timer   apt-daily-upgrade.service
Sun 2023-02-26 09:00:06 UTC 11h left      Sat 2023-02-25 20:58:06 UTC 5min ago      apt-daily.timer           apt-daily.service
对该过程进行一次演练,以检查 SSL 续订是否正常工作。
$ sudo certbot renew --dry-run
如果没有看到任何错误,则一切都已准备就绪。您的证书将自动更新。
第 8 步 - 安装 Wallabag
创建 /var/www/wallabag/html 目录。
$ sudo mkdir /var/www/html/wallabag -p
下载最新版本的 Wallabag。
$ wget https://wllbg.org/latest-v2-package
提取存档。
$ tar xzf latest-v2-package
将文件从提取的目录移动到之前创建的目录。您可以从 GitHub 发布页面查看 Wallabag 的最新版本。撰写本教程时的最新版本是 2.5.4。
$ sudo mv wallabag-2.5.4/* /var/www/html/wallabag
创建资产目录。
$ sudo mkdir /var/www/html/wallabag/data/assets
将 /var/www/html/wallabag 目录的权限更改为当前登录用户。
$ sudo chown -R $USER:$USER /var/www/html/wallabag
切换到目录。
$ cd /var/www/html/wallabag
通过复制示例文件来创建 parameters.yml 文件。
$ cp app/config/parameters.yml.dist app/config/parameters.yml
在我们开始配置 Wallabag 之前,请生成一个密钥。记下稍后要用到的密钥。
$ openssl rand -base64 32
QLV/GpZwDobQbyQZQ15FkM1Hvt+ZFJZXw8GW9F4KR3o=
打开参数文件进行编辑。
$ nano app/config/parameters.yml
找到以下部分并填写数据库凭据。 MySQL 的数据库端口为 3306。
..........
    database_driver: pdo_mysql
    database_host: 127.0.0.1
    database_port: 3306
    database_name: wallabag
    database_user: wallabaguser
    database_password: Your_password2
填写服务器描述和域名。
    domain_name: https://wallabag.example.com
    server_name: "Howtoforge Wallabag"
填写您的 SMTP 详细信息。在我们的示例中,我们使用 Amazon SES 服务。
    mailer_transport:  smtp
    mailer_user:       YOUR_AES_USERNAME
    mailer_password:   YOUR_AES_PASSWORD
    mailer_host:       email-smtp.us-west-2.amazonaws.com
    mailer_port:       587
    mailer_encryption: tls
填写之前生成的秘钥。如果您想保留双因素身份验证,请确保应用以下设置。如果您想关闭用户注册,请将 fouser_registration 的值设置为 false。 fouser_confirmation 变量设置为 true,这意味着每个用户注册都需要通过电子邮件确认。将 from_email 变量的值更改为您选择的电子邮件 ID。
    # A secret key that's used to generate certain security-related tokens
    secret: QLV/GpZwDobQbyQZQ15FkM1Hvt+ZFJZXw8GW9F4KR3o=

    # two factor stuff
    twofactor_auth: true
    twofactor_sender: [email

    # fosuser stuff
    fosuser_registration: true
    fosuser_confirmation: true
.....
    from_email: [email
.....
还有更多与Redis、RabbitMQ和Sentry设置相关的哨兵。安装上述软件包后,您可以根据需要配置它们。
按 Ctrl + X 并在出现提示时输入 Y 来保存文件。
使用 Composer 下载并安装 Wallabag 所需的依赖项。
$ SYMFONY_ENV=prod composer install --no-dev -o --prefer-dist
使用 Wallabag 命令行工具完成安装。
$ php bin/console wallabag:install --env=prod
系统将提示您是否要重置数据库及其架构。两次都输入 no 作为响应。接下来,系统会询问您是否要创建管理员帐户。输入 yes 继续并输入帐户的用户名、密码和电子邮件 ID。
wallabag installer
==================

Step 1 of 4: Checking system requirements.
------------------------------------------

 ------------------------ -------- ----------------
  Checked                  Status   Recommendation
 ------------------------ -------- ----------------
  PDO Driver (pdo_mysql)   OK!
  Database connection      OK!
  Database version         OK!
  curl_exec                OK!
  curl_multi_init          OK!
 ------------------------ -------- ----------------

 [OK] Success! Your system can run wallabag properly.


Step 2 of 4: Setting up database.
---------------------------------

 It appears that your database already exists. Would you like to reset it? (yes/no) [no]:
 > no

 Seems like your database contains schema. Do you want to reset it? (yes/no) [no]:
 > no

 Clearing the cache...

 Database successfully setup.

Step 3 of 4: Administration setup.
----------------------------------

 Would you like to create a new admin user (recommended)? (yes/no) [yes]:
 > yes

 Username [wallabag]:
 > navjot

 Password [wallabag]:
 >

 Email [[email ]:
 > [email

 Administration successfully setup.

Step 4 of 4: Config setup.
--------------------------

 Config successfully setup.

 [OK] wallabag has been successfully installed.

 [OK] You can now configure your web server, see https://doc.wallabag.org
将目录权限切换回Nginx。
$ sudo chown -R nginx:nginx /var/www/html/wallabag
第 9 步 - 配置 Nginx 和 PHP
配置 PHP-FPM
打开文件 /etc/php/8.1/fpm/pool.d/www.conf。
$ sudo nano /etc/php/8.1/fpm/pool.d/www.conf
我们需要将 PHP 进程的 Unix 用户/组设置为 nginx。在文件中找到 user=www-data 和 group=www-data 行,并将其更改为 nginx。
...
; Unix user/group of processes
; Note: The user is mandatory. If the group is not set, the default user's group
;       will be used.
; RPM: apache user chosen to provide access to the same directories as httpd
user = nginx
; RPM: Keep a group allowed to write in log dir.
group = nginx
...
在文件中找到 listen.owner=www-data 和 listen.group=www-data 行,并将其更改为 nginx。
; Set permissions for unix socket, if one is used. In Linux, read/write
; permissions must be set in order to allow connections from a web server. Many
; BSD-derived systems allow connections regardless of permissions. The owner
; and group can be specified either by name or by their numeric IDs.
; Default Values: user and group are set as the running user
;                 mode is set to 0660
listen.owner = nginx
listen.group = nginx
按 Ctrl + X 并在出现提示时输入 Y 来保存文件。
将 PHP-FPM 和 PHP-CLI 的执行时间增加到 60 秒。
$ sudo sed -i 's/max_execution_time = 30/max_execution_time = 60/' /etc/php/8.1/fpm/php.ini
$ sudo sed -i 's/max_execution_time = 30/max_execution_time = 60/' /etc/php/8.1/cli/php.ini
将 PHP-FPM 的内存限制从 128MB 增加到 256MB。
$ sudo sed -i 's/memory_limit = 128M/memory_limit = 256M/' /etc/php/8.1/fpm/php.ini
重新启动 PHP-FPM 服务。
$ sudo systemctl restart php8.1-fpm
将 PHP 会话目录的组更改为 Nginx。
$ sudo chgrp -R nginx /var/lib/php/sessions
配置 Nginx
创建并打开文件 /etc/nginx/conf.d/wallabag.conf 进行编辑。
$ sudo nano /etc/nginx/conf.d/wallabag.conf
将以下代码粘贴到其中。
server {
    listen       443 ssl http2;
    listen       [::]:443 ssl http2;
    server_name  wallabag.example.com;

    access_log  /var/log/nginx/wallabag.access.log;
    error_log   /var/log/nginx/wallabag.error.log;

	# SSL
    ssl_certificate      /etc/letsencrypt/live/wallabag.example.com/fullchain.pem;
    ssl_certificate_key  /etc/letsencrypt/live/wallabag.example.com/privkey.pem;
    ssl_trusted_certificate /etc/letsencrypt/live/wallabag.example.com/chain.pem;
    ssl_session_timeout  5m;
    ssl_session_cache shared:MozSSL:10m;
    ssl_session_tickets off;
    ssl_protocols TLSv1.2 TLSv1.3;
    ssl_prefer_server_ciphers on;
    ssl_ciphers ECDHE-ECDSA-AES128-GCM-SHA256:ECDHE-RSA-AES128-GCM-SHA256:ECDHE-ECDSA-AES256-GCM-SHA384:ECDHE-RSA-AES256-GCM-SHA384:ECDHE-ECDSA-CHACHA20-POLY1305:ECDHE-RSA-CHACHA20-POLY1305:DHE-RSA-AES128-GCM-SHA256:DHE-RSA-AES256-GCM-SHA384;
    ssl_ecdh_curve X25519:prime256v1:secp384r1:secp521r1;
    ssl_stapling on;
    ssl_stapling_verify on;
    ssl_dhparam /etc/ssl/certs/dhparam.pem;
    resolver 8.8.8.8;

    root /var/www/html/wallabag/web;

    location / {
        try_files $uri /app.php$is_args$args;
    }

    # Pass PHP Scripts To FastCGI Server
    location ~ ^/app\.php(/|$) {
        fastcgi_split_path_info ^(.+\.php)(/.*)$;
        fastcgi_pass unix:/run/php/php8.1-fpm.sock; # Depends On The PHP Version
        fastcgi_param SCRIPT_FILENAME  $realpath_root$fastcgi_script_name;
        fastcgi_param DOCUMENT_ROOT $realpath_root;
        include fastcgi_params;
        internal;
    }

    location ~ \.php$ {
        return 404;
    }
}

# enforce HTTPS
server {
    listen       80;
    listen       [::]:80;
    server_name  wallabag.example.com;
    return 301   https://$host$request_uri;
}
请注意,Nginx 配置中使用的根目录是 /var/www/html/wallabag/public/。
完成后按 Ctrl + X 并在出现提示时输入 Y 来保存文件。
打开文件 /etc/nginx/nginx.conf 进行编辑。
$ sudo nano /etc/nginx/nginx.conf
在 include /etc/nginx/conf.d/*.conf; 行之前添加以下行。
server_names_hash_bucket_size 64;
按 Ctrl + X 并在出现提示时输入 Y 来保存文件。
验证 Nginx 配置文件语法。
$ sudo nginx -t
nginx: the configuration file /etc/nginx/nginx.conf syntax is ok
nginx: configuration file /etc/nginx/nginx.conf test is successful
重新启动 Nginx 服务。
$ sudo systemctl restart nginx
第 10 步 - 访问 Wallabag
在浏览器中打开 URL https://wallabag.example.com,您将看到以下登录屏幕。
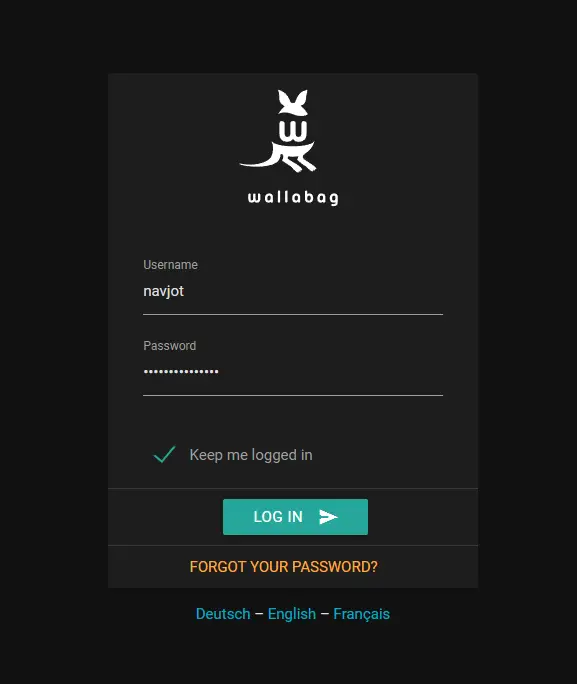
输入您在安装过程中创建的凭据,然后按登录按钮继续。您将看到 Wallabag 仪表板。

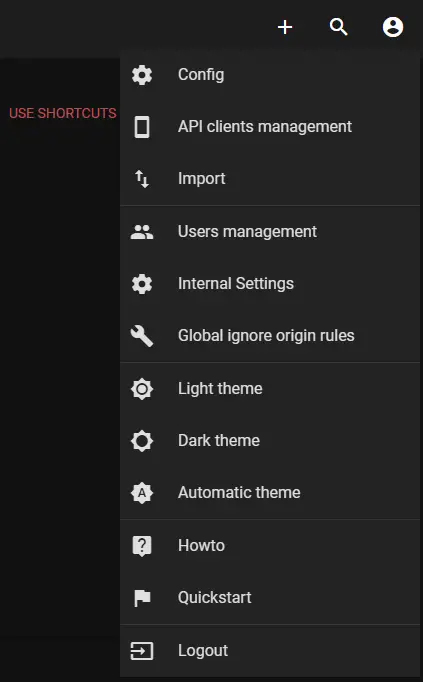
Wallabag 为您提供了多种适用于每种浏览器、移动设备或电子书阅读器的应用程序,您可以使用它们添加链接。如果您没有其他兴趣,您甚至可以使用书签,您可以通过单击仪表板右上角的用户图标从如何部分访问其详细信息。
您将获得浏览器扩展、移动应用程序和 Wallabag 书签的链接。
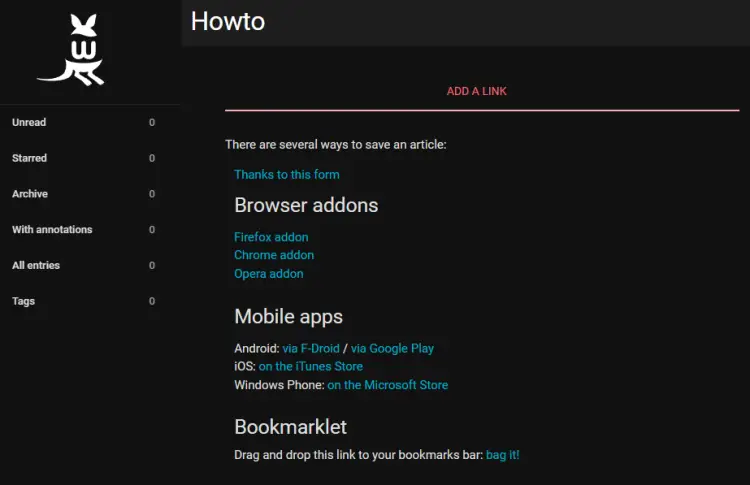
就是这样。您可以开始使用 Wallabag 保存文章以供以后阅读。
结论
我们在 Ubuntu 22.04 服务器上安装 Wallabag 的教程到此结束。如果您有任何疑问,请在下面的评论中发表。