在 CentOS 7/RHEL 7/Fedora 上安装 Asterisk 16 LTS
欢迎阅读我们有关如何在 CentOS 7/RHEL 7/Fedora 上安装 Asterisk 16 LTS 的指南。 Asterisk 是一款功能强大的开源 PBX 系统,其企业功能仅在商用 PBX 系统中提供。 Asterisk 使用商用以太网硬件,并允许集成物理上独立的安装。
Asterisk PBX系统的特点
- 电话会议
- 通话录音
- 通话监控
- 分布式通用号码发现
- 呼叫等待中的来电显示
- 直接向内系统访问
- 呼叫停车
- 短信
- 集群
- 转码
- 语音信箱
- 呼叫队列和许多其他功能。
在我们最近的指南中,我们介绍了在 Debian 服务器上使用 FreePBX 安装 Asterisk。如果您需要商业系统,可以使用 3CX,我们的博客上有安装指南。
在 CentOS 7/RHEL 7/Fedora 上安装 Asterisk 16
在 CentOS 7 上开始执行 Asterisk 安装命令之前
sudo yum -y update设置主机名类型:
sudo hostnamectl set-hostname pbx.example.com完成后,添加 epel 存储库 - 仅限 CentOS
sudo yum -y install epel-release通过运行以下命令将 SELinux 设置为宽容模式:
sudo setenforce 0
sudo sed -i 's/\(^SELINUX=\).*/\SELINUX=permissive/' /etc/selinux/config
然后按照以下步骤在 CentOS 7/RHEL 7/Fedora 服务器上安装和配置 Asterisk。
第 1 步:安装 Asterisk 16 PBX 依赖项
设置 Asterisk 的第一步是安装所有必需的依赖项。
sudo yum -y install wget vim net-tools openssl-devel您还需要安装开发工具组包。
sudo yum -y groupinstall "Development Tools"您需要安装的其他软件包是:
sudo yum -y install libedit-devel sqlite-devel psmisc ncurses-devel libtermcap-devel sox newt-devel libxml2-devel libtiff-devel audiofile-devel gtk2-devel uuid-devel libtool libuuid-devel subversion git subversion kernel-devel crontabs cronie cronie-anacron wget vim autoconf第 2 步:下载并安装 Jansson
Jansson 是一个用于编码、解码和操作 JSON 数据的 C 库。通过运行以下命令在 CentOS 7 服务器上下载并安装它:
sudo su -
cd /usr/src/
git clone https://github.com/akheron/jansson.git
cd jansson
autoreconf  -i
./configure --prefix=/usr/
make && make install
第 3 步:下载并安装 Asterisk
现在我们已经安装了所有依赖包,我们应该准备在 CentOS 7/RHEL 7 上下载并安装 Asterisk。
cd /usr/src/
wget http://downloads.asterisk.org/pub/telephony/asterisk/asterisk-16-current.tar.gz
tar xvfz asterisk-16-current.tar.gz
rm -f asterisk-16-current.tar.gz
cd asterisk-16*/
./configure --libdir=/usr/lib64
如果一切顺利,您应该得到类似于以下内容的输出:
configure: Menuselect build configuration successfully completed

               .$$$$$$$$$$$$$$$=..
            .$7$7..          .7$$7:.
          .$$:.                 ,$7.7
        .$7.     7$$$$           .$$77
     ..$$.       $$$$$            .$$$7
    ..7$   .?.   $$$$$   .?.       7$$$.
   $.$.   .$$$7. $$$$7 .7$$$.      .$$$.
 .777.   .$$$$$$77$$$77$$$$$7.      $$$,
 $$$~      .7$$$$$$$$$$$$$7.       .$$$.
.$$7          .7$$$$$$$7:          ?$$$.
$$$          ?7$$$$$$$$$$I        .$$$7
$$$       .7$$$$$$$$$$$$$$$$      :$$$.
$$$       $$$$$$7$$$$$$$$$$$$    .$$$.
$$$        $$$   7$$$7  .$$$    .$$$.
$$$$             $$$$7         .$$$.
7$$$7            7$$$$        7$$$
 $$$$$                        $$$
  $$$$7.                       $$  (TM)
   $$$$$$$.           .7$$$$$$  $$
     $$$$$$$$$$$$7$$$$$$$$$.$$$$$$
       $$$$$$$$$$$$$$$$.

configure: Package configured for:
configure: OS type  : linux-gnu
configure: Host CPU : x86_64
configure: build-cpu:vendor:os: x86_64 : pc : linux-gnu :
configure: host-cpu:vendor:os: x86_64 : pc : linux-gnu :
第 5 步:设置 Asterisk 菜单选项
通过运行以下命令设置菜单选项:
make menuselect使用箭头键进行导航,然后使用Enter键进行选择。
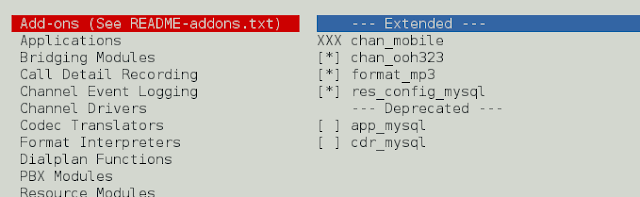
在附加组件上选择chan_ooh323和format_mp3,如下所示
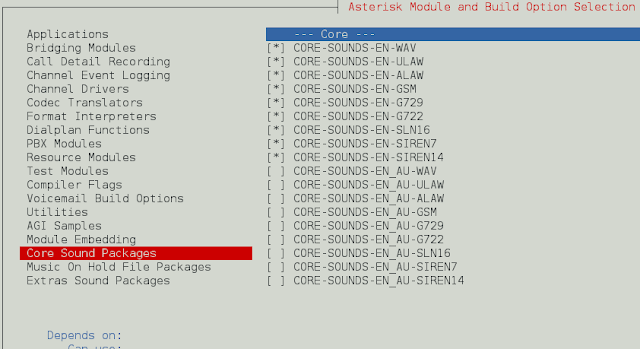
在 Core Sound Packages 上,选择音频数据包的格式,如下所示
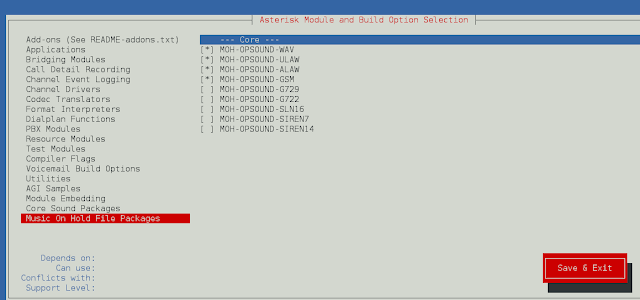
对于音乐保留,选择以下最小模块
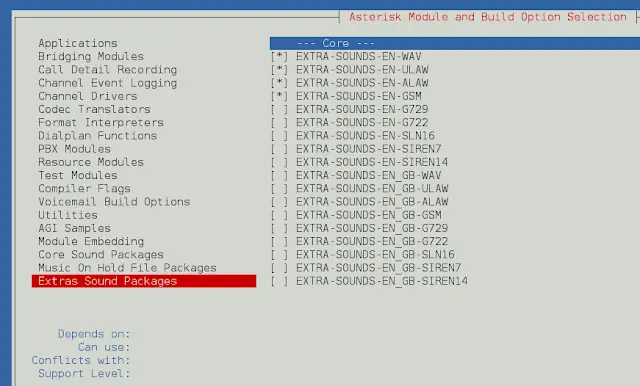
在额外声音包上选择如下所示:
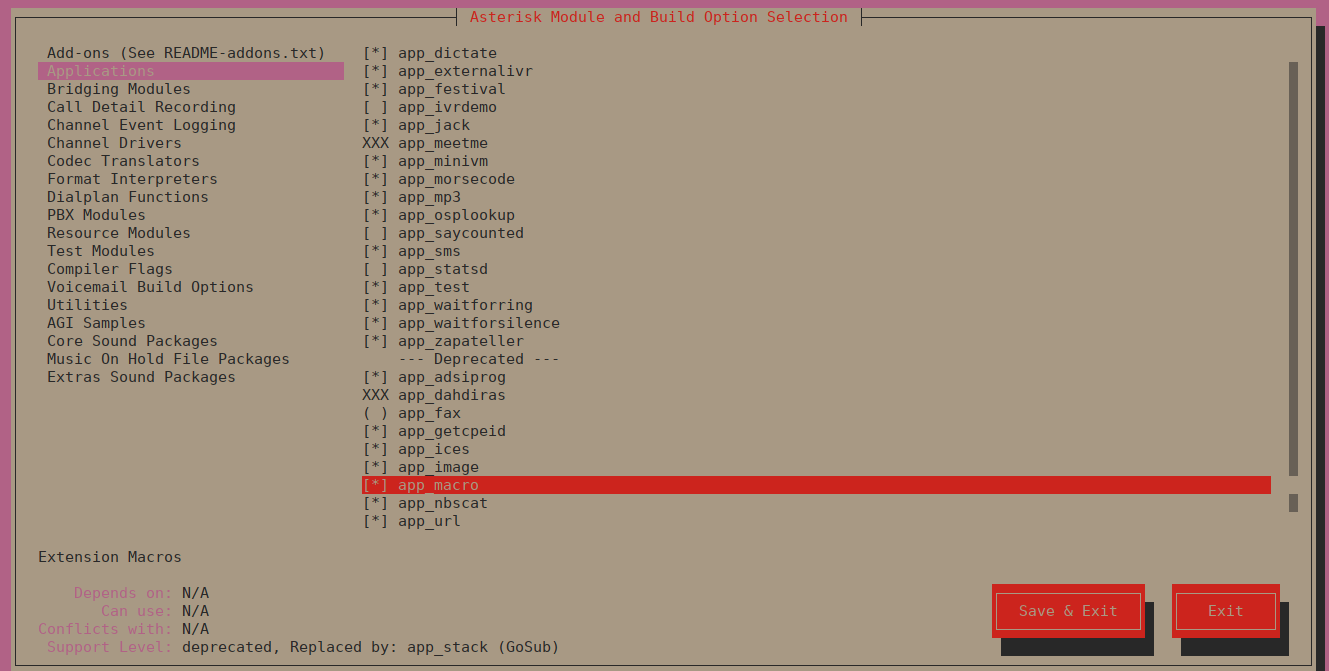
在“应用程序”部分下启用 app_macro。
您可以更改您认为合适的其他配置。完成后,保存并退出
现在运行以下命令将 mp3 解码器库下载到源代码树中。
sudo contrib/scripts/get_mp3_source.sh安装其他依赖项:
sudo ./contrib/scripts/install_prereq install要使用选定的模块开始构建和安装 Asterisk,请运行命令。
make
make install
make samples
make config
ldconfig
示例输出:
---- Asterisk Installation Complete -------+
 +                                           +
 +    YOU MUST READ THE SECURITY DOCUMENT    +
 +                                           +
 + Asterisk has successfully been installed. +
 + If you would like to install the sample   +
 + configuration files (overwriting any      +
 + existing config files), run:              +
 +                                           +
 + For generic reference documentation:      +
 +    make samples                           +
 +                                           +
 + For a sample basic PBX:                   +
 +    make basic-pbx                         +
 +                                           +
 +                                           +
 +-----------------  or ---------------------+
 +                                           +
 + You can go ahead and install the asterisk +
 + program documentation now or later run:   +
 +                                           +
 +               make progdocs               +
 +                                           +
 + **Note** This requires that you have      +
 + doxygen installed on your local system    +
 +-------------------------------------------+
将为您创建一个 systemd 星号单元文件。
创建单独的用户和组来运行星号服务,并分配正确的权限:
groupadd asterisk
useradd -r -d /var/lib/asterisk -g asterisk asterisk
usermod -aG audio,dialout asterisk
chown -R asterisk.asterisk /etc/asterisk
chown -R asterisk.asterisk /var/{lib,log,spool}/asterisk
chown -R asterisk.asterisk /usr/lib64/asterisk
将 Asterisk 默认用户设置为asterisk:
$ sudo vim /etc/sysconfig/asterisk
AST_USER="asterisk"
AST_GROUP="asterisk"

$ sudo vim /etc/asterisk/asterisk.conf
runuser = asterisk ; The user to run as.
rungroup = asterisk ; The group to run as.
更改后重新启动 asterisk 服务
sudo systemctl restart asterisk启用服务在启动时启动:
sudo systemctl enable asterisk测试是否可以连接到 Asterisk CLI:
# asterisk -rvv
Asterisk 16.25.1, Copyright (C) 1999 - 2021, Sangoma Technologies Corporation and others.
Created by Mark Spencer <[email >
Asterisk comes with ABSOLUTELY NO WARRANTY; type 'core show warranty' for details.
This is free software, with components licensed under the GNU General Public
License version 2 and other licenses; you are welcome to redistribute it under
certain conditions. Type 'core show license' for details.
=========================================================================
Running as user 'asterisk'
Running under group 'asterisk'
Connected to Asterisk 16.25.1 currently running on centos (pid = 17452)

centos*CLI> exit
Asterisk cleanly ending (0).
Executing last minute cleanups
您可以确认 Asterisk 服务正在以用户 asterisk 身份运行。 这是生产环境的推荐设置。
结论
现在,您已经在 CentOS 7/RHEL 7 服务器上运行了 Asterisk 16。在我们的下一个操作指南中,我们将介绍在 CentOS 7 上安装和配置 FreePBX。如果您遇到任何设置问题,请继续关注并发表评论。
进一步阅读:
- 保护 Asterisk 和 FreePBX 免受 VoIP 欺诈和暴力攻击
- 在 Ubuntu 上安装 Asterisk