在 CentOS 8 上安装 Openfire XMPP 服务器 |操作系统7
欢迎阅读我们关于如何在 CentOS 8 上安装 Openfire XMPP 服务器的指南 | CentOS 7. Openfire 是一个功能强大的即时消息 (IM) 和聊天服务器,使用 XMPP/Jabber 协议。 Openfire 是一个非常流行的消息(聊天)和状态服务器,它是一系列使用 XMPP 的产品的基础,正如它所说,它是可扩展的,这意味着它的功能可以增加,特别是使用像 Asterisk IM 插件这样的插件还有很多。
对于 Ubuntu 安装,请查看:如何在 Ubuntu 上安装 Openfire
XMPP(可扩展消息和状态协议)是一种广泛采用的即时消息开放协议。它是一种基于 XML 的实时通信协议(包括聊天)。
Openfire 提供了一些很酷的功能,例如:
- MySQL、Oracle、PostgreSQL 和嵌入式数据库支持用户详细信息和消息存储。
- LDAP 集成支持
- 同时支持 TLS 和 SSL 以确保安全
- Web GUI 配置管理器
- Spark IM 客户端集成
- 很多插件可以扩展其功能
- 集群以避免单点故障
- 与其他外部 IM 服务器集成
现在让我们开始在 CentOS 8 上安装 Openfire XMPP 服务器 | CentOS 7。
第1步:更新系统
第一步是更新 CentOS 8/CentOS 7 系统。
sudo yum -y update
sudo yum -y install wget curl
步骤2:在CentOS 8上安装Openfire |操作系统7
下载 Openfire 最新软件包。
wget https://www.igniterealtime.org/downloadServlet?filename=openfire/openfire-4.7.4-1.noarch.rpm -O openfire.rpm下载 Openfire 软件包后,将其安装在 CentOS 8 上 | CentOS 7 运行以下命令。
sudo yum localinstall ./openfire.rpm按键盘上的y键接受安装提示。
......................
Transaction Summary
========================================================================================================================================================
Install  57 Packages

Total size: 86 M
Total download size: 46 M
Installed size: 208 M
Is this ok [y/N]: y
打开防火墙中所有必需的端口。
sudo firewall-cmd --zone=public --add-port=9090/udp --permanent
sudo firewall-cmd --zone=public --add-port=9090/tcp --permanent
sudo firewall-cmd --zone=public --add-port=9091/udp --permanent
sudo firewall-cmd --zone=public --add-port=9091/tcp --permanent
sudo firewall-cmd --reload
启动并启用该服务。
sudo systemctl start openfire
sudo systemctl enable openfire
确认服务状态:
$ systemctl status openfire
● openfire.service - SYSV: Openfire is an XMPP server, which is a server that facilitates XML based communication, such as chat.
   Loaded: loaded (/etc/rc.d/init.d/openfire; generated)
   Active: active (running) since Sat 2020-05-23 19:22:59 CEST; 23s ago
     Docs: man:systemd-sysv-generator(8)
  Process: 2323 ExecStart=/etc/rc.d/init.d/openfire start (code=exited, status=0/SUCCESS)
 Main PID: 2350 (java)
    Tasks: 0 (limit: 24408)
   Memory: 1.3M
   CGroup: /system.slice/openfire.service
           ‣ 2350 /etc/alternatives/jre/bin/java -Dlog4j.configurationFile=/opt/openfire/lib/log4j2.xml -server -DopenfireHome=/opt/openfire -Dopenfire>

May 23 19:22:58 centos.computingforgeeks.com systemd[1]: Starting SYSV: Openfire is an XMPP server, which is a server that facilitates XML based commun>
May 23 19:22:58 centos.computingforgeeks.com su[2337]: (to daemon) root on none
May 23 19:22:58 centos.computingforgeeks.com su[2337]: pam_unix(su:session): session opened for user daemon by (uid=0)
May 23 19:22:58 centos.computingforgeeks.com su[2337]: pam_unix(su:session): session closed for user daemon
May 23 19:22:58 centos.computingforgeeks.com openfire[2323]: Starting openfire:
May 23 19:22:59 centos.computingforgeeks.com systemd[1]: Started SYSV: Openfire is an XMPP server, which is a server that facilitates XML based communi>
步骤3:访问Openfire控制台完成设置
使用 IP 地址或服务器主机名和端口 9090 访问服务器上的 Openfire Web 界面。 在第一个提示中选择安装语言:
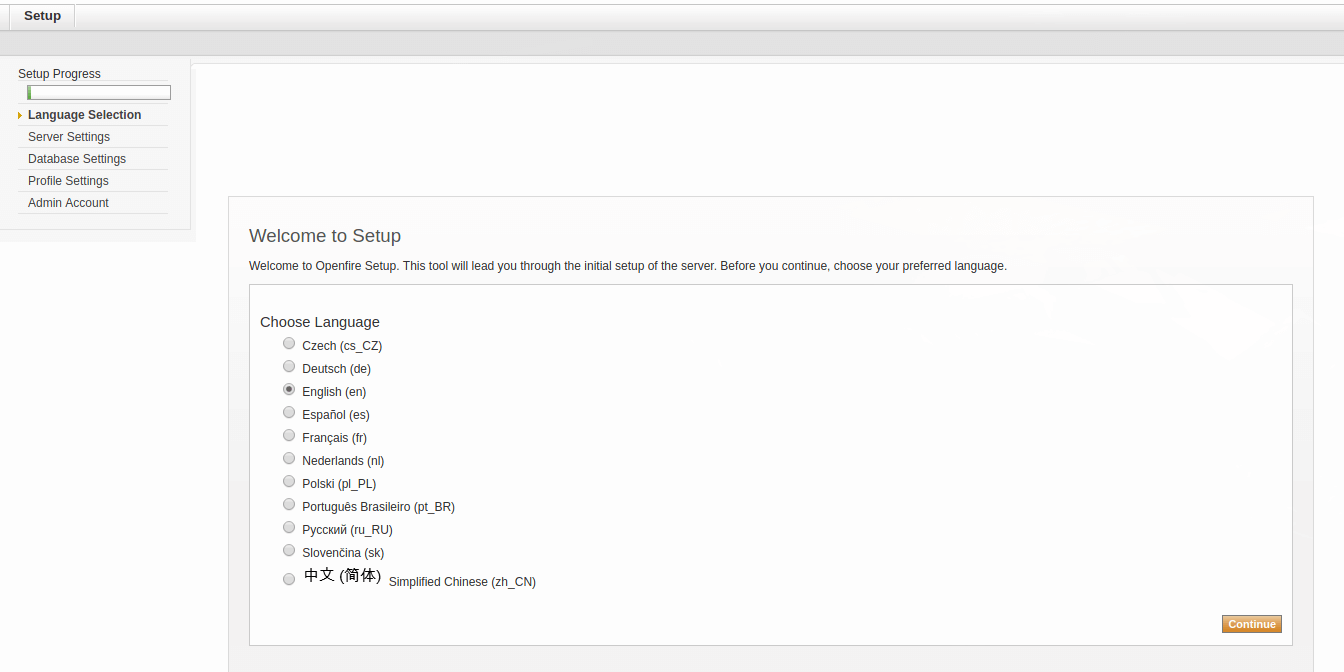
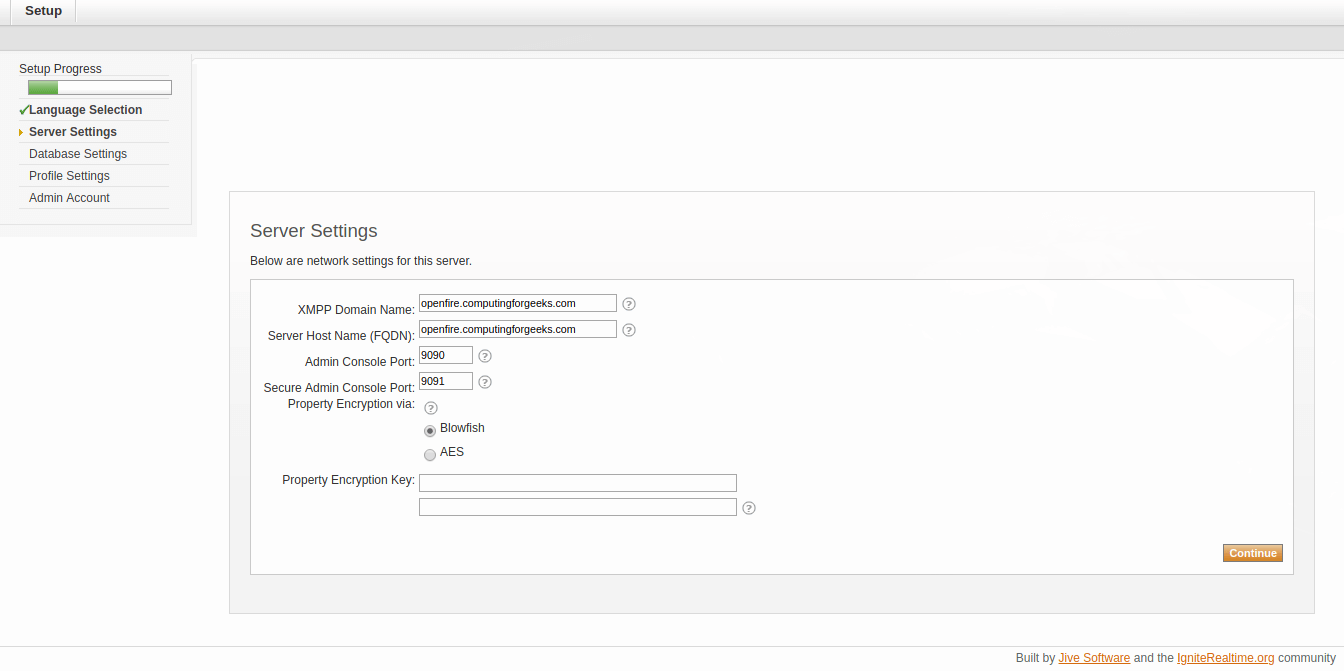
选择您的默认语言,然后单击继续。 在服务器设置窗口中,设置您的域,然后点击“继续”按钮。
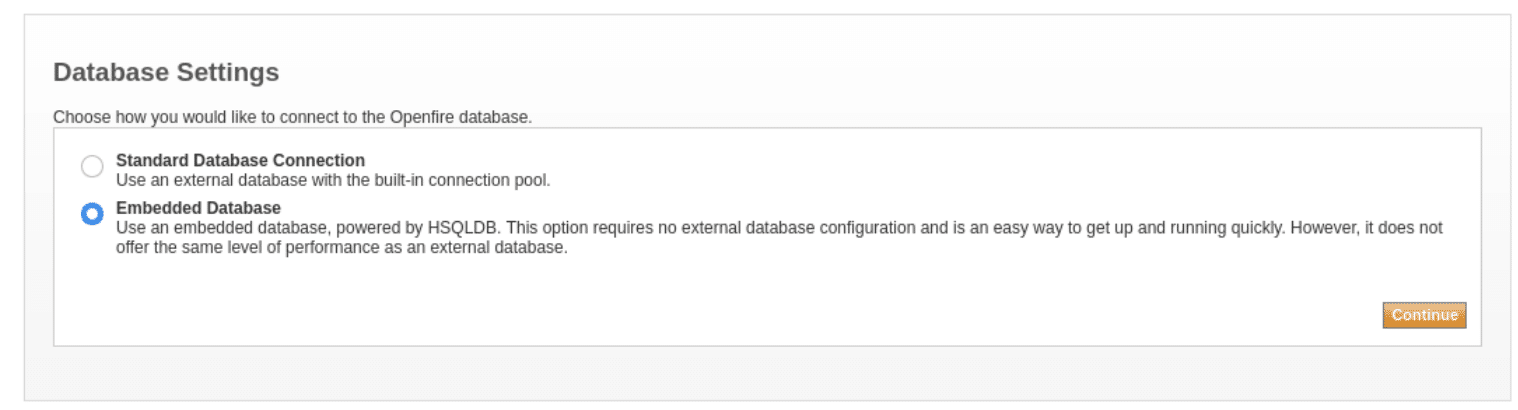
对于数据库设置,选择嵌入式数据库,然后单击“继续”。
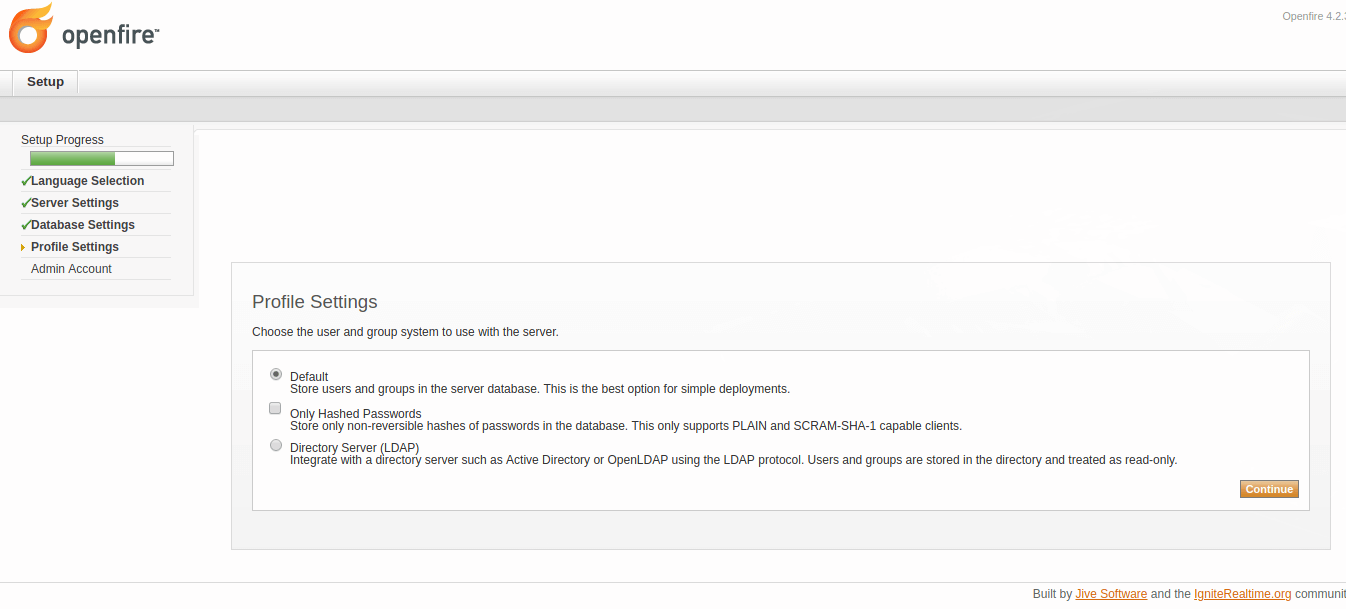
在配置文件设置中选择默认选项;您可以稍后添加外部身份验证机制,例如 LDAP
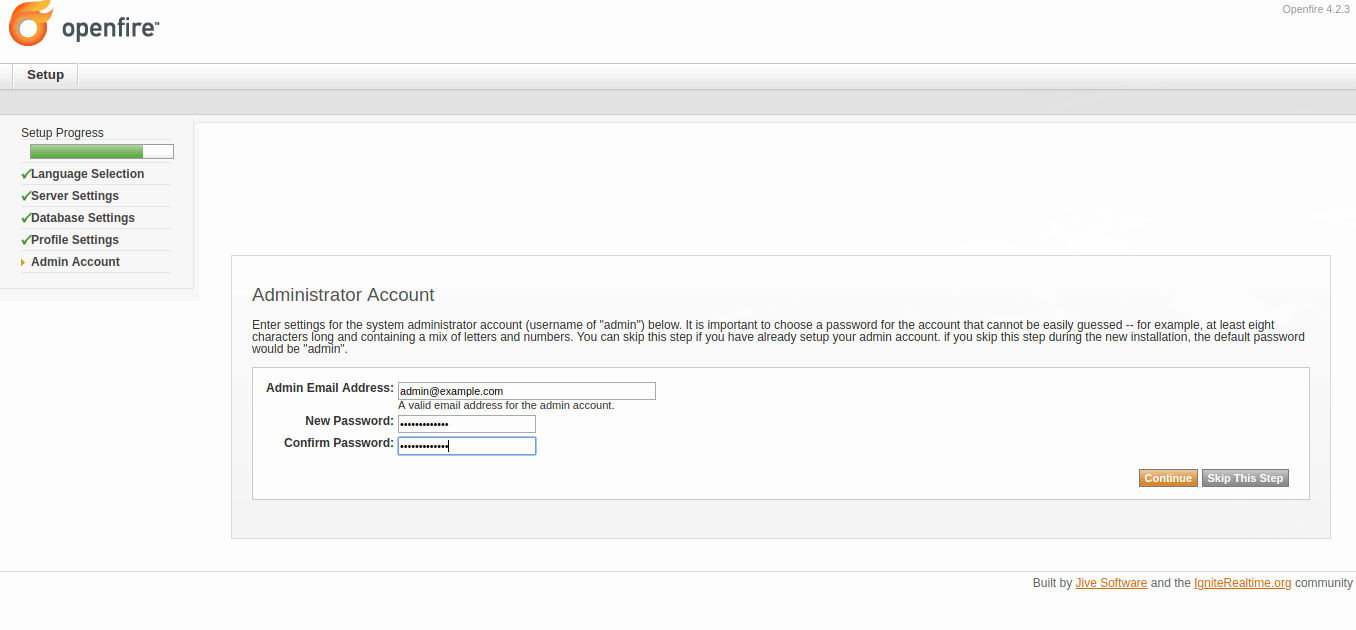
设置管理员用户电子邮件地址和密码:
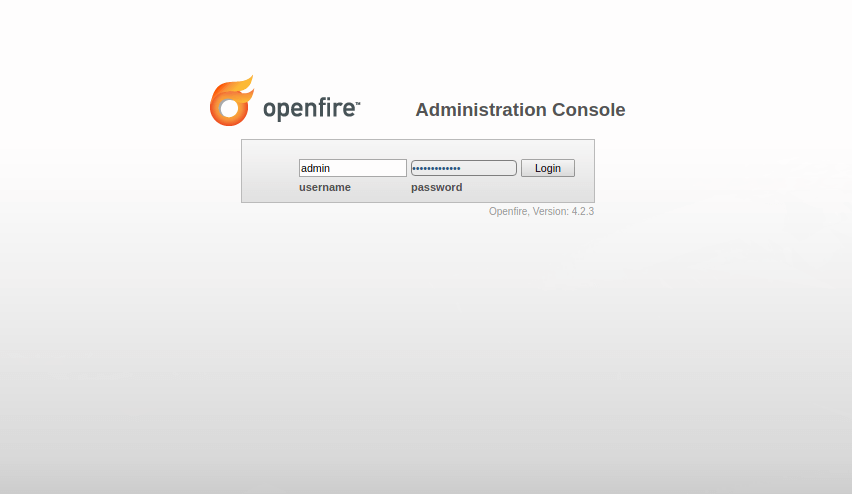
在下一页中登录 Openfire 控制台。
享受使用 Openfire 的乐趣。
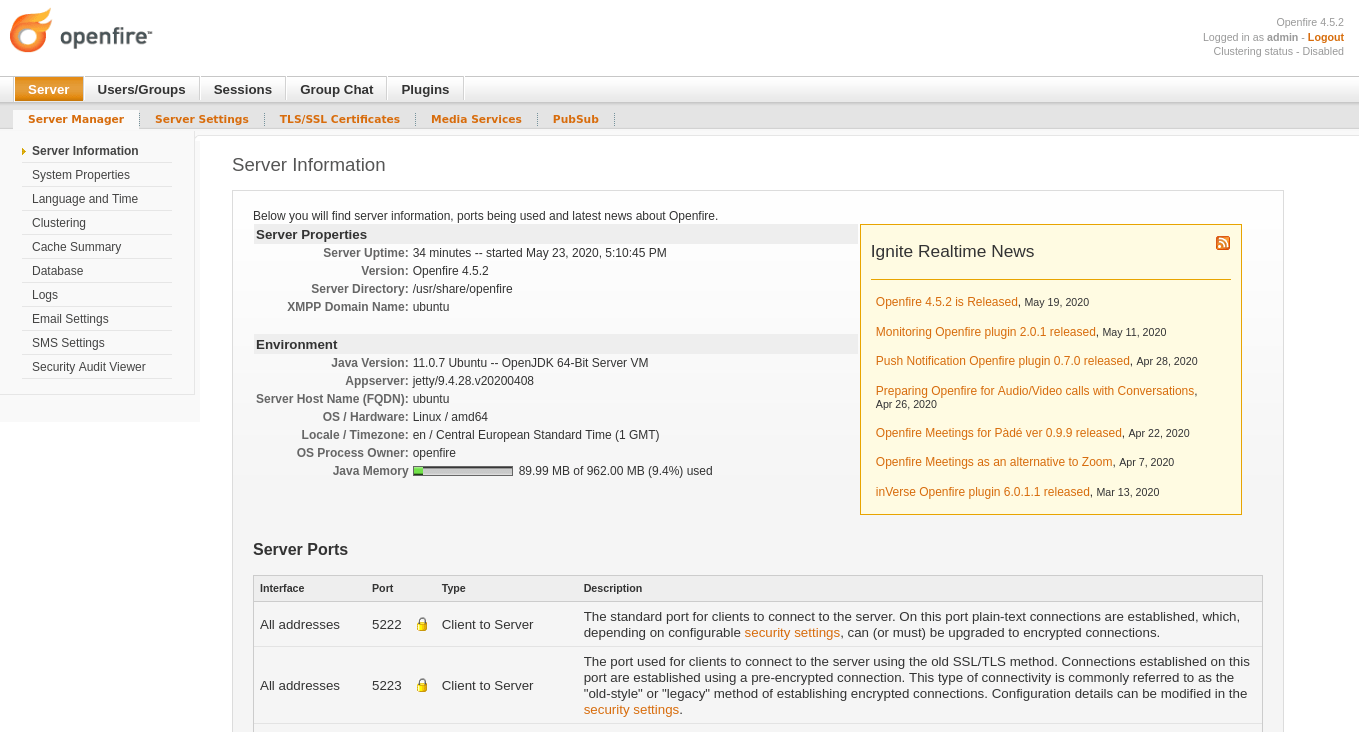
您现在已经在 CentOS 8 上安装了 Openfire | CentOS 7 Linux。