在 CentOS 8 上为 Apache/Nginx 安装 Varnish Cache 6
本教程适用于这些操作系统版本
- 中央操作系统 8
- 中央操作系统 7
在此页
- 先决条件
- 开始
- 安装清漆
- 配置清漆
- 安装和配置 Nginx 以使用 Varnish
- 安装和配置 Apache 以使用 Varnish
- 使用 Varnish 命令行
- 结论
Varnish Cache 是一种功能强大的反向 HTTP 代理,用于加速可作为开源软件使用的 Web 应用程序。 Varnish 缓存静态和动态内容。它会在所有入站请求到达您的 Web 服务器后端之前对其进行处理。它位于网络浏览器和 Apache 或 Nginx 网络服务器之间。 Varnish 缓存将所有传入的页面请求存储在内存中,因此 Web 服务器不必一遍又一遍地创建相同的网页。
在这篇文章中,我们将向您展示如何在 CentOS 8 上使用 Apache 和 Nginx 安装 Varnish 缓存。
先决条件
- 一台运行 CentOS 8 的服务器。
- 在您的服务器上配置了根密码。
入门
在开始之前,建议将您的系统包更新到最新版本。您可以通过运行以下命令来更新它们:
dnf update -y更新所有包后,您可以继续下一步。
安装清漆
默认情况下,Varnish 软件包包含在 CentOS 8 默认存储库中。您可以通过运行以下命令来安装它:
dnf install varnish -y安装 Varnish 后,编辑 Varnish 默认配置文件并定义 Nginx 或 Apache 网络服务器支持地址。
nano /etc/varnish/default.vcl更改以下行:
backend default {
    .host = "127.0.0.1";
    .port = "8080";
}
完成后保存并关闭文件。
配置清漆
默认情况下,Varnish 监听 6081 端口。因此您需要将 Varnish 配置为监听 80 端口。您可以通过编辑 varnish.service 文件来配置它:
nano /lib/systemd/system/varnish.service找到以下行:
ExecStart=/usr/sbin/varnishd -a :6081 -f /etc/varnish/default.vcl -s malloc,256m
将其替换为以下行:
ExecStart=/usr/sbin/varnishd -a :80 -f /etc/varnish/default.vcl -s malloc,256m
保存并关闭文件,然后重新加载 systemd 守护进程以应用更改:
systemctl daemon-reload接下来,启动 Varnish 服务并使用以下命令使其在系统重启时启动:
systemctl start varnish
systemctl enable varnish
您还可以使用以下命令检查 Varnish 的状态:
systemctl status varnish您应该得到以下输出:
? varnish.service - Varnish Cache, a high-performance HTTP accelerator
   Loaded: loaded (/usr/lib/systemd/system/varnish.service; disabled; vendor preset: disabled)
   Active: active (running) since Fri 2021-03-12 04:17:32 EST; 4s ago
  Process: 6391 ExecStart=/usr/sbin/varnishd -a :80 -f /etc/varnish/default.vcl -s malloc,256m (code=exited, status=0/SUCCESS)
 Main PID: 6392 (varnishd)
    Tasks: 217
   Memory: 99.5M
   CGroup: /system.slice/varnish.service
           ??6392 /usr/sbin/varnishd -a :80 -f /etc/varnish/default.vcl -s malloc,256m
           ??6402 /usr/sbin/varnishd -a :80 -f /etc/varnish/default.vcl -s malloc,256m

Mar 12 04:17:32 masternode systemd[1]: Starting Varnish Cache, a high-performance HTTP accelerator...
Mar 12 04:17:32 masternode varnishd[6391]: Debug: Version: varnish-6.0.6 revision 29a1a8243dbef3d973aec28dc90403188c1dc8e7
Mar 12 04:17:32 masternode varnishd[6391]: Debug: Platform: Linux,4.18.0-193.6.3.el8_2.x86_64,x86_64,-junix,-smalloc,-sdefault,-hcritbit
Mar 12 04:17:32 masternode varnishd[6392]: Version: varnish-6.0.6 revision 29a1a8243dbef3d973aec28dc90403188c1dc8e7
Mar 12 04:17:32 masternode varnishd[6392]: Platform: Linux,4.18.0-193.6.3.el8_2.x86_64,x86_64,-junix,-smalloc,-sdefault,-hcritbit
Mar 12 04:17:32 masternode varnishd[6391]: Debug: Child (6402) Started
Mar 12 04:17:32 masternode varnishd[6392]: Child (6402) Started
Mar 12 04:17:32 masternode varnishd[6392]: Child (6402) said Child starts
Mar 12 04:17:32 masternode systemd[1]: Started Varnish Cache, a high-performance HTTP accelerator.
此时Varnish已经启动并监听80端口,可以通过以下命令查看:
ss -antpl | grep varnishd您应该得到以下输出:
LISTEN    0         10               127.0.0.1:34977            0.0.0.0:*        users:(("varnishd",pid=1532,fd=11))
LISTEN    0         128                0.0.0.0:80               0.0.0.0:*        users:(("cache-main",pid=1542,fd=6),("varnishd",pid=1532,fd=6))
LISTEN    0         128                   [::]:80                  [::]:*        users:(("cache-main",pid=1542,fd=7),("varnishd",pid=1532,fd=7))
LISTEN    0         10                   [::1]:34909               [::]:*        users:(("varnishd",pid=1532,fd=10))
至此,Varnish 已安装并配置完毕。您现在可以继续下一步。
安装和配置 Nginx 以使用 Varnish
首先,您需要将 Nginx 包安装到您的服务器。您可以使用以下命令安装它:
dnf install nginx -y安装后,您需要将 Nginx 监听端口从 80 更改为 8080。您可以通过编辑 Nginx 默认配置文件来完成此操作:
nano /etc/nginx/nginx.conf更改以下行:
        listen       8080 default_server;
        listen       [::]:8080 default_server;
保存并关闭文件,然后使用以下命令验证 Nginx 是否存在任何语法错误:
nginx -t您应该得到以下输出:
nginx: the configuration file /etc/nginx/nginx.conf syntax is ok
nginx: configuration file /etc/nginx/nginx.conf test is successful
接下来,启动 Nginx 服务并使其在系统重启时启动:
systemctl start nginx
systemctl enable nginx
您还可以使用以下命令验证 Nginx 监听端口:
ss -antpl | grep 8080您应该得到以下输出:
LISTEN    0         128                0.0.0.0:8080             0.0.0.0:*        users:(("nginx",pid=5569,fd=8),("nginx",pid=5568,fd=8))
LISTEN    0         128                   [::]:8080                [::]:*        users:(("nginx",pid=5569,fd=9),("nginx",pid=5568,fd=9))
此时,Varnish 缓存已安装并配置为将端口 80 上的所有请求转发到侦听端口 8080 的 Nginx Web 服务器。
您可以使用以下命令验证 Varnish 缓存是否正常工作:
curl -I http://localhost您应该得到以下输出:
HTTP/1.1 200 OK
Server: nginx/1.14.1
Date: Fri, 12 Mar 2021 09:18:32 GMT
Content-Type: text/html
Content-Length: 4057
Last-Modified: Mon, 07 Oct 2019 21:16:24 GMT
ETag: "5d9bab28-fd9"
X-Varnish: 2
Age: 0
Via: 1.1 varnish (Varnish/6.0)
Accept-Ranges: bytes
Connection: keep-alive
安装和配置 Apache 以使用 Varnish
首先,您需要将 Apache 网络服务器包安装到您的系统中。您可以使用以下命令安装它:
dnf install httpd -y安装Apache后,编辑Apache默认配置文件,将监听端口从80改为8080。
nano /etc/httpd/conf/httpd.conf更改以下行:
Listen 8080
保存并关闭该文件,然后启动 Apache 服务并使用以下命令使其在系统重启时启动:
systemctl start httpd
systemctl enable httpd
您还可以使用以下命令验证 Apache 侦听端口:
ss -antpl | grep httpd您应该得到以下输出:
LISTEN 0 128 *:8080 *:* users:(("httpd",pid=7556,fd=4),("httpd",pid=7555,fd=4),("httpd",pid=7554,fd=4),("httpd",pid=7552,fd=4))
此时,Varnish 缓存已安装并配置为将端口 80 上的所有请求转发到侦听端口 8080 的 Apache Web 服务器。
您可以使用以下命令验证 Varnish 缓存是否正常工作:
curl -I http://localhost您应该得到以下输出:
Date: Fri, 12 Mar 2021 09:21:14 GMT
Server: Apache/2.4.37 (centos)
Content-Location: index.html.zh-CN
Vary: negotiate,accept-language
TCN: choice
Last-Modified: Fri, 14 Jun 2019 03:37:43 GMT
ETag: "fa6-58b405e7d6fc0;5bd5365602e05"
Accept-Ranges: bytes
Content-Length: 4006
Content-Type: text/html; charset=UTF-8
Content-Language: zh-cn
X-Varnish: 2
Age: 0
Via: 1.1 varnish (Varnish/6.0)
Connection: keep-alive
使用 Varnish 命令行
Varnish 附带了几个有用的实用程序,可帮助您监视和控制 Varnish。
varnishadm 是一个命令行实用程序,用于列出已配置的后端。
varnishadm您应该看到以下输出:
200
-----------------------------
Varnish Cache CLI 1.0
-----------------------------
Linux,4.18.0-193.6.3.el8_2.x86_64,x86_64,-junix,-smalloc,-sdefault,-hcritbit
varnish-6.0.6 revision 29a1a8243dbef3d973aec28dc90403188c1dc8e7

Type 'help' for command list.
Type 'quit' to close CLI session.
现在,运行以下命令列出所有后端:
varnish> backend.list您应该看到以下输出:
200
Backend name                   Admin      Probe                Last updated
boot.default                   probe      Healthy (no probe)   Sat, 13 Mar 2021 03:00:02 GMT
清漆日志
varnishlog 实用程序用于显示所有用户请求的日志。
varnishlog您应该得到以下输出:
*   << BeReq    >> 6
-   Begin          bereq 5 fetch
-   VCL_use        boot
-   Timestamp      Start: 1615604631.507187 0.000000 0.000000
-   BereqMethod    GET
-   BereqURL       /
-   BereqProtocol  HTTP/1.1
-   BereqHeader    Host: 69.87.218.214
-   BereqHeader    Upgrade-Insecure-Requests: 1
-   BereqHeader    User-Agent: Mozilla/5.0 (X11; Linux x86_64) AppleWebKit/537.36 (KHTML, like Gecko) Chrome/87.0.4280.141 Safari/537.36
-   BereqHeader    Accept: text/html,application/xhtml+xml,application/xml;q=0.9,image/avif,image/webp,image/apng,*/*;q=0.8,application/signed-exchange;v=b3;q=0.9
-   BereqHeader    Accept-Language: en-GB,en-US;q=0.9,en;q=0.8
-   BereqHeader    X-Forwarded-For: 106.213.193.241
-   BereqHeader    Accept-Encoding: gzip
-   BereqHeader    X-Varnish: 6
-   VCL_call       BACKEND_FETCH
-   VCL_return     fetch
-   BackendOpen    31 boot.default 127.0.0.1 8080 127.0.0.1 58860
-   BackendStart   127.0.0.1 8080
-   Timestamp      Bereq: 1615604631.507458 0.000270 0.000270
-   Timestamp      Beresp: 1615604631.507844 0.000657 0.000386
-   BerespProtocol HTTP/1.1
-   BerespStatus   200
-   BerespReason   OK
-   BerespHeader   Server: nginx/1.14.1
-   BerespHeader   Date: Sat, 13 Mar 2021 03:03:51 GMT
-   BerespHeader   Content-Type: text/html
-   BerespHeader   Content-Length: 4057
-   BerespHeader   Last-Modified: Mon, 07 Oct 2019 21:16:24 GMT
清漆状态
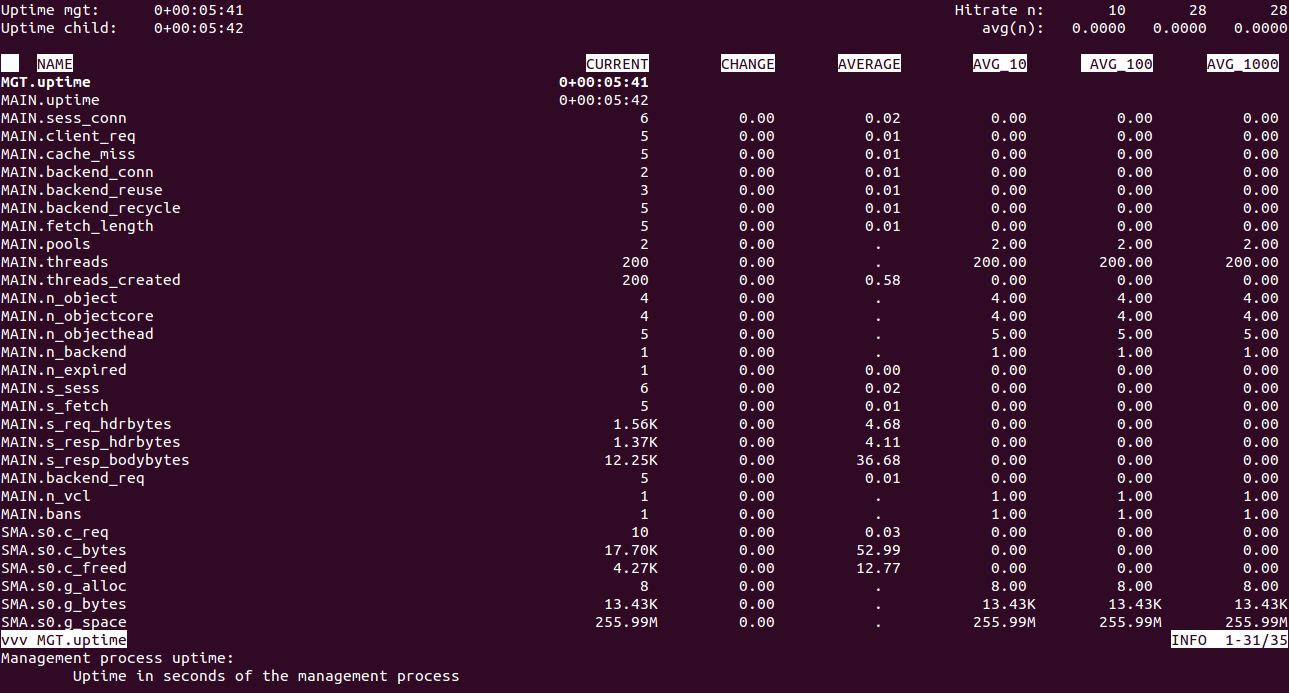
varnishstat 命令为您提供有关内存统计信息、存储、创建的线程和删除的对象的信息。
varnishstat您应该看到以下屏幕:
上光漆
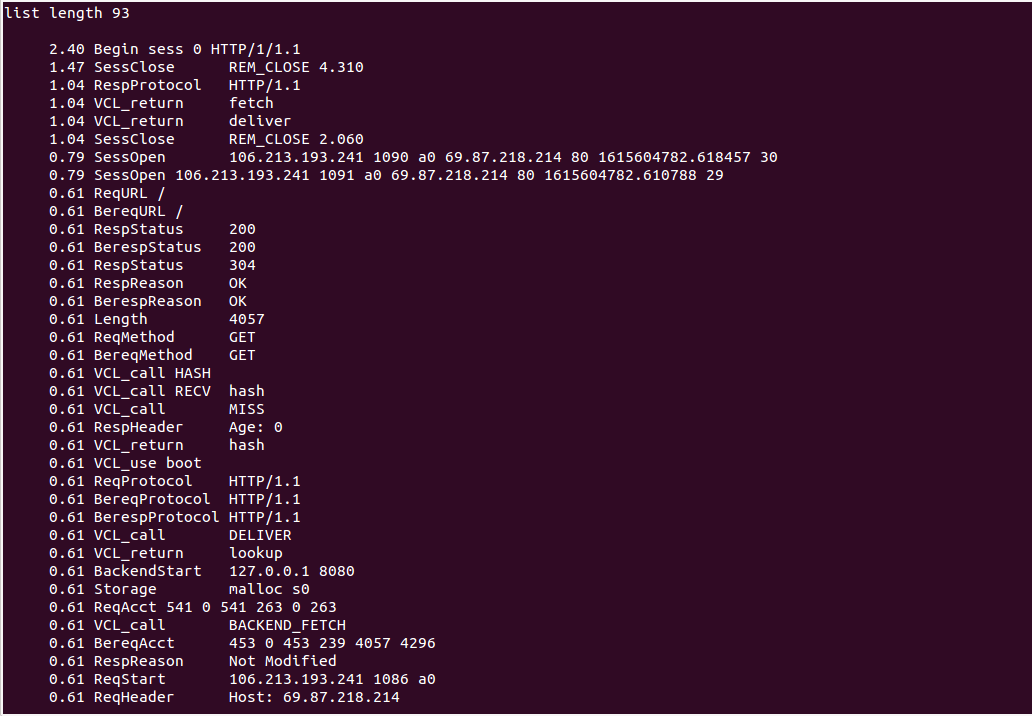
varnishtop 命令读取 varnishd 共享内存日志并提供一个不断更新的最常出现的日志条目列表。
varnishtop您应该看到以下屏幕:
清漆师
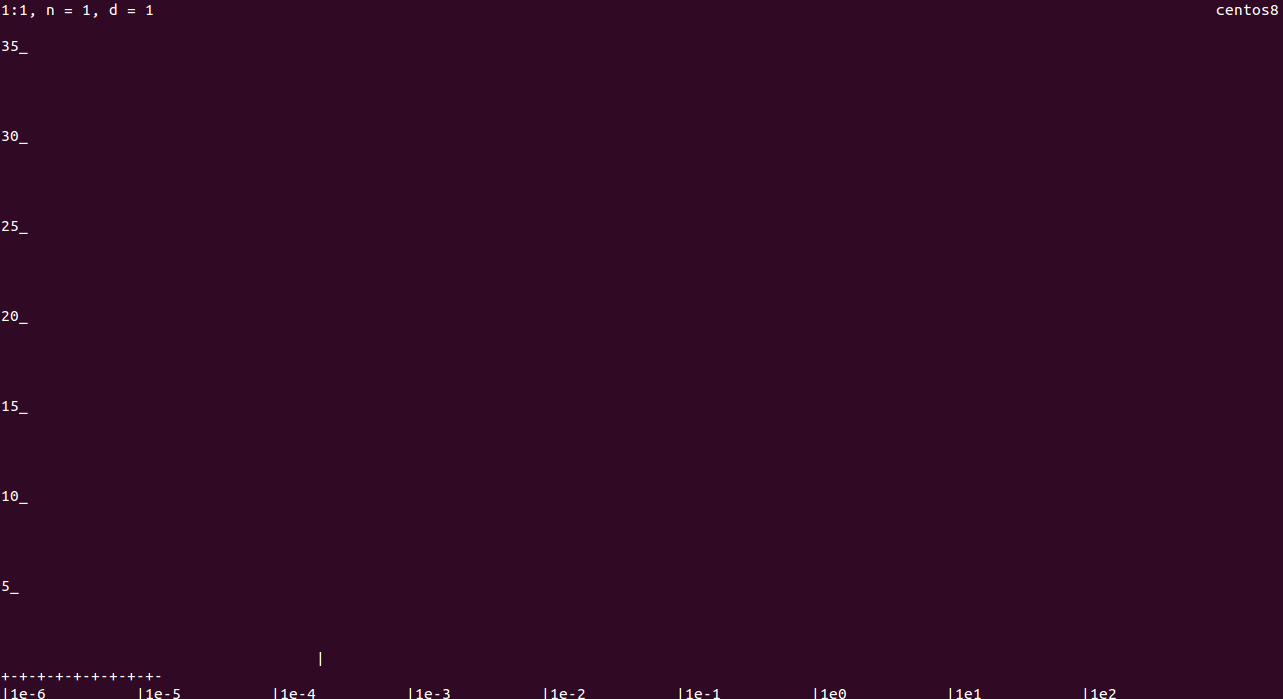
Varnishhist 解析 Varnish 日志并打印其处理的最后 n 个请求。
varnishhist您应该看到以下屏幕:
结论
在上面的指南中,您学习了如何使用 Apache 和 Nginx Web 服务器安装和配置 Varnish 缓存。您现在可以在生产环境中实施 Varnish 缓存并提高网站性能。如果您有任何问题,请随时问我。