如何在 Debian 12 上安装 OpenSearch
OpenSearch 是 Amazon 开发的 Elasticsearch 和 Kibana 的开源分支。它是一个实时、分布式、可扩展的搜索引擎,允许全文搜索和分析。它用于对大量数据进行索引和搜索。它通常与 OpenSearch Dashboards(Kibana 的一个分支)一起部署,后者是 OpenSearch 的强大数据可视化仪表板。 OpenSearch 仪表板允许您探索 OpenSearch 日志数据,并构建仪表板和查询以深入了解您的应用程序。
本教程将向您展示如何在 Debian 12 服务器上安装 OpenSearch。您还将了解如何使用自定义 TLS 证书保护您的安装并在 OpenSearch 上启用身份验证。
先决条件
运行 Debian 12 且 RAM 至少为 4GB 的服务器。
具有 sudo 权限的非 root 用户。
简单的防火墙(UFW)已启用并正在运行。
完全限定的域名 (FQDN),例如指向您的服务器的 opensearch.example.com。如果您想使用代理服务器通过 SSL 为 OpenSearch Dashboards 提供服务,这将非常有用。
一切都更新了。
$ sudo apt update && sudo apt upgrade
本教程和 Craft CMS 的运行需要一些必要的软件包。其中一些已经在您的服务器上。
$ sudo apt install curl wget nano software-properties-common dirmngr apt-transport-https ca-certificates lsb-release debian-archive-keyring gnupg2 ufw unzip -y
第 1 步 - 配置防火墙
安装任何软件包之前的第一步是配置防火墙以允许 HTTP 和 HTTPS 连接。
检查防火墙的状态。
$ sudo ufw status
您应该看到类似以下内容。
Status: active

To                         Action      From
--                         ------      ----
OpenSSH                    ALLOW       Anywhere
OpenSSH (v6)               ALLOW       Anywhere (v6)
允许 HTTP 和 HTTPs 端口。
$ sudo ufw allow http
$ sudo ufw allow https
再次检查状态以确认。
$ sudo ufw status
Status: active

To                         Action      From
--                         ------      ----
OpenSSH                    ALLOW       Anywhere
80/tcp                     ALLOW       Anywhere
443/tcp                    ALLOW       Anywhere
OpenSSH (v6)               ALLOW       Anywhere (v6)
80/tcp (v6)                ALLOW       Anywhere (v6)
443/tcp (v6)               ALLOW       Anywhere (v6)
第 2 步 - 准备系统
在安装 OpenSearch 之前,我们需要为其准备并优化我们的系统。涉及几个步骤,包括禁用任何交换内存(如果有)、设置系统内存映射的数量以及设置系统主机名。
首先,检查是否启用了交换内存。
$ free -m
如果启用了交换,那么您应该会看到类似的输出。
               total        used        free      shared  buff/cache   available
Mem:            7945        1083        6492          34         636        6861
Swap:           4242           0        4242
运行以下命令以永久禁用交换空间。
$ sudo swapoff -a
$ sudo sed -i '/ swap / s/^\(.*\)$/#\1/g' /etc/fstab
再次检查交换内存,它应该显示以下内容。
               total        used        free      shared  buff/cache   available
Mem:            7945        1113        6449          37         651        6831
Swap:              0           0           0
OpenSearch 默认使用 mapfs 目录来存储其索引。默认操作系统对 nmap 计数的限制太低,这可能会导致内存不足错误。
检查 vm.max_map_count 变量的现有值。
$ sysctl -n vm.max_map_count
65530
要增加每个进程使用的内存映射数量,请运行以下命令。
$ sudo sysctl -w vm.max_map_count=262144
这仅在系统重新启动之前有效。要使该值永久存在,请使用以下命令在 /etc/sysctl.conf 文件中添加行 vm.max_map_count=262144 。
$ echo "vm.max_map_count=262144" | sudo tee -a /etc/sysctl.conf
您可以通过重新引导系统或运行以下命令来使更改永久生效。
$ sudo sysctl -p
最后一步是设置主机名。根据您托管服务器的位置,一些云公司允许您直接通过其控制面板设置主机名。但是,最好通过终端进行操作。
运行以下命令设置主机名。
$ sudo hostnamectl set-hostname opensearch
将 FQDN(完全限定域名)添加到 /etc/hosts 文件中。在这里,我们将主机名 opensearch 映射到域名 opensearch.example.com 并将其指向服务器 IP 地址。将以下命令中的
$ echo "<serverIPaddress> opensearch.example.com opensearch" | sudo tee -a /etc/hosts
使用以下命令检查主机名和 FQDN。
$ hostname
opensearch
$ hostname -f
opensearch.example.com
这样就完成了优化我们的系统以与 OpenSearch 配合使用的过程。
第 3 步 - 安装 OpenSearch
导入用于签署安装包的 OpenSearch GPG 密钥。
$ curl -o- https://artifacts.opensearch.org/publickeys/opensearch.pgp | sudo gpg --dearmor --batch --yes -o /usr/share/keyrings/opensearch-keyring
创建 OpenSearch APT 存储库文件。
$ echo "deb [signed-by=/usr/share/keyrings/opensearch-keyring] https://artifacts.opensearch.org/releases/bundle/opensearch/2.x/apt stable main" | sudo tee /etc/apt/sources.list.d/opensearch-2.x.list
更新系统存储库列表。
$ sudo apt update
检查所有可用的 OpenSearch 版本。
$ sudo apt list -a opensearch
Listing... Done
opensearch/stable 2.12.0 amd64
opensearch/stable 2.11.1 amd64
opensearch/stable 2.11.0 amd64
opensearch/stable 2.10.0 amd64
opensearch/stable 2.9.0 amd64
opensearch/stable 2.8.0 amd64
opensearch/stable 2.7.0 amd64
opensearch/stable 2.6.0 amd64
opensearch/stable 2.5.0 amd64
最新版本的 OpenSearch v2.12.0 要求您在安装前设置管理员演示密码,否则将失败。
您可以使用以下命令安装最新版本的 OpenSearch。我们可以使用安装命令本身中的环境变量来设置管理员演示密码。选择一个强密码。
$ sudo env OPENSEARCH_INITIAL_ADMIN_PASSWORD=<custom-admin-password> apt install opensearch
如果您在安装过程中看到以下警告,您可以安全地忽略它。
......
chown: warning: '.' should be ':': ‘opensearch.opensearch’
chown: warning: '.' should be ':': ‘opensearch.opensearch’
chown: warning: '.' should be ':': ‘opensearch.opensearch’
chown: warning: '.' should be ':': ‘opensearch.opensearch’
chown: warning: '.' should be ':': ‘opensearch.opensearch’
......
或者您可以安装特定版本。
$ sudo apt install opensearch=2.11.1
重新加载服务守护进程。
$ sudo systemctl daemon-reload
启用 OpenSearch 服务。
$ sudo systemctl enable opensearch
启动开放搜索服务。
$ sudo systemctl start opensearch
验证 OpenSearch 服务的状态。
$ sudo systemctl status opensearch
您应该得到以下输出。
? opensearch.service - OpenSearch
     Loaded: loaded (/lib/systemd/system/opensearch.service; enabled; preset: enabled)
     Active: active (running) since Sat 2024-03-02 06:37:01 UTC; 5s ago
       Docs: https://opensearch.org/
   Main PID: 31109 (java)
      Tasks: 75 (limit: 4652)
     Memory: 1.3G
        CPU: 1min 3.128s
     CGroup: /system.slice/opensearch.service
             ??31109 /usr/share/opensearch/jdk/bin/java -Xshare:auto -Dopensearch.networkaddress.cache.ttl=60 -Dopensearch.networkaddress.cache.negative.ttl=10 -XX:+AlwaysPreTouch -Xss1m -Djava.awt.headless=true...
第 4 步 - 测试 OpenSearch
在继续之前,让我们检查安装是否正常。运行以下命令来验证 OpenSearch 是否按预期运行。
$ curl -X GET https://localhost:9200 -u 'admin:<custom-admin-password>' --insecure
您应该得到类似的输出。
{
  "name" : "opensearch",
  "cluster_name" : "opensearch",
  "cluster_uuid" : "3oFvYn96St2MOpDP3Sf29g",
  "version" : {
    "distribution" : "opensearch",
    "number" : "2.12.0",
    "build_type" : "deb",
    "build_hash" : "2c355ce1a427e4a528778d4054436b5c4b756221",
    "build_date" : "2024-02-20T02:18:31.541484890Z",
    "build_snapshot" : false,
    "lucene_version" : "9.9.2",
    "minimum_wire_compatibility_version" : "7.10.0",
    "minimum_index_compatibility_version" : "7.0.0"
  },
  "tagline" : "The OpenSearch Project: https://opensearch.org/"
}
查询 OpenSearch 插件端点以查看可用插件的列表。
$ curl -X GET https://localhost:9200/_cat/plugins?v -u 'admin:<custom-admin-password>' --insecure
您还可以使用以下命令进行相同的操作。
$ /usr/share/opensearch/bin/opensearch-plugin list
您应该得到类似的输出。
name       component                            version
opensearch opensearch-alerting                  2.12.0.0
opensearch opensearch-anomaly-detection         2.12.0.0
opensearch opensearch-asynchronous-search       2.12.0.0
opensearch opensearch-cross-cluster-replication 2.12.0.0
opensearch opensearch-custom-codecs             2.12.0.0
opensearch opensearch-flow-framework            2.12.0.0
opensearch opensearch-geospatial                2.12.0.0
opensearch opensearch-index-management          2.12.0.0
opensearch opensearch-job-scheduler             2.12.0.0
opensearch opensearch-knn                       2.12.0.0
opensearch opensearch-ml                        2.12.0.0
opensearch opensearch-neural-search             2.12.0.0
opensearch opensearch-notifications             2.12.0.0
opensearch opensearch-notifications-core        2.12.0.0
opensearch opensearch-observability             2.12.0.0
opensearch opensearch-performance-analyzer      2.12.0.0
opensearch opensearch-reports-scheduler         2.12.0.0
opensearch opensearch-security                  2.12.0.0
opensearch opensearch-security-analytics        2.12.0.0
opensearch opensearch-skills                    2.12.0.0
opensearch opensearch-sql                       2.12.0.0
您可以使用以下命令安装其他插件。
$ /usr/share/opensearch/bin/opensearch-plugin install <plugin-name>
您可以在其官方网站上找到可用的 OpenSearch 插件列表。
第 5 步 - 配置 OpenSearch
OpenSearch 的默认设置不适合生产环境。默认情况下,OpenSearch 未绑定到网络接口,并且无法从外部访问。此外,正在使用默认的用户名和密码,如果直接在生产环境中使用,可能会导致安全问题。
OpenSearch 将其配置存储在 /etc/opensearch/opensearch.yml 文件中。打开它进行编辑。
$ sudo nano /etc/opensearch/opensearch.yml
找到 #network.host: 192.168.0.1 行并通过删除其前面的哈希 (#) 并更改其值来取消注释,如图所示。这将 OpenSearch 绑定到所有可用的接口。您还可以选择输入特定 IP 将其绑定到特定接口。
# Set the bind address to a specific IP (IPv4 or IPv6):
#
network.host: 0.0.0.0
在文件底部添加以下行。
# Unless you have already configured a cluster, you should set
# discovery.type to single-node, or the bootstrap checks will
# fail when you try to start the service.
discovery.type: single-node

# If you previously disabled the Security plugin in opensearch.yml,
# be sure to re-enable it. Otherwise you can skip this setting.
plugins.security.disabled: false
由于我们安装在单个服务器上,因此我们将 discovery.type 设置为 single-node。将 plugins.security.disabled 设置为 false 启用 OpenSearch 安全插件。
按 Ctrl + X 并在出现提示时输入 Y 来保存文件。
我们还需要指定初始和最大 JVM(Java 虚拟内存)堆大小。此设置取决于服务器的 RAM 大小。例如,我们使用具有 4GB RAM 的服务器,因此我们将堆大小设置为 3GB。
在 /etc/opensearch/jvm.options.d 目录中创建并打开 heapsize.options 进行编辑。它将覆盖 /etc/opensearch/jvm.options 文件中设置的默认值。
$ sudo nano /etc/opensearch/jvm.options.d/heapsize.options
将以下行添加到其中。
-Xms3g
-Xmx3g
按 Ctrl + X 并在出现提示时输入 Y 来保存文件。
重新启动 OpenSearch 服务以实施更改。
$ sudo systemctl restart opensearch
您可以使用以下命令检查当前堆大小和最大内存。
$ curl -sS "https://localhost:9200/_cat/nodes?h=heap*&v" -u 'admin:<custom-admin-password>' --insecure
您应该得到以下输出。
heap.current heap.percent heap.max
     345.5mb           11      3gb
第 6 步 - 为 OpenSearch 配置 TLS
在这里,我们将生成证书来保护 OpenSearch。 TLS 证书允许客户端确认主机身份并加密客户端和主机之间的流量,从而提供安全性。我们将生成以下证书
- 根 CA 证书 - 这些是将签署所有其他证书的主要证书。
- 管理证书 - 这些证书用于获取执行与安全插件相关的管理任务的提升权限。
- 节点证书 - 这些证书用于节点和客户端之间的通信。
所有 OpenSearch 证书都存储在 /etc/opensearch 目录中。第一步是删除 OpenSearch 安装期间设置的默认证书。
切换到 OpenSearch 目录。
$ cd /etc/opensearch
删除默认证书。
$ sudo rm -f *.pem
打开 OpenSearch 配置文件进行编辑。
$ sudo nano opensearch.yml
通过在 OpenSearch 安全演示配置 部分内的每一行前面放置一个哈希值,注释掉文件底部的以下代码,如下所示。
######## Start OpenSearch Security Demo Configuration ########
# WARNING: revise all the lines below before you go into production
#plugins.security.ssl.transport.pemcert_filepath: esnode.pem
#plugins.security.ssl.transport.pemkey_filepath: esnode-key.pem
#plugins.security.ssl.transport.pemtrustedcas_filepath: root-ca.pem
#plugins.security.ssl.transport.enforce_hostname_verification: false
#plugins.security.ssl.http.enabled: true
#plugins.security.ssl.http.pemcert_filepath: esnode.pem
#plugins.security.ssl.http.pemkey_filepath: esnode-key.pem
#plugins.security.ssl.http.pemtrustedcas_filepath: root-ca.pem
#plugins.security.allow_unsafe_democertificates: true
#plugins.security.allow_default_init_securityindex: true
#plugins.security.authcz.admin_dn: ['CN=kirk,OU=client,O=client,L=test,C=de']
#plugins.security.audit.type: internal_opensearch
#plugins.security.enable_snapshot_restore_privilege: true
#plugins.security.check_snapshot_restore_write_privileges: true
#plugins.security.restapi.roles_enabled: [all_access, security_rest_api_access]
#plugins.security.system_indices.enabled: true
#plugins.security.system_indices.indices: [.plugins-ml-config, .plugins-ml-connector,
#  .plugins-ml-model-group, .plugins-ml-model, .plugins-ml-task, .plugins-ml-conversation-meta,
#  .plugins-ml-conversation-interactions, .plugins-ml-memory-meta, .plugins-ml-memory-message,
#  .opendistro-alerting-config, .opendistro-alerting-alert*, .opendistro-anomaly-results*,
#  .opendistro-anomaly-detector*, .opendistro-anomaly-checkpoints, .opendistro-anomaly-detection-state,
#  .opendistro-reports-*, .opensearch-notifications-*, .opensearch-notebooks, .opensearch-observability,
#  .ql-datasources, .opendistro-asynchronous-search-response*, .replication-metadata-store,
#  .opensearch-knn-models, .geospatial-ip2geo-data*, .plugins-flow-framework-config,
#  .plugins-flow-framework-templates, .plugins-flow-framework-state]
#node.max_local_storage_nodes: 3
######## End OpenSearch Security Demo Configuration ########
按 Ctrl + X 并在出现提示时输入 Y 来保存文件。
接下来,在 /etc/opensearch 目录中创建一个目录来存储证书。
$ sudo mkdir /etc/opensearch/certs
将目录的权限更改为当前登录的用户,以避免在生成证书时使用 sudo。
$ sudo chown $USER:$USER /etc/opensearch/certs -R
切换到证书目录。
$ cd /etc/opensearch/certs
生成根证书
为根证书生成私钥。
$ openssl genrsa -out root-ca-key.pem 2048
生成自签名根 CA 证书。我们使用 -subj 参数来提供嵌入在证书中的信息。如果您不使用 -subj 标志,系统会要求您提供所有这些信息。
$ openssl req -new -x509 -sha256 -key root-ca-key.pem -subj "/C=CA/ST=ONTARIO/L=TORONTO/O=ORG/OU=UNIT/CN=ROOT" -out root-ca.pem -days 730
您可以更改信息以适合您的特定主机。
-subj 参数中的变量含义如下。
C=国家/地区名称(2 个字母代码)、ST=州或省名称(全名)、L=地点名称(例如城市)、O=组织名称、OU=组织单位名称(例如部门)、CN=通用名称(例如服务器 FQDN)
您的根证书现已生效。
生成管理员证书
使用以下命令生成管理证书的私钥。
$ openssl genrsa -out admin-key-temp.pem 2048
使用 PKCS#12 兼容算法 (3DES) 将私钥转换为 PKCS#8 格式,以便在 Java 中使用。
$ openssl pkcs8 -inform PEM -outform PEM -in admin-key-temp.pem -topk8 -nocrypt -v1 PBE-SHA1-3DES -out admin-key.pem
从私钥生成管理 CSR(证书签名请求)。由于此证书不绑定到任何主机并用于验证提升的访问权限,因此我们使用值 A 作为通用名称 (CN)。
$ openssl req -new -key admin-key.pem -subj "/C=CA/ST=ONTARIO/L=TORONTO/O=ORG/OU=UNIT/CN=A" -out admin.csr
使用您刚刚创建的根证书和私钥签署管理 CSR。
$ openssl x509 -req -in admin.csr -CA root-ca.pem -CAkey root-ca-key.pem -CAcreateserial -sha256 -out admin.pem -days 730
Certificate request self-signature ok
subject=C = CA, ST = ONTARIO, L = TORONTO, O = ORG, OU = UNIT, CN = A
生成节点证书
为节点证书生成私钥。
$ openssl genrsa -out node1-key-temp.pem 2048
将节点私钥转换为PKCS#8格式。
$ openssl pkcs8 -inform PEM -outform PEM -in node1-key-temp.pem -topk8 -nocrypt -v1 PBE-SHA1-3DES -out node1-key.pem
从私钥为节点证书创建新的 CSR。确保使用节点的主机名更改 CN 变量的值。该证书与您的主机绑定,并且应与节点的主机名或 IP 地址匹配。
$ openssl req -new -key node1-key.pem -subj "/C=CA/ST=ONTARIO/L=TORONTO/O=ORG/OU=UNIT/CN=opensearch.example.com" -out node1.csr
创建包含节点主机名或 FQDN 或 IP 地址的 SAN(主题备用名称)扩展文件。
$ sh -c 'echo subjectAltName=DNS:opensearch.example.com > node1.ext'
使用您刚刚创建的根证书和私钥签署节点证书 CSR。
$ openssl x509 -req -in node1.csr -CA root-ca.pem -CAkey root-ca-key.pem -CAcreateserial -sha256 -out node1.pem -days 730 -extfile node1.ext
Certificate request self-signature ok
subject=C = CA, ST = ONTARIO, L = TORONTO, O = ORG, OU = UNIT, CN = opensearch.example.com
准备安装证书
删除所有临时证书、CSR 和 SAN 扩展文件。
$ rm -f *temp.pem *csr *ext
接下来,我们将在服务器上安装根 CA 证书。为此,请将根 CA 证书转换为 .crt 格式。
$ openssl x509 -outform der -in root-ca.pem -out root-ca.crt
将 root-ca.crt 文件复制到 /usr/local/share/ca-certificates/ 目录。
$ sudo cp root-ca.crt /usr/local/share/ca-certificates/
使用以下命令将根 CA 证书添加到您的 Debian 服务器。
$ sudo update-ca-certificates
您应该看到以下输出 (1 added),确认根 CA 证书已添加到您的系统中。
Updating certificates in /etc/ssl/certs...
rehash: warning: skipping ca-certificates.crt,it does not contain exactly one certificate or CRL
rehash: warning: skipping root-ca.pem,it does not contain exactly one certificate or CRL
1 added, 0 removed; done.
Running hooks in /etc/ca-certificates/update.d...
done.
将目录的所有权更改回 opensearch 用户。
$ sudo chown opensearch:opensearch /etc/opensearch/certs -R
将目录的权限更改为0700。
$ sudo chmod 0700 /etc/opensearch/certs
将证书的权限更改为 0600。
$ sudo chmod 0600 /etc/opensearch/certs/{admin-key,admin,node1-key,node1,root-ca-key,root-ca}.pem
$ sudo chmod 0600 /etc/opensearch/certs/root-ca.crt
第 7 步 - 将 TLS 安装到 OpenSearch
现在所有证书都已生成并设置完毕,是时候安装证书并将其添加到您的 OpenSearch 安装中了。
第一步是创建一个 bash 脚本,将所有创建的证书和 TLS 安全插件设置添加到 OpenSearch 配置文件 (/etc/opensearch/opensearch.yml)。
创建一个名为 add-opensearch-tls.sh 的文件并打开它进行编辑。
$ cd ~
$ nano add-opensearch-tls.sh
将以下代码粘贴到其中。
#! /bin/bash

# Before running this script, make sure to replace the CN in the
# node's distinguished name with a real DNS A record.

echo "plugins.security.ssl.transport.pemcert_filepath: /etc/opensearch/certs/node1.pem" | sudo tee -a /etc/opensearch/opensearch.yml
echo "plugins.security.ssl.transport.pemkey_filepath: /etc/opensearch/certs/node1-key.pem" | sudo tee -a /etc/opensearch/opensearch.yml
echo "plugins.security.ssl.transport.pemtrustedcas_filepath: /etc/opensearch/certs/root-ca.pem" | sudo tee -a /etc/opensearch/opensearch.yml
echo "plugins.security.ssl.http.enabled: true" | sudo tee -a /etc/opensearch/opensearch.yml
echo "plugins.security.ssl.http.pemcert_filepath: /etc/opensearch/certs/node1.pem" | sudo tee -a /etc/opensearch/opensearch.yml
echo "plugins.security.ssl.http.pemkey_filepath: /etc/opensearch/certs/node1-key.pem" | sudo tee -a /etc/opensearch/opensearch.yml
echo "plugins.security.ssl.http.pemtrustedcas_filepath: /etc/opensearch/certs/root-ca.pem" | sudo tee -a /etc/opensearch/opensearch.yml
echo "plugins.security.allow_default_init_securityindex: true" | sudo tee -a /etc/opensearch/opensearch.yml
echo "plugins.security.authcz.admin_dn:" | sudo tee -a /etc/opensearch/opensearch.yml
echo "  - 'CN=A,OU=UNIT,O=ORG,L=TORONTO,ST=ONTARIO,C=CA'" | sudo tee -a /etc/opensearch/opensearch.yml
echo "plugins.security.nodes_dn:" | sudo tee -a /etc/opensearch/opensearch.yml
echo "  - 'CN=opensearch.example.com,OU=UNIT,O=ORG,L=TORONTO,ST=ONTARIO,C=CA'" | sudo tee -a /etc/opensearch/opensearch.yml
echo "plugins.security.audit.type: internal_opensearch" | sudo tee -a /etc/opensearch/opensearch.yml
echo "plugins.security.enable_snapshot_restore_privilege: true" | sudo tee -a /etc/opensearch/opensearch.yml
echo "plugins.security.check_snapshot_restore_write_privileges: true" | sudo tee -a /etc/opensearch/opensearch.yml
echo "plugins.security.restapi.roles_enabled: [\"all_access\", \"security_rest_api_access\"]" | sudo tee -a /etc/opensearch/opensearch.yml
按 Ctrl + X 并在出现提示时输入 Y 来保存文件。
使文件可执行。
$ chmod +x add-opensearch-tls.sh
运行脚本。
$ ./add-opensearch-tls.sh
您应该得到以下输出。
plugins.security.ssl.transport.pemcert_filepath: /etc/opensearch/certs/node1.pem
plugins.security.ssl.transport.pemkey_filepath: /etc/opensearch/certs/node1-key.pem
plugins.security.ssl.transport.pemtrustedcas_filepath: /etc/opensearch/certs/root-ca.pem
plugins.security.ssl.http.enabled: true
plugins.security.ssl.http.pemcert_filepath: /etc/opensearch/certs/node1.pem
plugins.security.ssl.http.pemkey_filepath: /etc/opensearch/certs/node1-key.pem
plugins.security.ssl.http.pemtrustedcas_filepath: /etc/opensearch/certs/root-ca.pem
plugins.security.allow_default_init_securityindex: true
plugins.security.authcz.admin_dn:
  - 'CN=A,OU=UNIT,O=ORG,L=TORONTO,ST=ONTARIO,C=CA'
plugins.security.nodes_dn:
  - 'CN=opensearch.example.com,OU=UNIT,O=ORG,L=TORONTO,ST=ONTARIO,C=CA'
plugins.security.audit.type: internal_opensearch
plugins.security.enable_snapshot_restore_privilege: true
plugins.security.check_snapshot_restore_write_privileges: true
plugins.security.restapi.roles_enabled: ["all_access", "security_rest_api_access"]
打开 /etc/opensearch/opensearch.yml 文件检查您的设置是否已应用。
$ sudo nano /etc/opensearch/opensearch.yml
滚动到文件底部,您应该会看到以下内容。
# If you previously disabled the Security plugin in opensearch.yml,
# be sure to re-enable it. Otherwise you can skip this setting.
plugins.security.disabled: false
....
plugins.security.ssl.transport.pemcert_filepath: /etc/opensearch/certs/node1.pem
plugins.security.ssl.transport.pemkey_filepath: /etc/opensearch/certs/node1-key.pem
plugins.security.ssl.transport.pemtrustedcas_filepath: /etc/opensearch/certs/root-ca.pem
plugins.security.ssl.http.enabled: true
plugins.security.ssl.http.pemcert_filepath: /etc/opensearch/certs/node1.pem
plugins.security.ssl.http.pemkey_filepath: /etc/opensearch/certs/node1-key.pem
plugins.security.ssl.http.pemtrustedcas_filepath: /etc/opensearch/certs/root-ca.pem
plugins.security.allow_default_init_securityindex: true
plugins.security.authcz.admin_dn:
  - 'CN=A,OU=UNIT,O=ORG,L=TORONTO,ST=ONTARIO,C=CA'
plugins.security.nodes_dn:
  - 'CN=opensearch.example.com,OU=UNIT,O=ORG,L=TORONTO,ST=ONTARIO,C=CA'
plugins.security.audit.type: internal_opensearch
plugins.security.enable_snapshot_restore_privilege: true
plugins.security.check_snapshot_restore_write_privileges: true
plugins.security.restapi.roles_enabled: ["all_access", "security_rest_api_access"]
一旦您满意,请按 Ctrl + X 保存文件。
第 8 步 - 创建 OpenSearch 用户
在此步骤中,我们将删除除 admin 用户之外的所有演示用户,并使用脚本替换默认的 admin 密码。
切换到 OpenSearch 安全插件工具目录。
$ cd /usr/share/opensearch/plugins/opensearch-security/tools
运行 hash.sh 脚本生成新密码。
$ ./hash
该脚本将失败,并且您将收到以下错误,因为尚未定义 Java 可执行文件 (JDK) 的路径。
**************************************************************************
** This tool will be deprecated in the next major release of OpenSearch **
** https://github.com/opensearch-project/security/issues/1755           **
**************************************************************************
WARNING: nor OPENSEARCH_JAVA_HOME nor JAVA_HOME is set, will use
./hash.sh: line 35: java: command not found
通过使用 JDK 的位置声明环境变量 OPENSEARCH_JAVA_HOME 来再次运行该命令。
$ OPENSEARCH_JAVA_HOME=/usr/share/opensearch/jdk ./hash.sh
您将得到类似的输出。
**************************************************************************
** This tool will be deprecated in the next major release of OpenSearch **
** https://github.com/opensearch-project/security/issues/1755           **
**************************************************************************
[Password:]
$2y$12$4NL0LqEnN4FXaUdQQC.gOupeCQT2IuMo9gN0b5d3nxdMVbLX088f2
它将生成我们稍后需要的密码哈希。
打开/etc/opensearch/opensearch-security/目录中的OpenSearch用户配置文件internal_users.yml进行编辑。
$ sudo nano /etc/opensearch/opensearch-security/internal_users.yml
通过在前面添加哈希来注释掉所有演示用户,如图所示。
---
# This is the internal user database
# The hash value is a bcrypt hash and can be generated with plugin/tools/hash.sh

_meta:
  type: "internalusers"
  config_version: 2

# Define your internal users here

## Demo users

#admin:
#  hash: "$2y$12$Twy84uxOX0SQ1QMQ68og8O/i1MvqWItt/phZX3DiJMjpBoT9u9KX6"
#  reserved: true
#  backend_roles:
#  - "admin"
#  description: "Demo admin user"

#anomalyadmin:
使用上面生成的哈希添加管理员用户,如图所示。
---
# This is the internal user database
# The hash value is a bcrypt hash and can be generated with plugin/tools/hash.sh

_meta:
  type: "internalusers"
  config_version: 2

# Define your internal users here

admin:
  hash: "$2y$12$4NL0LqEnN4FXaUdQQC.gOupeCQT2IuMo9gN0b5d3nxdMVbLX088f2"
  reserved: true
  backend_roles:
  - "admin"
  description: "Admin user"

## Demo users

#admin:
完成后,按 Ctrl + X 并在出现提示时输入 Y 来保存文件。
现在 TLS 证书已安装,演示用户已删除或分配了新密码,现在是应用配置更改的时候了。要应用更改,我们将调用 /usr/share/opensearch/plugins/opensearch-security/tools 目录中的 securityadmin.sh 脚本。该脚本需要 OpenSearch 服务才能运行。
重新启动 OpenSearch 服务。
$ sudo systemctl restart opensearch
切换到 /usr/share/opensearch/plugins/opensearch-security/tools 目录。
$ cd /usr/share/opensearch/plugins/opensearch-security/tools
使用以下命令运行脚本。
$ sudo OPENSEARCH_JAVA_HOME=/usr/share/opensearch/jdk ./securityadmin.sh -h opensearch.nspeaks.com -p 9200 -cd /etc/opensearch/opensearch-security/ -cacert /etc/opensearch/certs/root-ca.pem -cert /etc/opensearch/certs/admin.pem -key /etc/opensearch/certs/admin-key.pem -icl -nhnv
安全插件将其配置存储在 OpenSearch 集群的系统索引中,包括用户、权限、角色和后端设置。通过将这些设置存储在集群中,您可以在不重新启动集群的情况下更改设置,并且无需在每个节点上编辑配置文件。这是通过运行 securityadmin.sh 脚本来完成的。
-cd选项指定安全插件配置文件的位置。-icl(--ignore-clustername) 选项告诉安全插件无论集群名称如何都上传配置。您还可以指定集群名称,而不是使用-cn(--clustername) 选项。- 由于证书是自签名的,因此我们使用
-nhnv(--disable-host-name-verification) 选项。 --cacert、--cert和--key选项定义根证书、管理证书和私有证书的位置。管理员证书的密钥。如果私钥有密码,您可以使用-keypass选项定义它。
您可以在 OpenSearch 文档中了解有关安全插件配置的更多信息。
使用上述命令,您应该得到如下所示的类似输出。
**************************************************************************
** This tool will be deprecated in the next major release of OpenSearch **
** https://github.com/opensearch-project/security/issues/1755           **
**************************************************************************
Security Admin v7
Will connect to opensearch:9200 ... done
Connected as "CN=A,OU=UNIT,O=ORG,L=TORONTO,ST=ONTARIO,C=CA"
OpenSearch Version: 2.12.0
Contacting opensearch cluster 'opensearch' and wait for YELLOW clusterstate ...
Clustername: opensearch
Clusterstate: GREEN
Number of nodes: 1
Number of data nodes: 1
.opendistro_security index already exists, so we do not need to create one.
Populate config from /etc/opensearch/opensearch-security/
Will update '/config' with /etc/opensearch/opensearch-security/config.yml
   SUCC: Configuration for 'config' created or updated
Will update '/roles' with /etc/opensearch/opensearch-security/roles.yml
   SUCC: Configuration for 'roles' created or updated
Will update '/rolesmapping' with /etc/opensearch/opensearch-security/roles_mapping.yml
   SUCC: Configuration for 'rolesmapping' created or updated
Will update '/internalusers' with /etc/opensearch/opensearch-security/internal_users.yml
   SUCC: Configuration for 'internalusers' created or updated
Will update '/actiongroups' with /etc/opensearch/opensearch-security/action_groups.yml
   SUCC: Configuration for 'actiongroups' created or updated
Will update '/tenants' with /etc/opensearch/opensearch-security/tenants.yml
   SUCC: Configuration for 'tenants' created or updated
Will update '/nodesdn' with /etc/opensearch/opensearch-security/nodes_dn.yml
   SUCC: Configuration for 'nodesdn' created or updated
Will update '/whitelist' with /etc/opensearch/opensearch-security/whitelist.yml
   SUCC: Configuration for 'whitelist' created or updated
Will update '/audit' with /etc/opensearch/opensearch-security/audit.yml
   SUCC: Configuration for 'audit' created or updated
Will update '/allowlist' with /etc/opensearch/opensearch-security/allowlist.yml
   SUCC: Configuration for 'allowlist' created or updated
SUCC: Expected 10 config types for node {"updated_config_types":["allowlist","tenants","rolesmapping","nodesdn","audit","roles","whitelist","internalusers","actiongroups","config"],"updated_config_size":10,"message":null} is 10 (["allowlist","tenants","rolesmapping","nodesdn","audit","roles","whitelist","internalusers","actiongroups","config"]) due to: null
Done with success
使用以下命令验证新凭据。
在之前的测试中,我们将请求定向到localhost。现在 TLS 证书已设置,并且新证书引用主机的实际 DNS 记录,对 localhost 的请求将无法通过 CN 检查,并且证书将被视为无效。因此,请在以下命令中添加您的实际 DNS 记录以进行验证。
$ curl https://your.host.address:9200 -u admin:yournewpassword -k
您应该看到以下响应。
{
  "name" : "opensearch",
  "cluster_name" : "opensearch",
  "cluster_uuid" : "3oFvYn96St2MOpDP3Sf29g",
  "version" : {
    "distribution" : "opensearch",
    "number" : "2.12.0",
    "build_type" : "deb",
    "build_hash" : "2c355ce1a427e4a528778d4054436b5c4b756221",
    "build_date" : "2024-02-20T02:18:31.541484890Z",
    "build_snapshot" : false,
    "lucene_version" : "9.9.2",
    "minimum_wire_compatibility_version" : "7.10.0",
    "minimum_index_compatibility_version" : "7.0.0"
  },
  "tagline" : "The OpenSearch Project: https://opensearch.org/"
}
第 9 步 - 安装 OpenSearch 仪表板
由于我们已经安装了 OpenSearch,因此我们可以跳过导入 OpenSearch GPG 密钥的步骤。
要安装 OpenSearch 仪表板,请运行以下命令为其创建 APT 存储库。
$ echo "deb [signed-by=/usr/share/keyrings/opensearch-keyring] https://artifacts.opensearch.org/releases/bundle/opensearch-dashboards/2.x/apt stable main" | sudo tee /etc/apt/sources.list.d/opensearch-dashboards-2.x.list
更新系统存储库列表。
$ sudo apt update
列出 OpenSearch Dashboards 的所有可用版本。
$ sudo apt list -a opensearch-dashboards
您应该看到类似的输出。
Listing... Done
opensearch-dashboards/stable 2.12.0 amd64
opensearch-dashboards/stable 2.11.1 amd64
opensearch-dashboards/stable 2.11.0 amd64
opensearch-dashboards/stable 2.10.0 amd64
opensearch-dashboards/stable 2.9.0 amd64
opensearch-dashboards/stable 2.8.0 amd64
opensearch-dashboards/stable 2.7.0 amd64
opensearch-dashboards/stable 2.6.0 amd64
opensearch-dashboards/stable 2.5.0 amd64
安装最新版本的 OpenSearch 仪表板。
$ sudo apt install opensearch-dashboards
或者安装特定版本的 OpenSearch Dashboard。
$ sudo apt install opensearch-dashboards=2.12.0
OpenSearch 仪表板和 OpenSearch 的版本应该相同,否则您可能会遇到多个问题。
重新加载服务守护进程。
$ sudo systemctl daemon-reload
启用 OpenSearch 仪表板服务。
$ sudo systemctl enable opensearch-dashboards
启动 OpenSearch 仪表板服务。
$ sudo systemctl start opensearch-dashboards
验证 OpenSearch Dashboards 服务的状态。
$ sudo systemctl status opensearch-dashboards
您应该看到以下输出。
? opensearch-dashboards.service - "OpenSearch Dashboards"
     Loaded: loaded (/lib/systemd/system/opensearch-dashboards.service; enabled; preset: enabled)
     Active: active (running) since Sat 2024-03-02 16:01:25 UTC; 4s ago
   Main PID: 7098 (node)
      Tasks: 11 (limit: 9484)
     Memory: 175.4M
        CPU: 5.389s
     CGroup: /system.slice/opensearch-dashboards.service
             ??7098 /usr/share/opensearch-dashboards/node/bin/node /usr/share/opensearch-dashboards/src/cli/dist

Mar 02 16:01:25 opensearch systemd[1]: Started opensearch-dashboards.service - "OpenSearch Dashboards".
第 10 步 - 配置 OpenSearch 仪表板
OpenSearch Dashboards 将其配置存储在 /etc/opensearch-dashboards/opensearch_dashboards.yml 文件中。打开它进行编辑。
$ sudo nano /etc/opensearch-dashboards/opensearch_dashboards.yml
找到行 # server.host: "localhost" 并通过删除其前面的哈希值并更改其值(如图所示)来取消注释。
# Specifies the address to which the OpenSearch Dashboards server will bind. IP addresses and host names are both valid values.
# The default is 'localhost', which usually means remote machines will not be able to connect.
# To allow connections from remote users, set this parameter to a non-loopback address.
server.host: 0.0.0.0
将 server.host 的值设置为 0.0.0.0 会将 OpenSearch Dashboard 绑定到任何外部 IP,从而可以通过万维网进行访问。如果您想使用反向代理通过 SSL 为仪表板提供服务,请保持该值不变。
向下滚动找到以下部分。
opensearch.hosts: [https://localhost:9200]
opensearch.ssl.verificationMode: none
opensearch.username: kibanaserver
opensearch.password: kibanaserver
opensearch.requestHeadersWhitelist: [authorization, securitytenant]
更改为 OpenSearch 安装配置的值。
opensearch.hosts: [https://opensearch:9200]
opensearch.ssl.verificationMode: none
opensearch.username: admin
opensearch.password: <custom-admin-password>
opensearch.requestHeadersWhitelist: [authorization, securitytenant]
完成后,按 Ctrl + X 并在出现提示时输入 Y 来保存文件。
重新启动 OpenDashboards 服务。
$ sudo systemctl restart opensearch-dashboards
在 UFW 防火墙中打开端口 5601。
$ sudo ufw allow 5601
打开 URL http:// 或 http://opensearch.example.com:5601 以启动 OpenSearch Dashboards 网站。
如果您希望通过 HTTP 访问 OpenSearch 仪表板并在 URL 中包含端口号,则可以在此停止。但是,最好通过 SSL 提供仪表板。为此,我们将安装 Nginx 作为反向代理并通过它提供 SSL。
第11步-安装Nginx
Debian 12 附带旧版本的 Nginx。您需要下载官方 Nginx 存储库来安装最新版本。
导入 Nginx 的签名密钥。
$ curl https://nginx.org/keys/nginx_signing.key | gpg --dearmor \
    | sudo tee /usr/share/keyrings/nginx-archive-keyring.gpg >/dev/null
添加 Nginx 主线版本的存储库。
$ echo "deb [signed-by=/usr/share/keyrings/nginx-archive-keyring.gpg] \
http://nginx.org/packages/mainline/debian `lsb_release -cs` nginx" \
    | sudo tee /etc/apt/sources.list.d/nginx.list
更新系统存储库。
$ sudo apt update
安装 Nginx。
$ sudo apt install nginx
验证安装。在 Debian 系统上,以下命令仅适用于 sudo。
$ sudo nginx -v
nginx version: nginx/1.25.4
启动 Nginx 服务器。
$ sudo systemctl start nginx
检查服务状态。
$ sudo systemctl status nginx
? nginx.service - nginx - high performance web server
     Loaded: loaded (/lib/systemd/system/nginx.service; enabled; preset: enabled)
     Active: active (running) since Sat 2024-03-02 12:53:57 UTC; 4s ago
       Docs: https://nginx.org/en/docs/
    Process: 3976 ExecStart=/usr/sbin/nginx -c /etc/nginx/nginx.conf (code=exited, status=0/SUCCESS)
   Main PID: 3977 (nginx)
      Tasks: 3 (limit: 9484)
     Memory: 2.7M
        CPU: 9ms
     CGroup: /system.slice/nginx.service
             ??3977 "nginx: master process /usr/sbin/nginx -c /etc/nginx/nginx.conf"
             ??3978 "nginx: worker process"
             ??3979 "nginx: worker process"

Mar 02 12:53:57 opensearch systemd[1]: Starting nginx.service - nginx - high performance web server...
Mar 02 12:53:57 opensearch systemd[1]: Started nginx.service - nginx - high performance web server.
第 12 步 - 安装 SSL
我们需要安装 Certbot 来生成 SSL 证书。您可以使用 Debian 的存储库安装 Certbot,也可以使用 Snapd 工具获取最新版本。我们将使用 Snapd 版本。
Debian 12 并未安装 Snapd。安装 Snapd 软件包。
$ sudo apt install snapd
运行以下命令以确保您的 Snapd 版本是最新的。
$ sudo snap install core && sudo snap refresh core
安装证书机器人。
$ sudo snap install --classic certbot
使用以下命令确保可以通过创建到 /usr/bin 目录的符号链接来运行 Certbot 命令。
$ sudo ln -s /snap/bin/certbot /usr/bin/certbot
验证 Certbot 是否正常运行。
$ certbot --version
certbot 2.9.0
运行以下命令生成 SSL 证书。
$ sudo certbot certonly --nginx --agree-tos --no-eff-email --staple-ocsp --preferred-challenges http -m [email -d craftcms.example.com
上述命令会将证书下载到服务器上的 /etc/letsencrypt/live/craftcms.example.com 目录中。
生成 Diffie-Hellman 组证书。
$ sudo openssl dhparam -dsaparam -out /etc/ssl/certs/dhparam.pem 4096
检查 Certbot 续订调度程序服务。
$ sudo systemctl list-timers
您会发现 snap.certbot.renew.service 是计划运行的服务之一。
NEXT                        LEFT           LAST                        PASSED    UNIT                         ACTIVATES                   ---------------------------------------------------------------------------------------------------------------------------------------
Sat 2024-03-02 16:25:00 UTC 3h 27min left  -                           -         snap.certbot.renew.timer     snap.certbot.renew.service
Sat 2024-03-02 23:00:51 UTC 10h left       Sat 2024-03-02 06:29:02 UTC 6h ago    apt-daily.timer              apt-daily.service
Sun 2024-03-03 00:00:00 UTC 11h left       -                           -         dpkg-db-backup.timer         dpkg-db-backup.service
.....
对该过程进行一次演练,以检查 SSL 续订是否正常工作。
$ sudo certbot renew --dry-run
如果没有看到任何错误,则一切都已准备就绪。您的证书将自动更新。
步骤 13 - 配置 Nginx
打开文件 /etc/nginx/nginx.conf 进行编辑。
$ sudo nano /etc/nginx/nginx.conf
在 include /etc/nginx/conf.d/*.conf; 行之前添加以下行。
server_names_hash_bucket_size 64;
按 Ctrl + X 并在出现提示时输入 Y 来保存文件。
创建并打开文件 /etc/nginx/conf.d/opensearch.conf 进行编辑。
$ sudo nano /etc/nginx/conf.d/opensearch.conf
将以下代码粘贴到其中。将 opensearch.example.com 替换为您的域名。
server {

    listen 443 ssl;
    listen [::]:443 ssl;

    http2 on;
    http3 on;
    quic_retry on;

    server_name opensearch.example.com;

    access_log  /var/log/nginx/opensearch.access.log;
    error_log   /var/log/nginx/opensearch.error.log;

    ssl_certificate      /etc/letsencrypt/live/opensearch.example.com/fullchain.pem;
    ssl_certificate_key  /etc/letsencrypt/live/opensearch.example.com/privkey.pem;
    ssl_trusted_certificate /etc/letsencrypt/live/opensearch.example.com/chain.pem;

    ssl_session_timeout  5m;
    ssl_session_cache shared:MozSSL:10m;
    ssl_session_tickets off;
    ssl_early_data on;

    ssl_protocols TLSv1.2 TLSv1.3;
    ssl_prefer_server_ciphers on;
    ssl_ciphers ECDHE-ECDSA-AES128-GCM-SHA256:ECDHE-RSA-AES128-GCM-SHA256:ECDHE-ECDSA-AES256-GCM-SHA384:ECDHE-RSA-AES256-GCM-SHA384:ECDHE-ECDSA-CHACHA20-POLY1305:ECDHE-RSA-CHACHA20-POLY1305:DHE-RSA-AES128-GCM-SHA256:DHE-RSA-AES256-GCM-SHA384;
    ssl_ecdh_curve X25519:prime256v1:secp384r1:secp521r1;
    ssl_stapling on;
    ssl_stapling_verify on;
    ssl_dhparam /etc/ssl/certs/dhparam.pem;

    location / {
        proxy_pass http://localhost:5601;
        proxy_set_header Host $host;
        proxy_set_header X-Real-IP $remote_addr;
        proxy_set_header X-Forwarded-For $proxy_add_x_forwarded_for;
        proxy_set_header X-Forwarded-Proto $scheme;
    }
}
# enforce HTTPS
server {
    listen 80;
    listen [::]:80;
    server_name  opensearch.example.com;
    return 301   https://$host$request_uri;
}
按 Ctrl + X 并在出现提示时输入 Y 来保存文件。
验证您的 Nginx 配置。
$ sudo nginx -t
重新启动 Nginx 服务器。
$ sudo systemctl restart nginx
在浏览器中访问 https://opensearch.example.com 以启动 OpenSearch 仪表板。
第 14 步 - 访问和使用 OpenSearch 仪表板
如果您使用 Nginx,则通过 URL https://opensearch.example.com 或使用 http://opensearch.example.com:5601 访问仪表板,然后您应该得到登录页面。
输入 admin 以及您在第 4 步中为 OpenSearch 配置的自定义管理员密码,然后单击登录按钮继续。

单击添加数据按钮开始直接添加数据,或者如果您想先浏览,请单击自行浏览链接。我们将首先浏览,它应该会带您到一个弹出窗口,其中讨论 OpenSearch Dashboards 的黑暗模式。

单击关闭按钮继续。接下来,您将被要求选择一个租户。
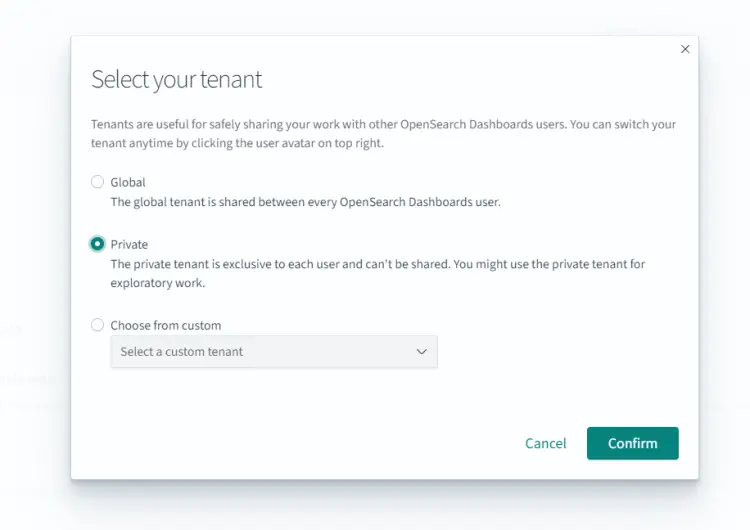
OpenSearch 仪表板中的租户是用于保存索引模式、可视化、仪表板和其他 OpenSearch 仪表板对象的空间。每个用户可以创建多个租户以供多种用途。租户对于与其他 OpenSearch Dashboards 用户安全地共享您的工作非常有用。 OpenSearch 使您可以在三个选项之间进行选择。
- 全球 - 此租户由每个 OpenSearch Dashboards 用户共享。
- 私人 - 此租户是每个用户独有的,无法共享。
- 自定义 - 管理员可以创建自定义租户并将其分配给特定角色。创建后,您可以使用这些租户向特定用户组提供空间。
目前,我们将坚持使用私人租户的默认选项。单击确认按钮继续。您将看到以下页面。
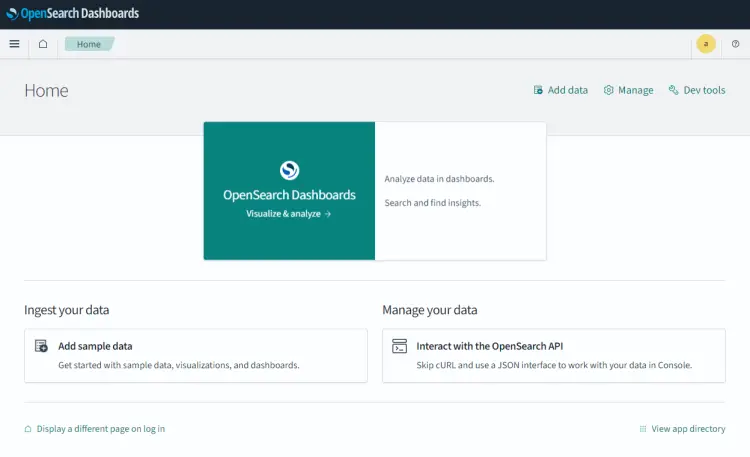
接下来,我们将验证 OpenSearch 和 OpenSearch 仪表板之间的连接。
单击右上角的开发工具按钮,您将看到一个有关 OpenSearch 仪表板控制台 UI 的迷你弹出窗口。
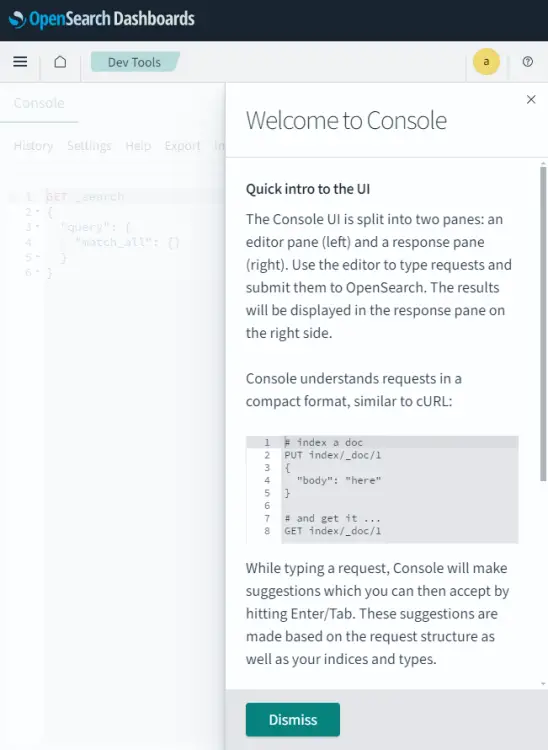
点击Dismiss按钮,在左侧控制台输入查询GET /,然后点击中间的小播放按钮。您应该在右侧看到以下输出。
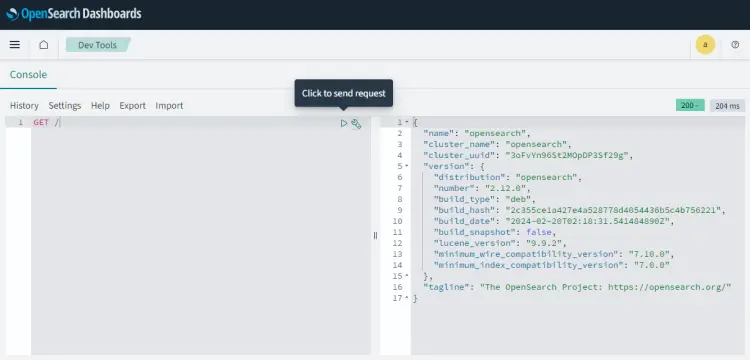
这证实了 OpenSearch Dashboards 正在从 OpenSearch 接收数据,并且两者都工作正常。您可以从这里开始添加数据。
结论
在 Debian 12 服务器上安装 OpenSearch 的教程到此结束。如果您有任何疑问,请在下面的评论中发表。